Using community plugins
The Pioreactor comes with a large set of functionality and behaviour to accomplish most projects. For example, continuous culturing, optical density reading, and stable temperatures are available out-of-the-box. However, the specifics and range of how people use bioreactors goes far beyond what we could ever cover. That's why Pioreactor has added a platform so that community members can make their own extensions and share them with others. We call these plugins. (Below is how to install plugins - if you are looking to create your own plugins, see here.)
Installing plugins
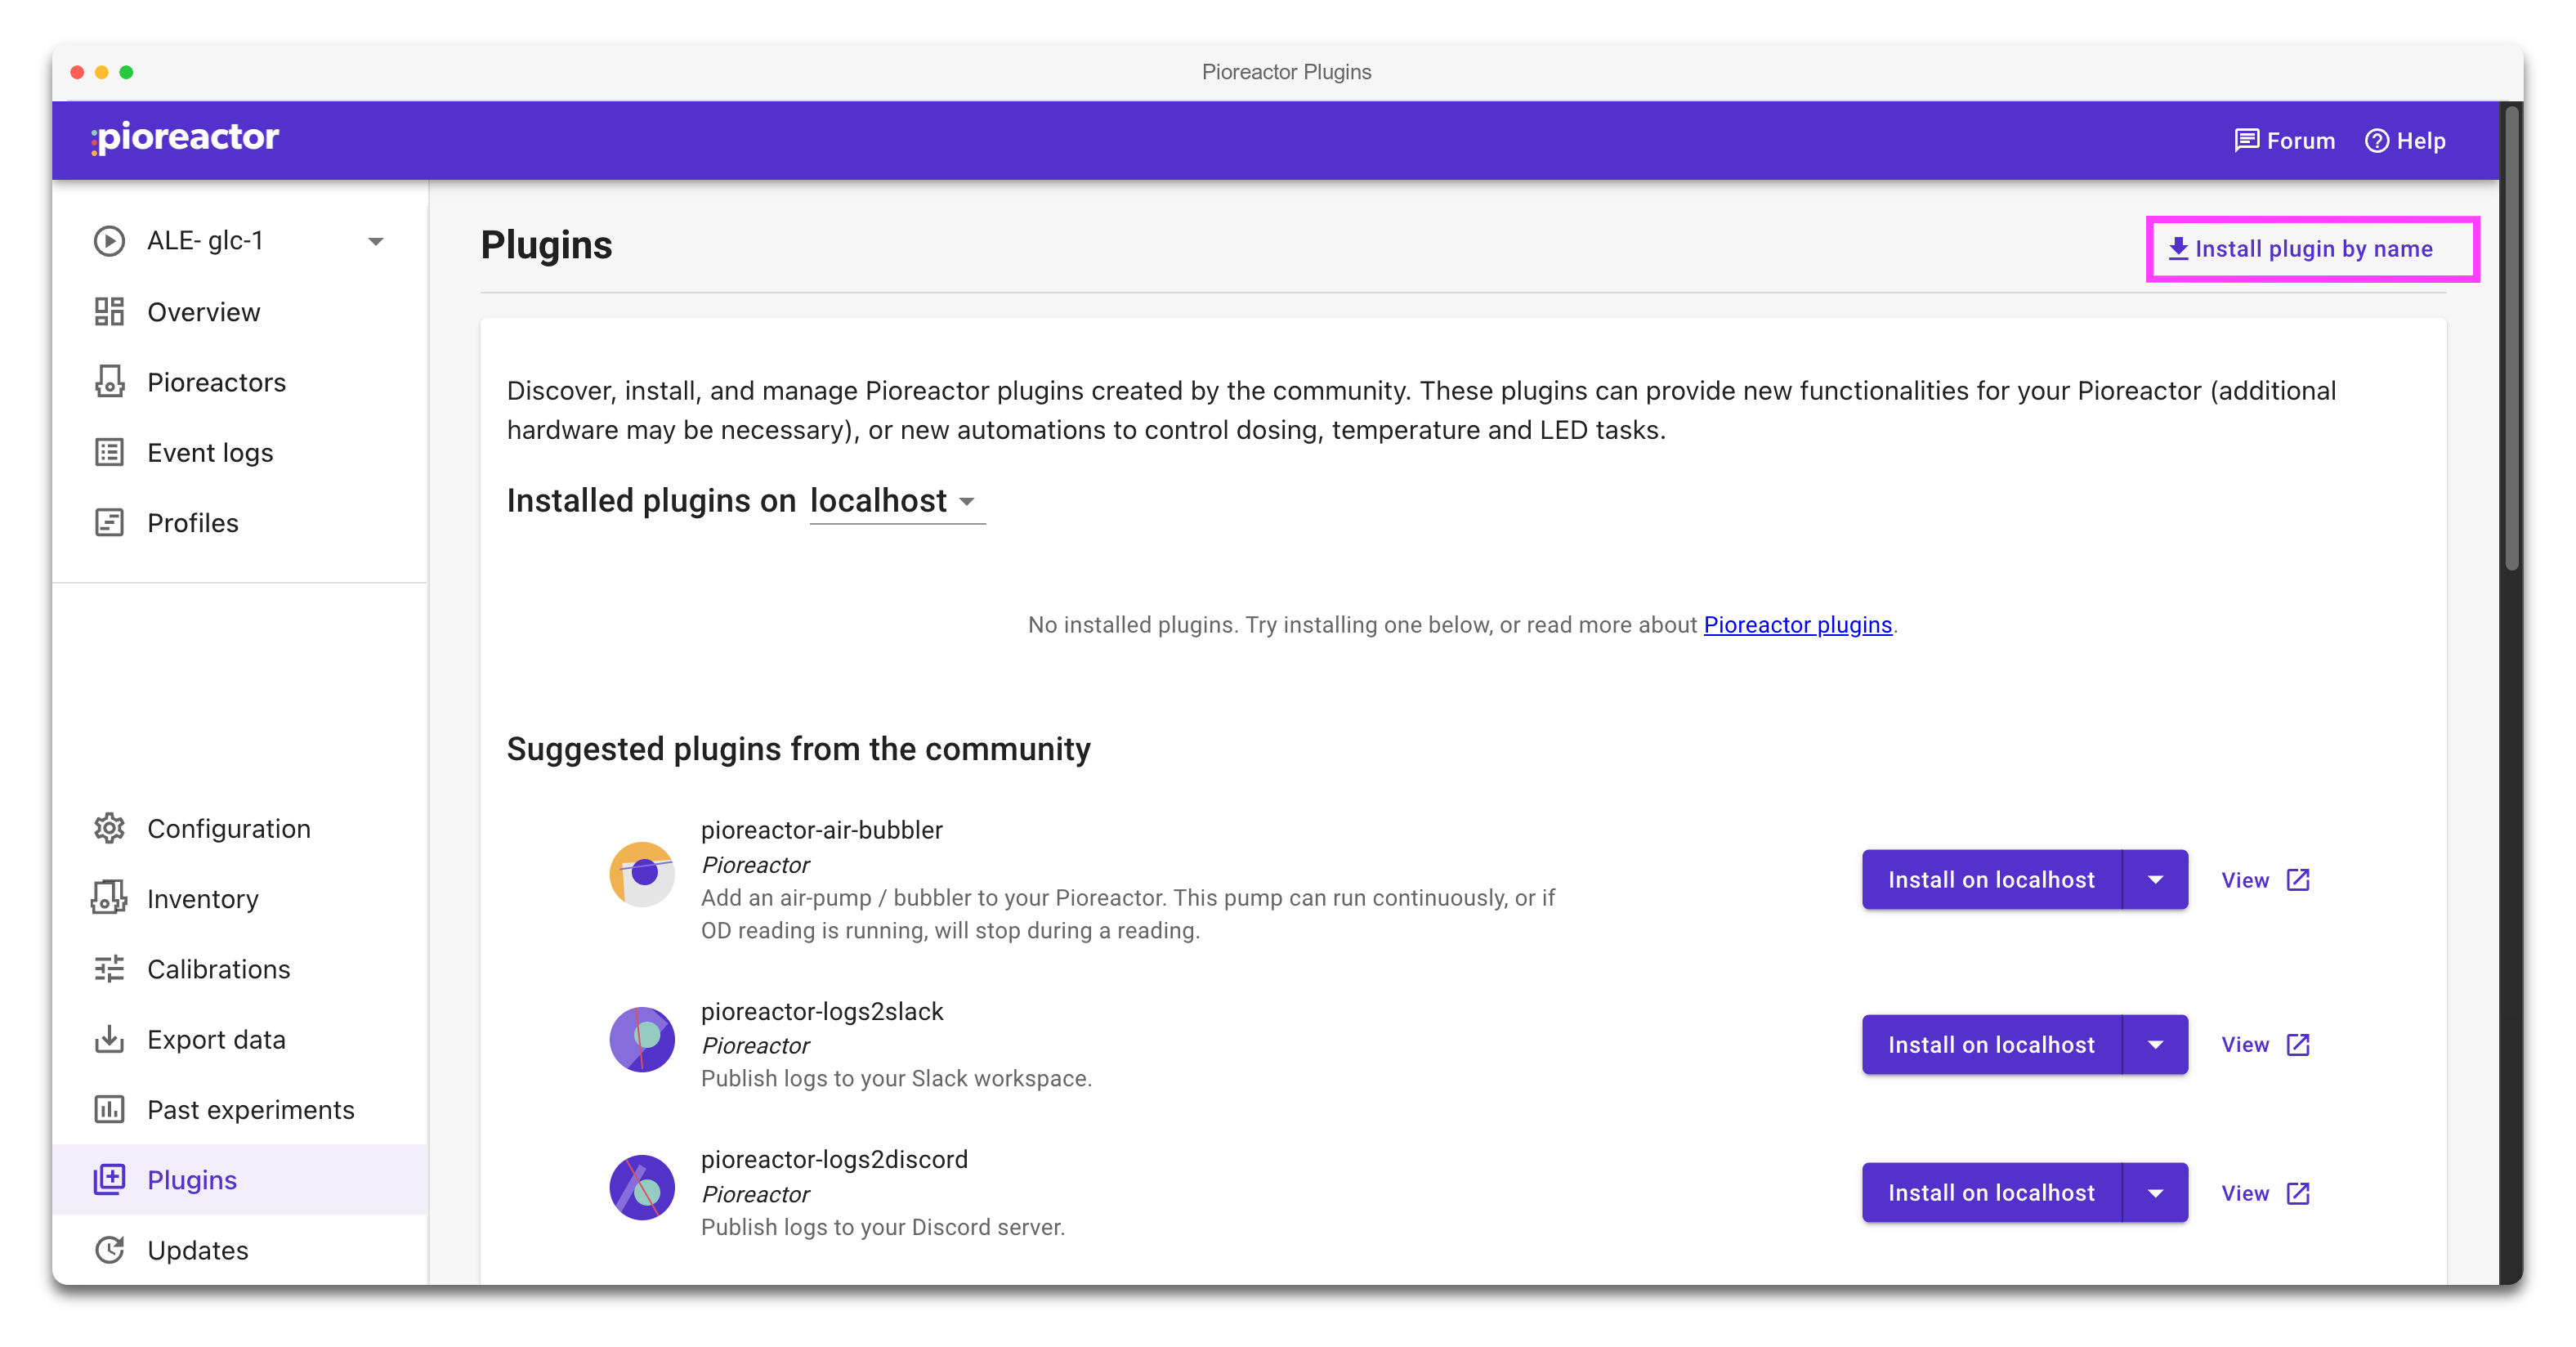
From your Pioreactor's interface, the "Plugins" button on the left navigation bar will display all your currently installed plugins, and some recommended plugins. We also encourage you to explore our forums for more plugins created by the community.

Automations installed via plugins
Some plugins add new automations to your Pioreactor. After installing, new dosing, LED, or temperature automations will be available in the list of automations available to you.
Uninstalling plugins
You can uninstall plugins from the same page, too. These will remove the action on the Pioreactor's card, but won't delete the section in your config.ini. Also, if a SQL table was installed with the plugin, the table will not be deleted.
I don't have internet access - how can I install the plugin?
- First, get the latest .whl file here onto any computer that can SSH into the Pioreactor.
- To get this .whl file onto a Pioreactor, use either
scp, WinSCP, or FileZilla. Note: if you upload the .whl file to your leader Pioreactor first, you can distribute the .whl file to all your workers withpios cp <location of .whl file> - Once the .whl file is on the Pioreactor, use the following to install the plugin:
For example:
pio plugins install <name-of-plugin> --source <location of .whl file>pio plugins install pioreactor-air-bubbler --source ~/pioreactor_air_bubbler-0.3.1-py3-none-any.whl
Alternative: putting Python files in the the plugins folder
An alternative way to install a plugin is to place a Python file in the /home/pioreactor/.pioreactor/plugins directory on the Raspberry Pi. This is good for one-off scripts or plugins you are demoing or testing. See more about writing and distributing plugins.