Software installation
Before you begin
You can expect the setup process to take 10-15 minutes. If you encounter any problems, feel free to email us for support at hello@pioreactor.com.
Before you get started, you'll need to have the following:
- A Raspberry Pi (our list of recommended Raspberry Pis is here)
- A blank microSD card (our recommended microSD cards is here)
- A suitable power supply for the Raspberry Pi (our recommended power supply units are here). You don't need to plug power in yet.
- A computer with internet access and ability to read & write to a microSD card
Setting up your Raspberry Pi's SD Card
We'll start with your blank microSD card.
-
Download the latest version of Raspberry Pi Imager for your operating system and install it.
-
Open the newly-installed Raspberry Pi Imager.
-
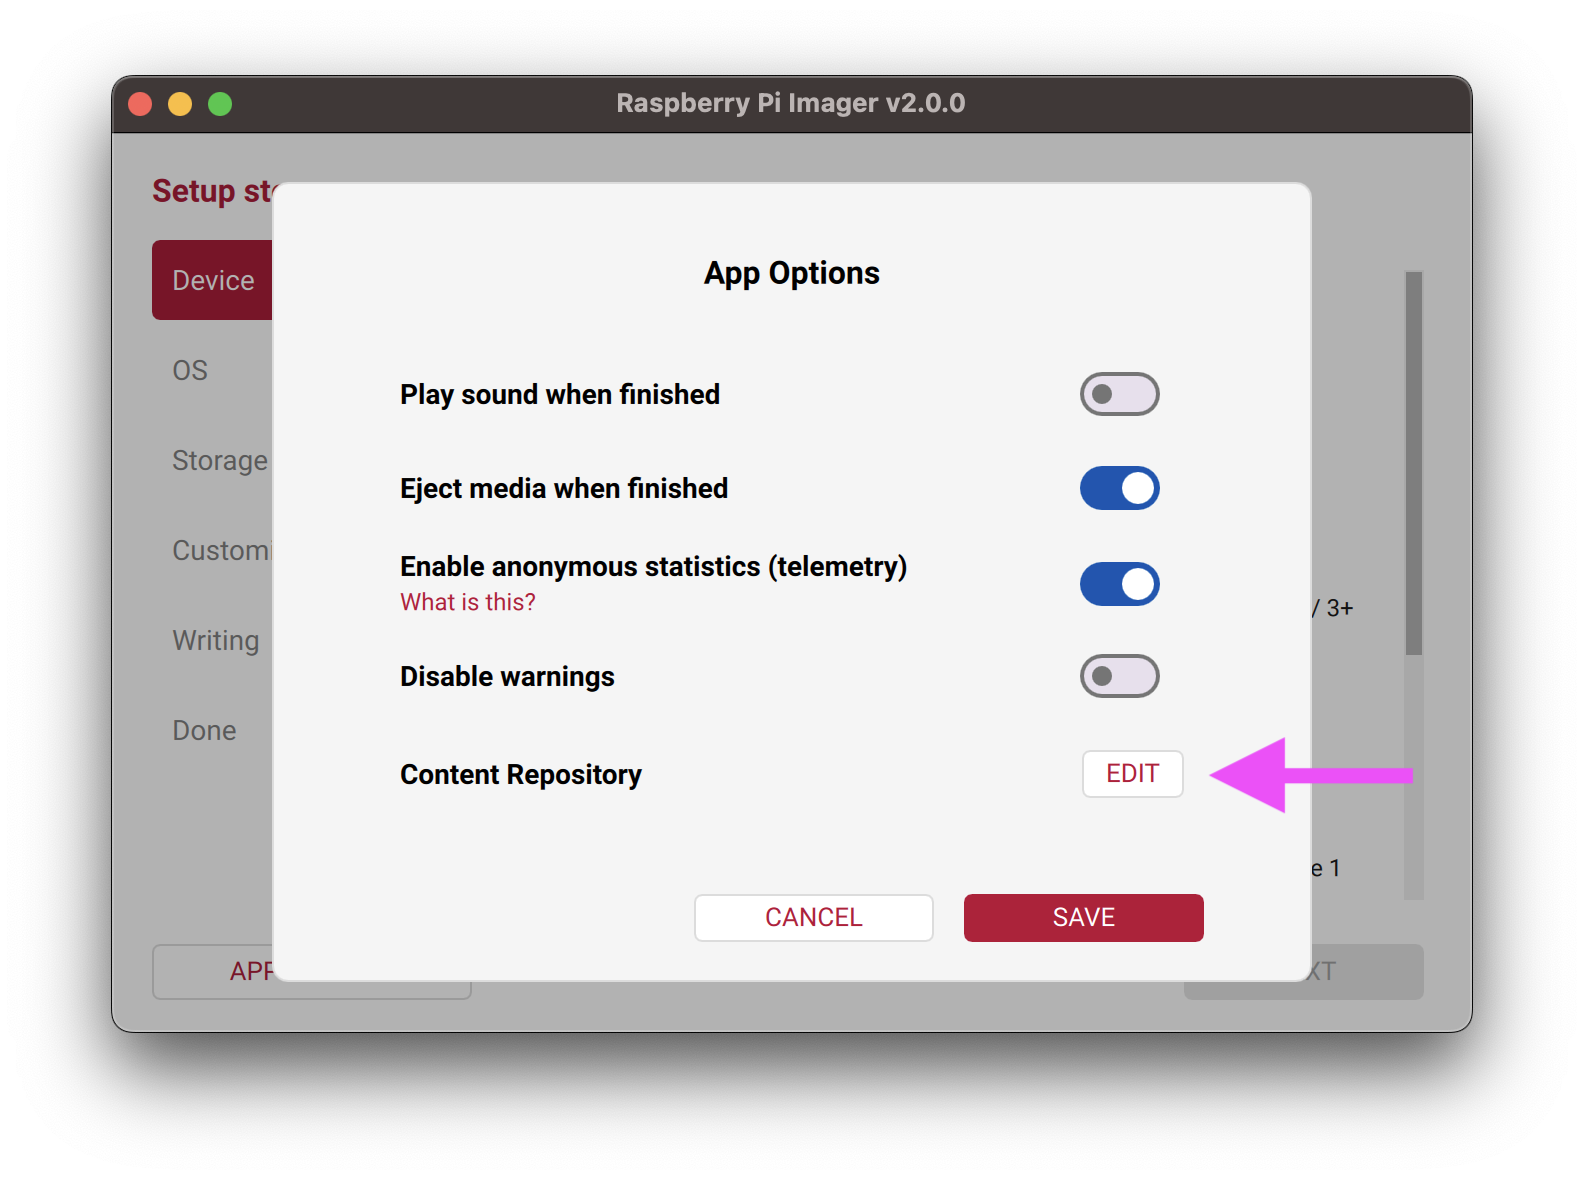
Immediately, click "App Options"

-
Click Edit next to Content Repository.
-
Choose Use Custom URL, and paste the value:
https://pioreactor.com/imager/os-list.json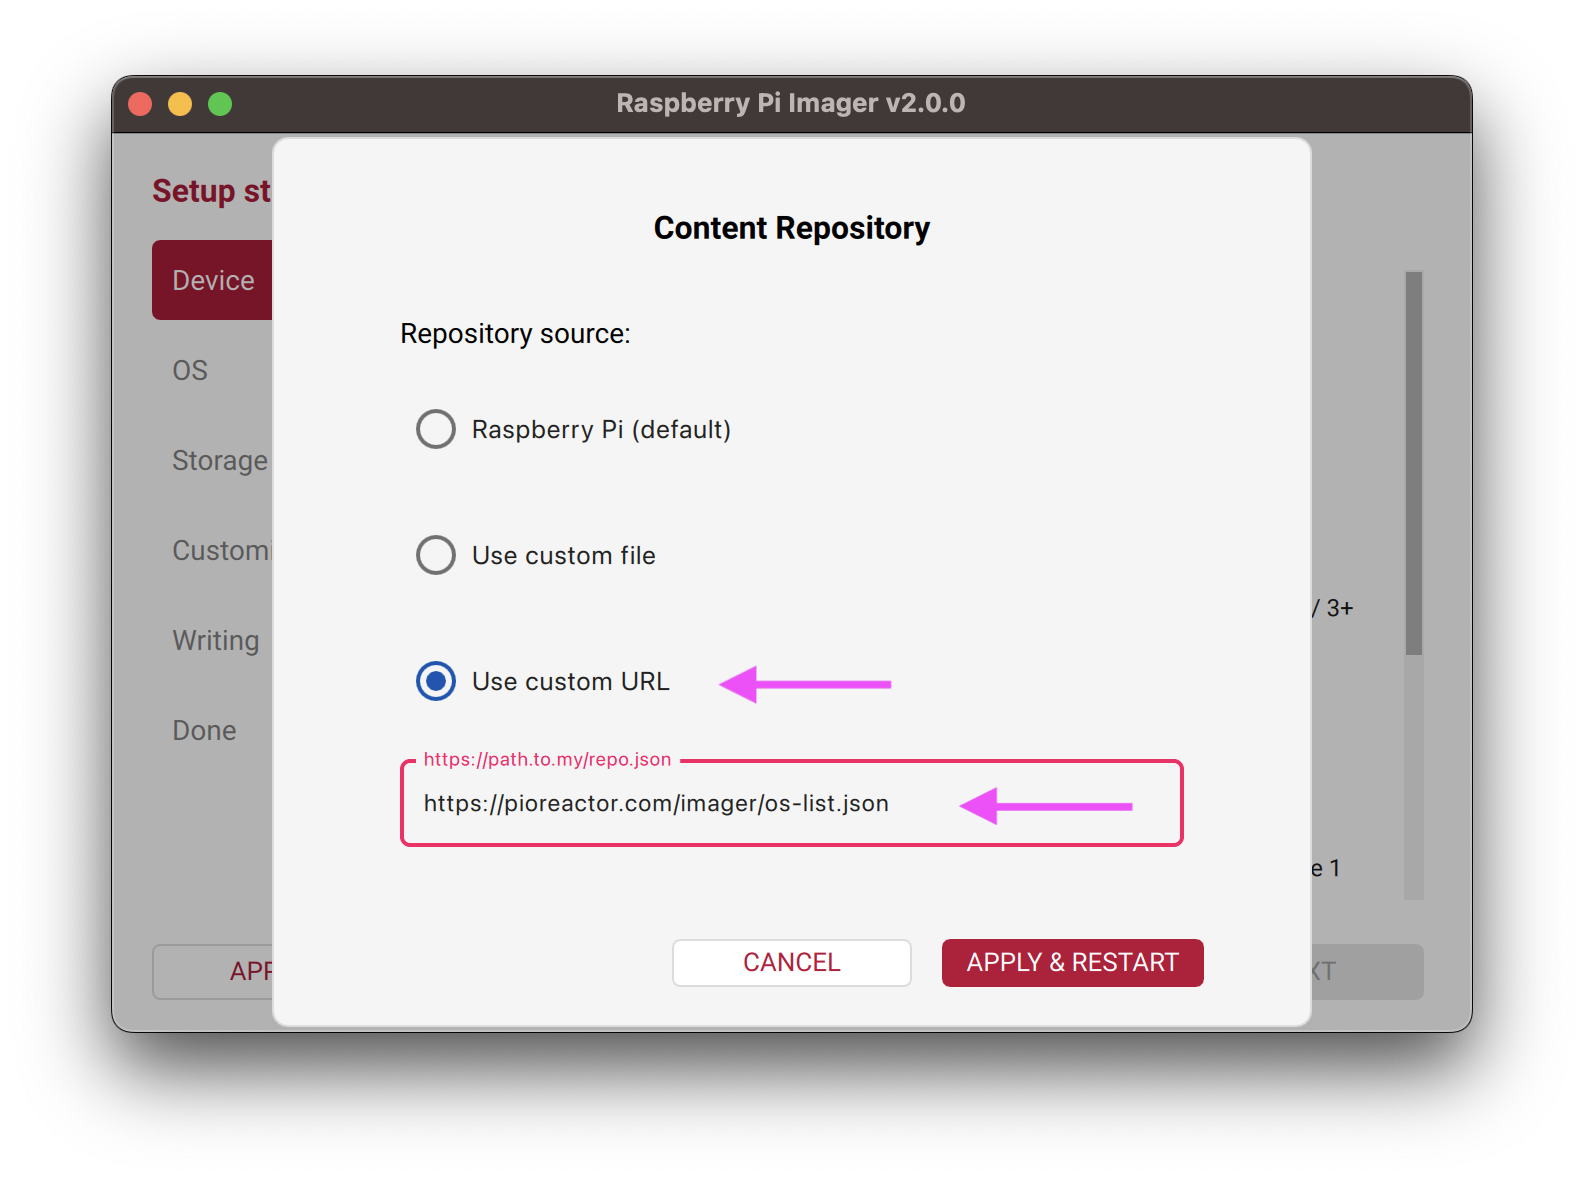
-
Click Apply & restart.
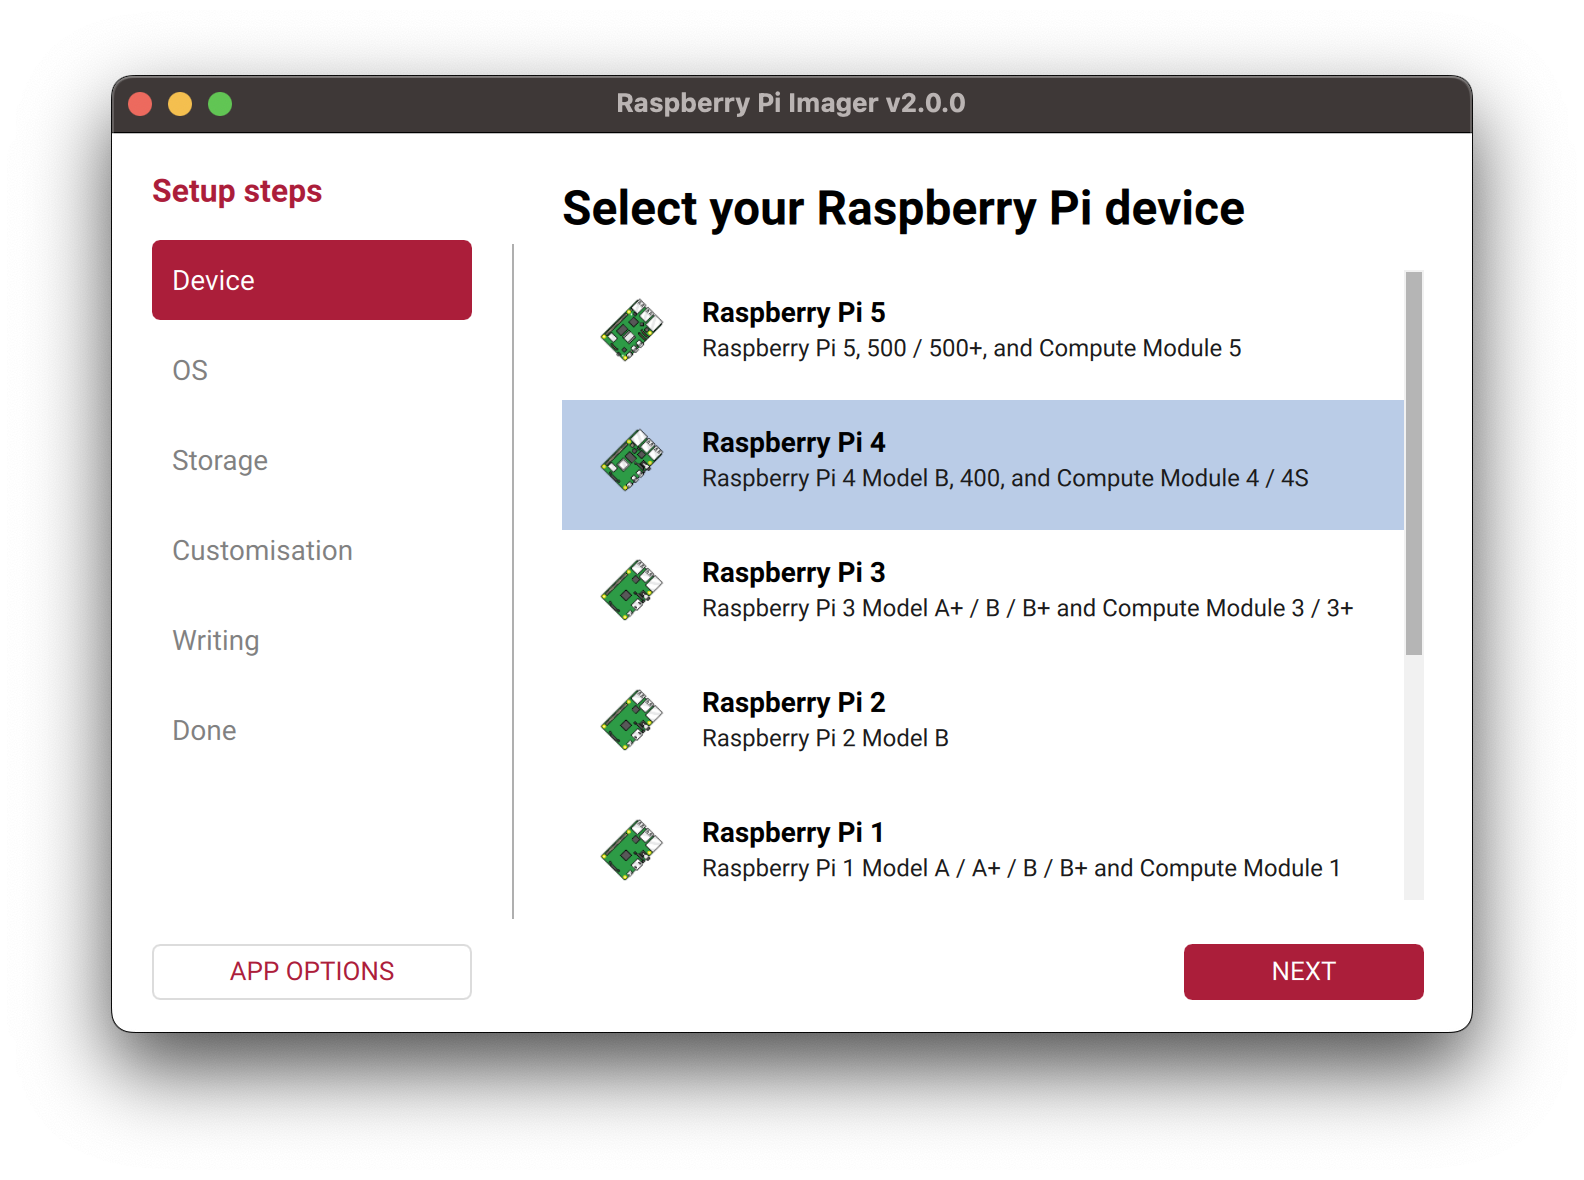
-
Choose your RPi model. Select Next.
-
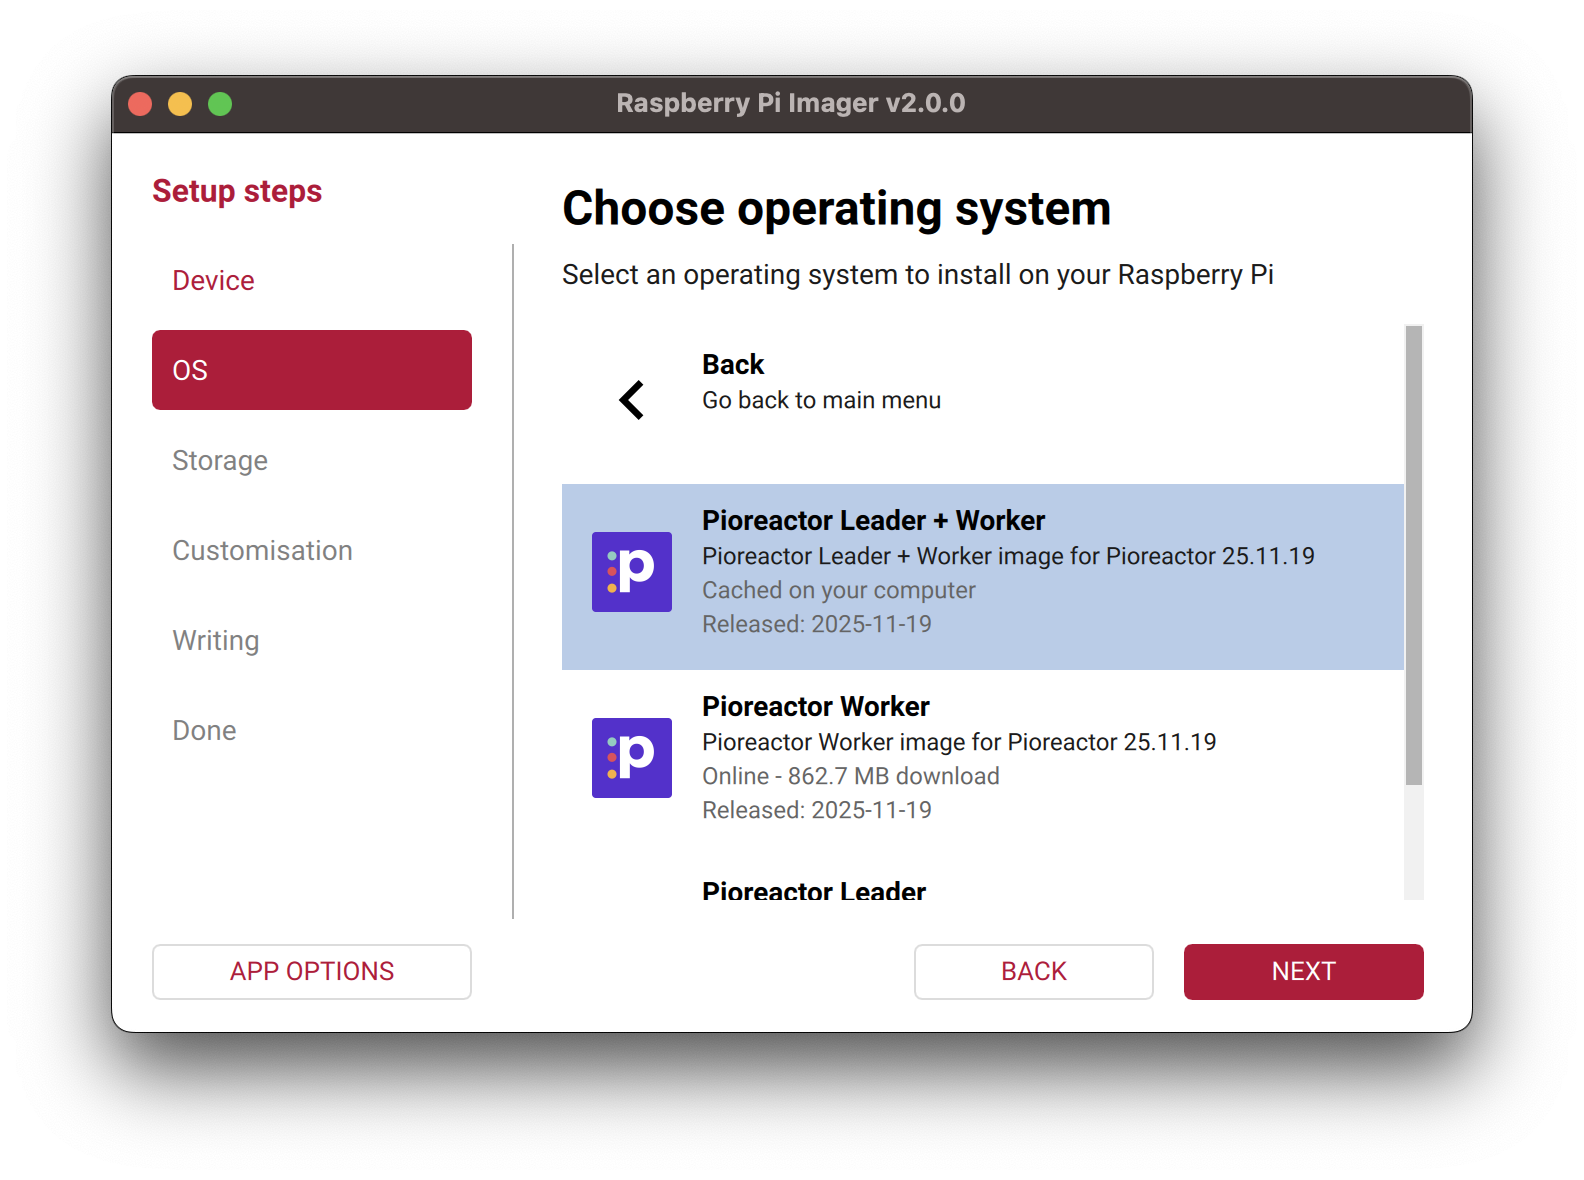
Choose the operating system Pioreactor. Click Next.

-
Choose the latest OS on the list (at the top). Click Next.

-
Choose the Leader + Worker. Click Next.
-
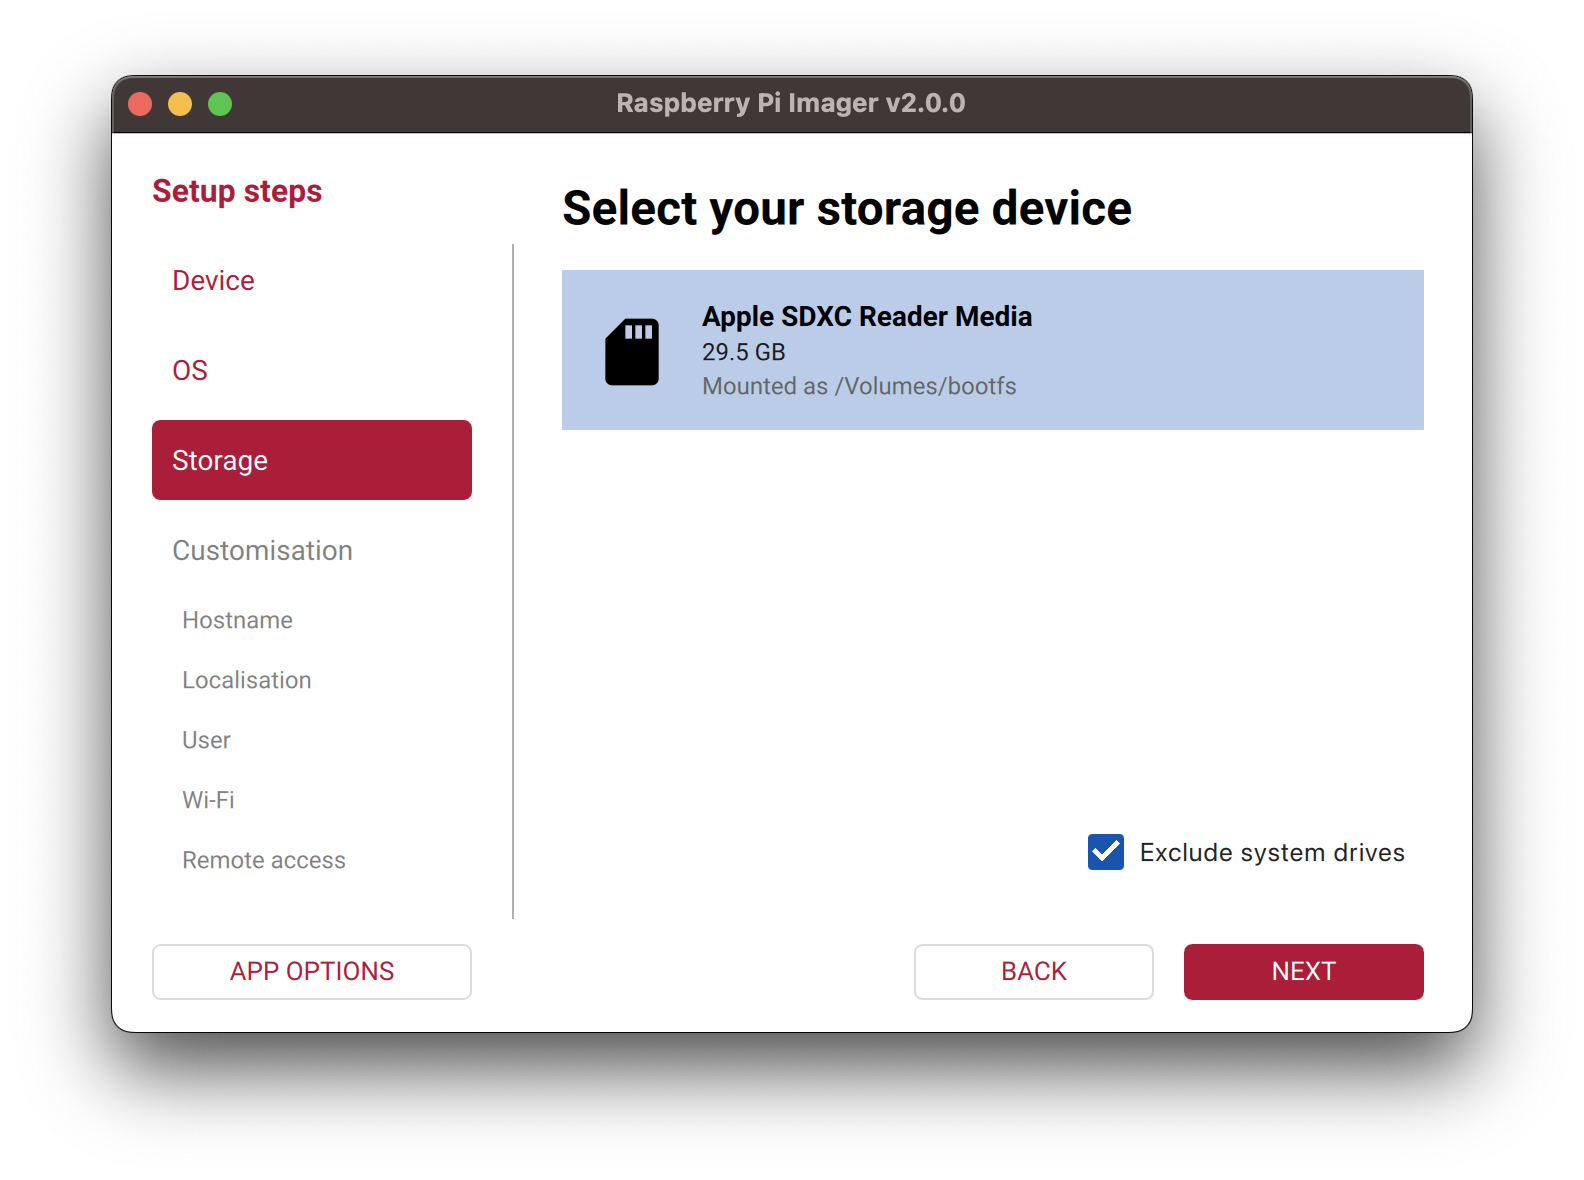
Insert your micro SD card if you haven't already. Select your Storage device (it may be a different icon than shown).
-
Input a unique name for this Pioreactor. Some names that we use for our first Pioreactor:
pioreactor01, orleader, orpio01. Don't usepioreactororraspberrypi.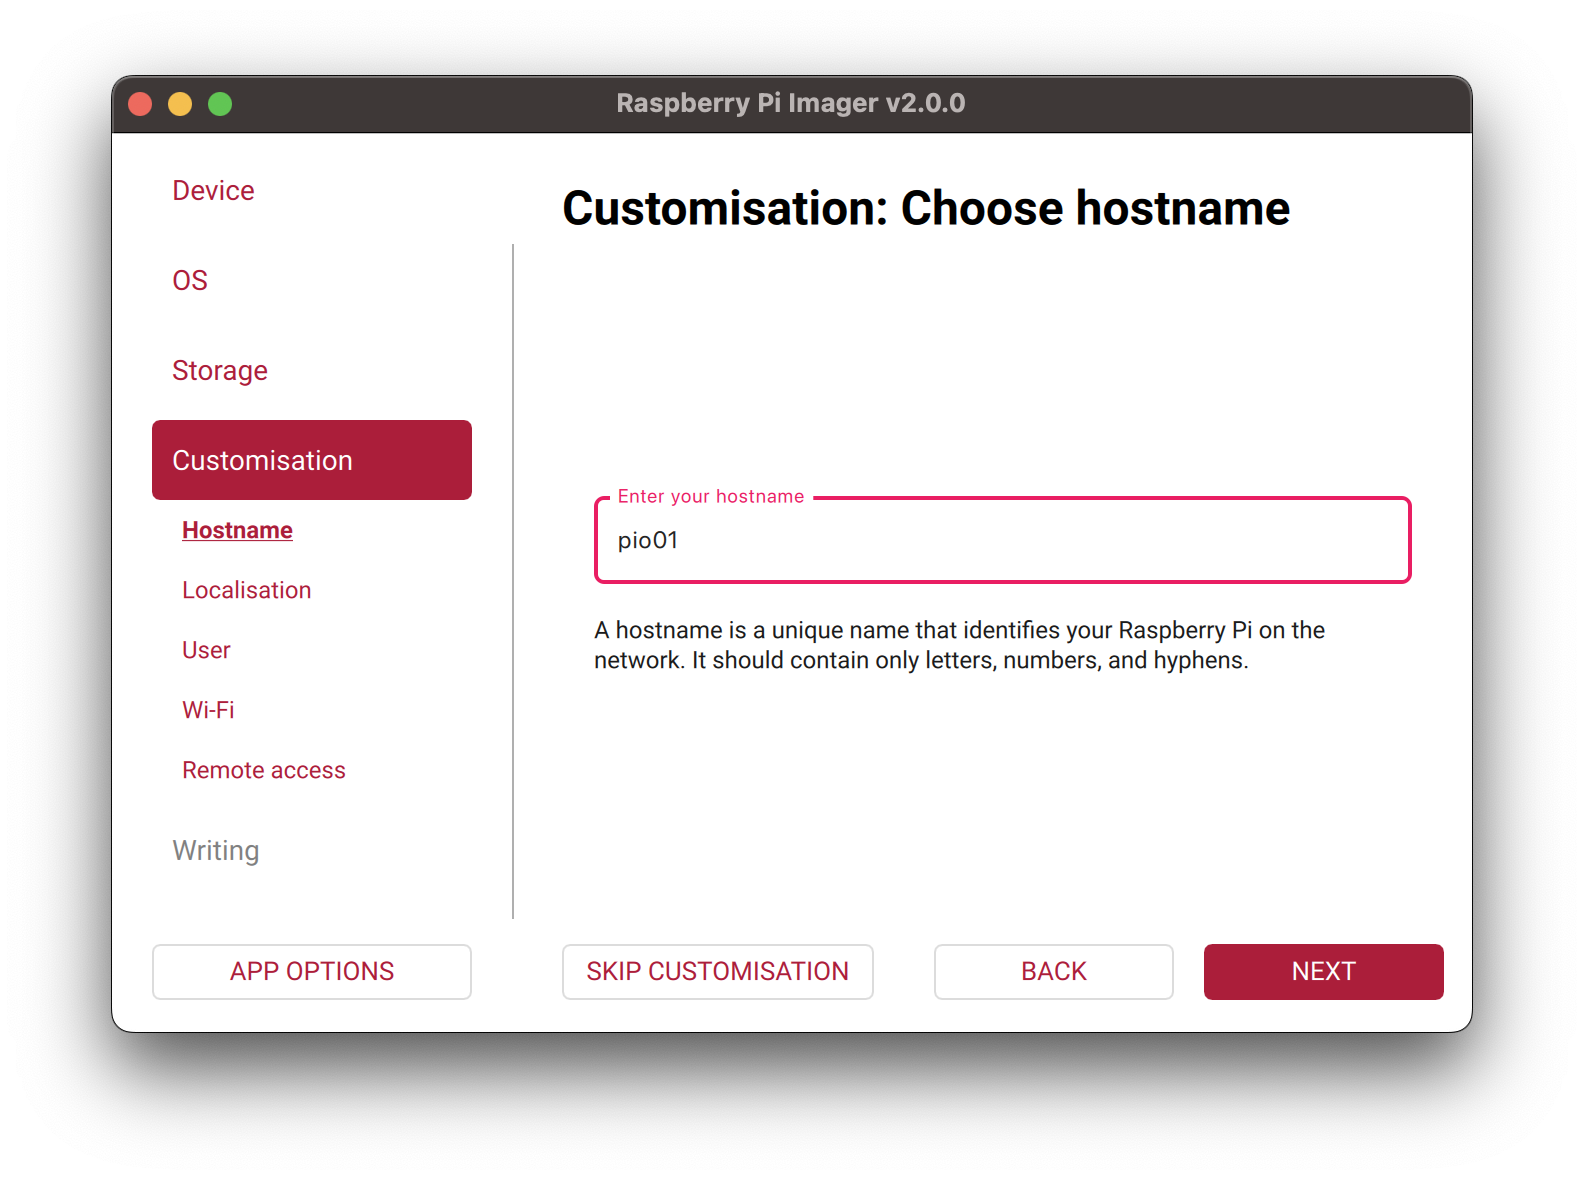 Click Next.
 -
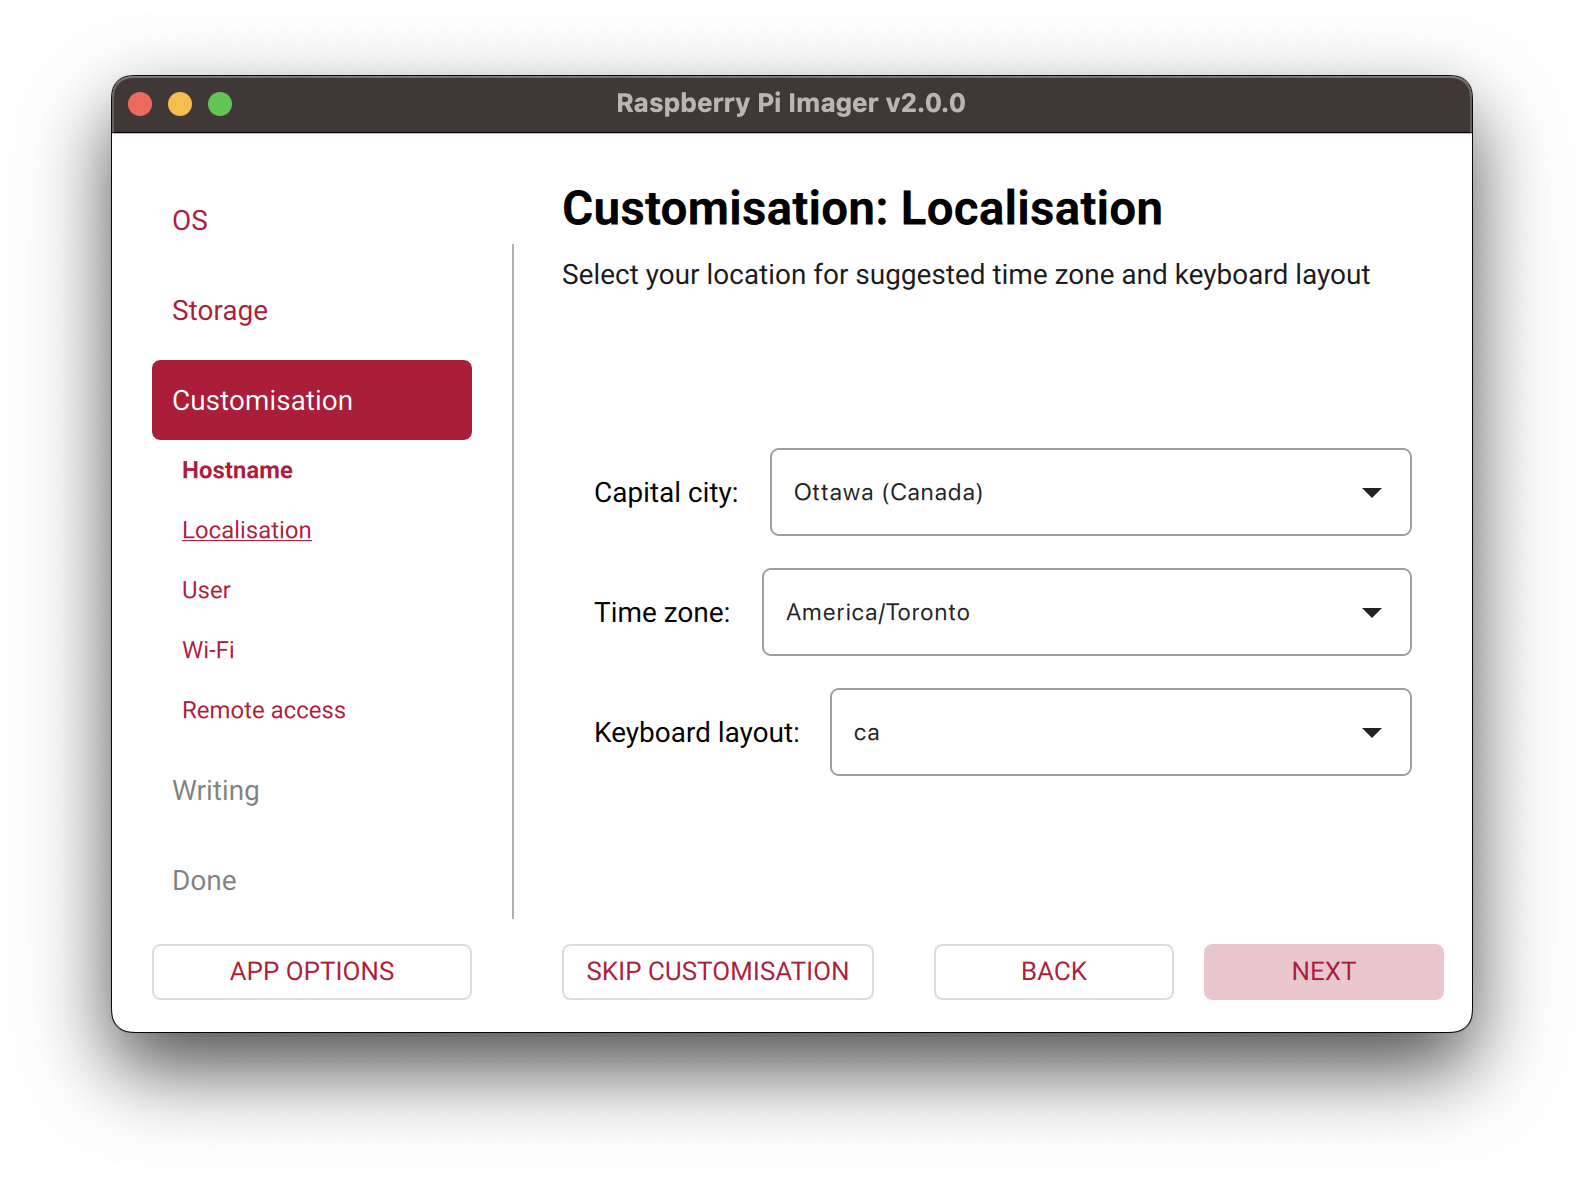
Change localization preferences. Click Next.
-
Check Set username and password. Enter the following:
- username:
pioreactor. - password:
raspberry. - Note: You can change the password later.
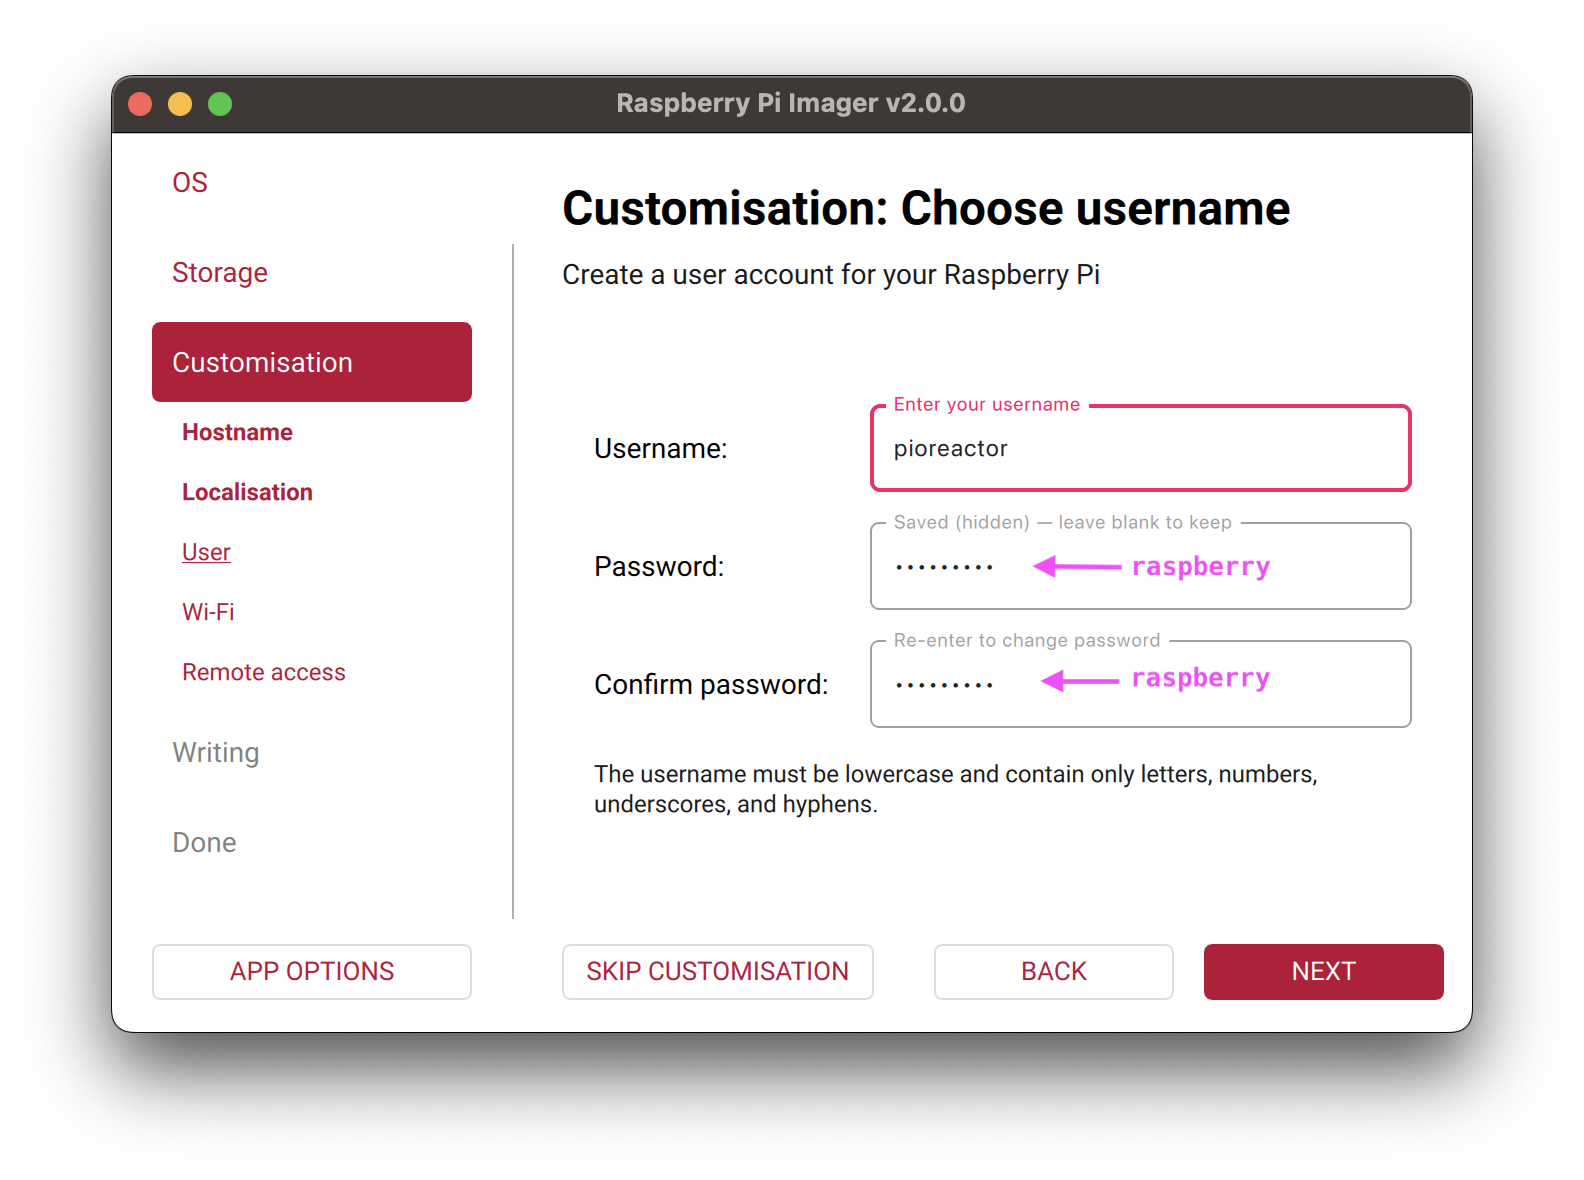 Click Next.
- username:
-
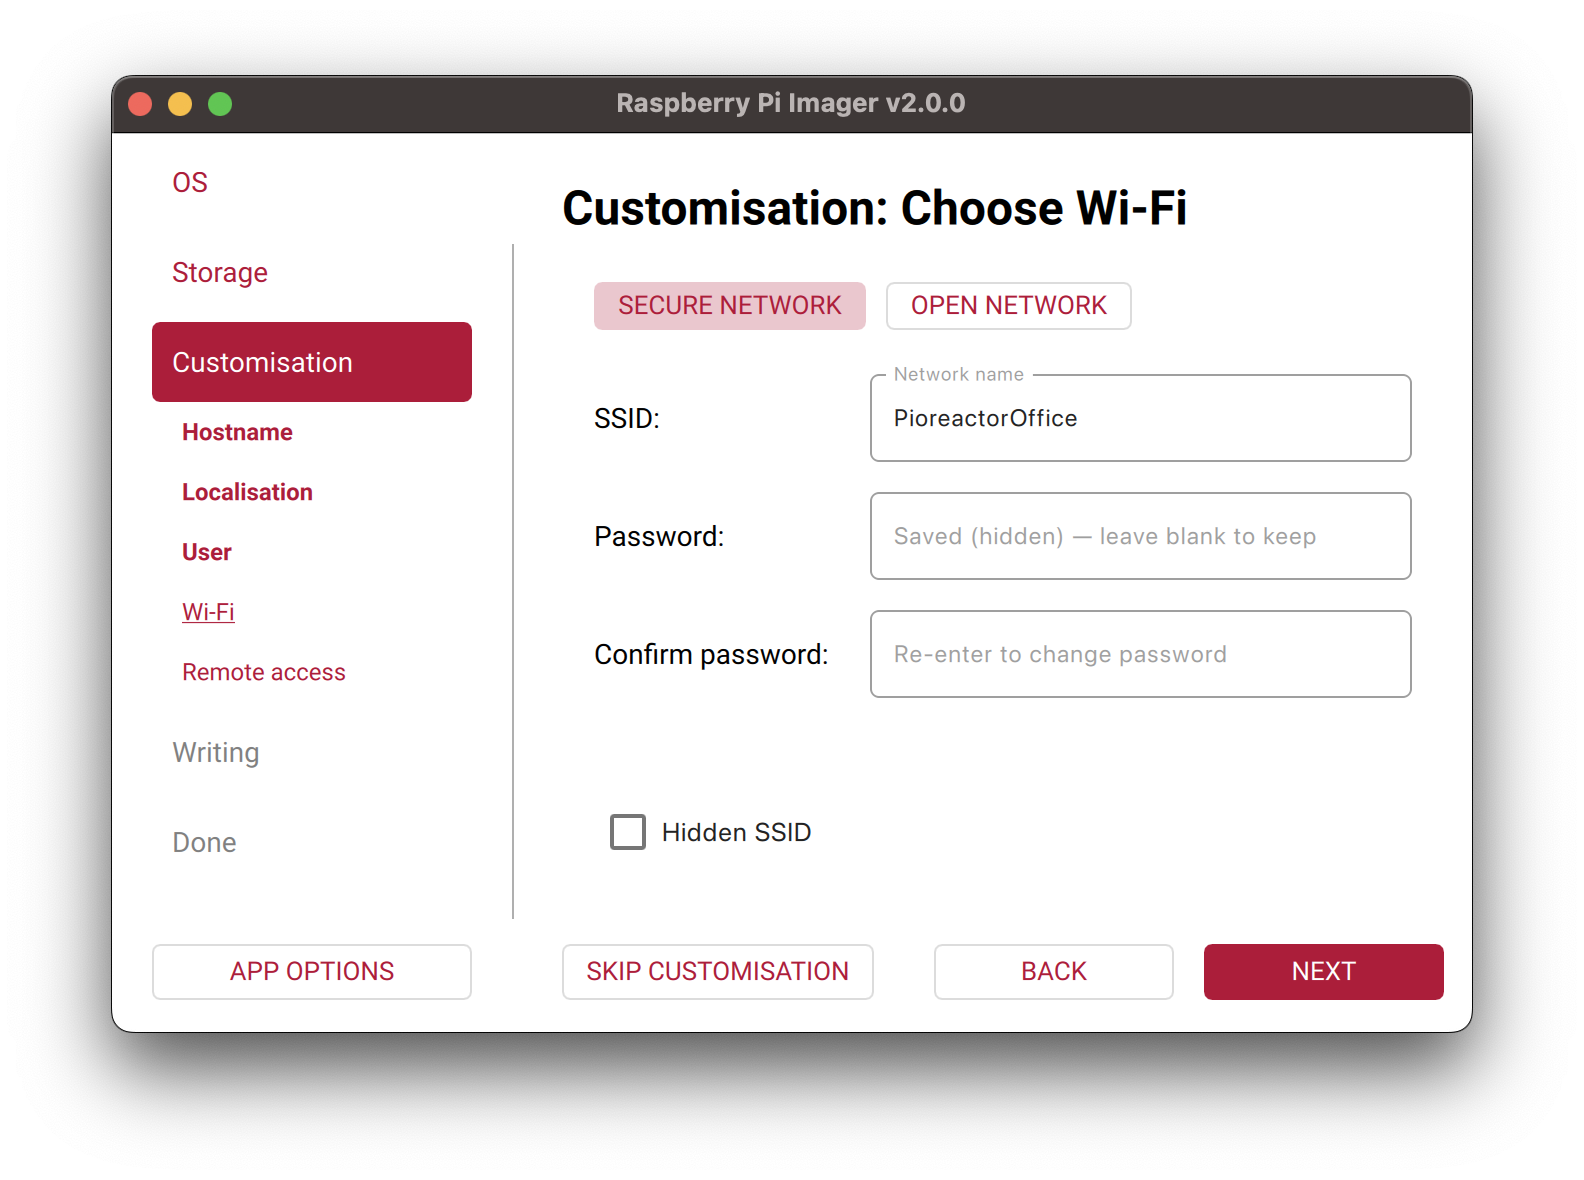
Enter your network name into SSID network name, and WiFi password. Optional: leave blank if using ethernet. Click Next.
tipIf you are having difficulty connecting to a network, like at a university that may not easily incorporate Raspberry Pi's, there's a built-in solution for creating a local access point) and a solution for internet-sharing from a PC via ethernet.
-
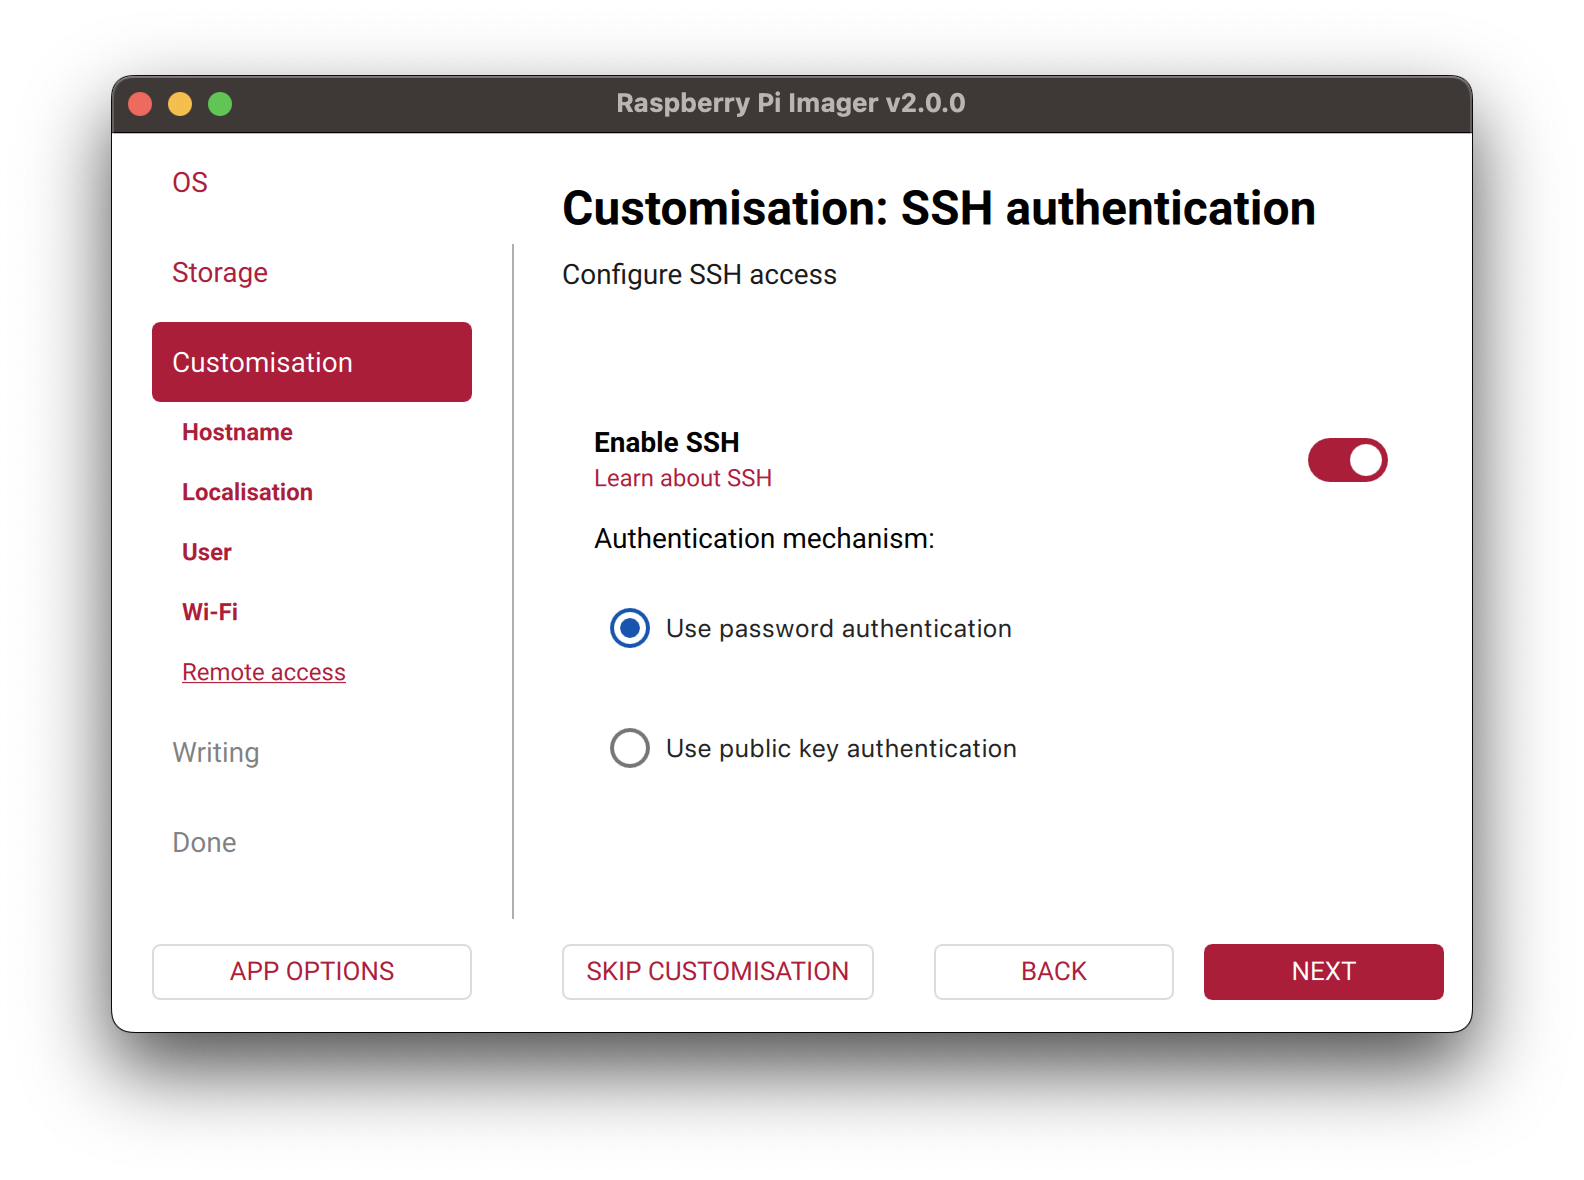
Confirm that Enable SSH is active, and Use password authentication. Click Next.
-
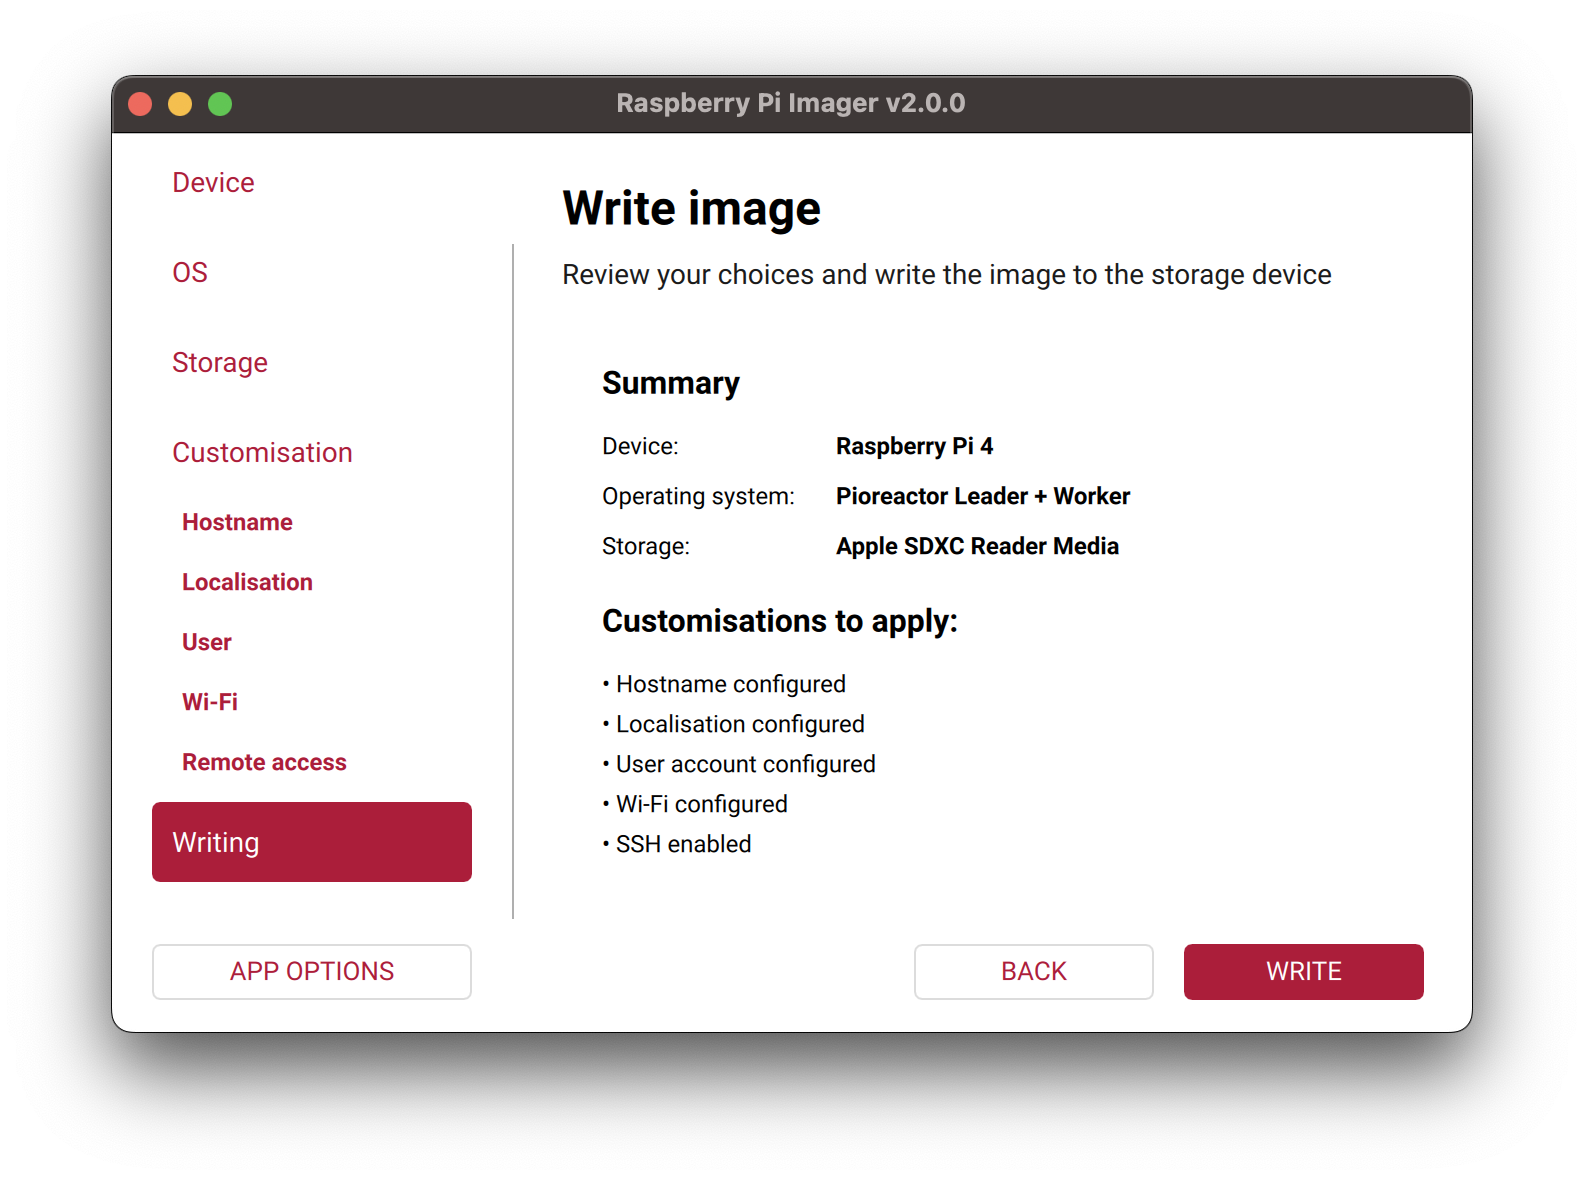
Click Write to begin writing your image to the micro SD card.
 tip
tipIf Raspberry Pi Imager fails while writing, first try Erase in Raspberry Pi Imager to format the card as FAT32, then write the image again.
-
A prompt may appear asking for permission to write, accept it. Writing will take up to 5 minutes. Perfect time for a tea break.

-
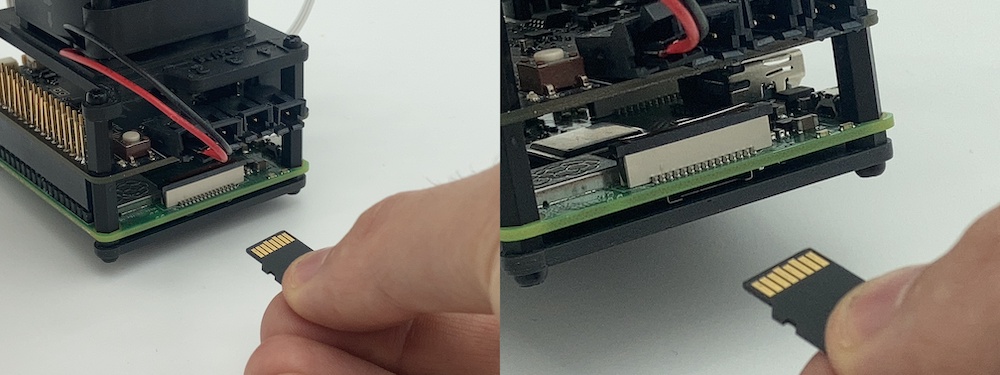
Once writing is complete, remove the microSD card, and place it into the Raspberry Pi. Your Raspberry Pi's power should be unplugged before inserting the microSD card. The microSD slot is located on the PWM side of the Pioreactor. Example for a Raspberry Pi A model:
-
Plug power into your Raspberry Pi. LEDs onboard the Raspberry Pi may start to light up momentarily. After a few minutes, your Pioreactor HAT will briefly blink a blue LED, telling us it is ready.
infoWaited, but didn't see a blue LED blink, or maybe you missed it? Try pressing on the onboard button, near the side labelled "PWM", and pictured above. If this lights up the blue LED, you're good to move on. Still not working? Try power-cycling the Raspberry Pi, or email us at hello@pioreactor.com.
-
After observing the blue LED flashing, navigate to http://pioreactor.local in a web browser to visit the web interface. If you are using local-access-point, looking for a
pioreactorwifi network and then visit the link. (Not able to load http://pioreactor.local? Read Common Questions below). -
When the UI loads for the first time you'll be prompted by the Update Pioreactor model dialog. Select the correct model and hardware version for each Pioreactor listed, then click Save to continue.
 tip
tipIf the Update Pioreactor model dialog doesn't appear, open the Inventory page and use the Model dropdown on the Pioreactor card to select the correct model and hardware version (the dropdown can be hidden if the card is narrow). Then reboot the Pioreactor from the Inventory page.
-
The Pioreactor is now ready for use! Follow the hardware pre-flight check before setting up your first experiment.

Adding additional workers to your cluster
Workers are additional Pioreactors that you can control from a single UI. Together, a leader and workers form a Pioreactor cluster.
Step 1. Install the worker software
-
Follow the same instructions above, but instead of choosing Leader + Worker, choose Worker.
tipCheck the software version of your leader first (you can find that on the Updates page, or the Inventory Page, or use
pio versionon the command line). It's recommended to download the associated worker image for that same version. -
Follow the same instructions above to write the image to an microSD card. All the settings are the same, including username and password, but choose a new hostname. Choose a hostname that isn't currently being used in your cluster, ex:
worker01,worker02, etc. Re-using old names is fine, so long as that worker isn't present in your cluster.tipIf you plan to have many Pioreactors, use a leading zero in numbers, like
pio01, orworker01, etc. -
If using a local-access-point on your leader Pioreactor, use the wifi ssid
pioreactorand passwordraspberry. Otherwise, use the same wifi credentials are your leader Pioreactor. -
After the image is written to the microSD card, place the microSD card into the Raspberry Pi and power it on.
-
After a few minutes, the Pioreactor's blue LED will light up and stay on, indicating that it's ready to be connected. Move onto the next step.
Step 2. Add worker to cluster using the UI
Follow the instructions here to add your worker to your Pioreactor cluster.
From the command line (Alternative)
On the leader's command line, the command pio workers add <hostname> will connect the new Pioreactor worker to the cluster.
We recommend running a pre-flight hardware check on all Pioreactors after your initial setup to detect any hardware bugs at this point.
Common questions
My leader Pioreactor never flashes the blue LED
- First, confirm that when you press the HAT button, the blue LED does not show up. If it does, you're good to go.
- It's likely that the installation failed (due to a settings issue), or there is a problem with the SD card. Double check the settings that you used and try reinstalling the image.
- Are you using a microSD card with a size larger than 32GB or with exFAT format? You may need to reformat it to FAT32. To do this, in the Raspberry Pi Imager, first select "Erase: format card as FAT32" under "Choose OS". Then proceed with writing the image.
- If writing still fails after reformatting the card as FAT32, try a different, reputable microSD card.
My Pioreactor keeps flashing the blue LED
On a successful start, the Pioreactor will flash its blue LED for about 2 seconds. If you observe the blue LED flashing for longer, something may be wrong. You can diagnose the problem by counting the number of flashes observed.
My RPi won't connect to my WiFi.
- Some Raspberry Pis can't connect to Wifi natively, and some Raspberry Pis can only connect to 2.4GHz connections. See table below:

- If you are using the built-in WiFi in a Raspberry Pi3, a Pi3B+, or Pi Zero W, be aware that the signal strength from the tiny internal antenna may be weaker than other WiFi devices. Try moving your Pioreactor closer to the router as a test.
- If your network hidden? You will need to check
hidden SSIDin the configuration in the Raspberry Pi imager. To fix this, you'll need to restart the image installation from the Raspberry Pi Imager. - Try power-cycling the Raspberry Pi (unplug and plug back in).
- If you are on a restrictive network (like at a university), and wish to avoid the network, creating a local access point may be a better option.
- You may have mis-typed your WiFi credentials. To fix this, you'll need to restart the image installation from the Raspberry Pi Imager.
- If connecting to a 5GHz WiFi connection, you need to supply a valid country code. See the list here: https://en.wikipedia.org/wiki/ISO_3166-1_alpha-2/.
- It's possible your SD card is damaged. This can cause all sorts of problems (including failing to boot), not just WiFi issues. The most common cause of SD card failure is probably inserting or removing the SD card while the Pi is powered up.
I want to change the Pioreactor name on installation of leader
Easiest solution is to start over. You can edit the name in the RPi Imager, and reflash the image onto the microSD card to remove all previous data.
http://pioreactor.local in a web browser is not showing up
- In your browser's address bar, add the
http://in front of the url, like so:http://pioreactor.local. - Try appending a backslash as well:
http://pioreactor.local/. - The UI is hosted on http, not https. Check if you are accessing
http://pioreactor.local, and nothttps://pioreactor.local. - Try accessing using the url
http://<the name of your leader Pioreactor aka hostname>.local. - If you know your Raspberry Pi's IP, try
http://<IP address of your Raspberry Pi>. Here's information to determine the IP address. - On macOS, if your browser shows
ERR_ADDRESS_UNREACHABLE, check System Settings > Privacy & Security > Local Network and make sure your browser is allowed to access devices on the local network. If it is already allowed, try toggling the permission off and on. - When pressing the button on the HAT, does the blue LED show up? If not, installation may have failed. Try installing the image again, and double check the settings.
- Try power-cycling the Raspberry Pi (unplug and plug back in).
- In your Raspberry Pi Imager settings, confirm that you clicked "Set username and password", and used the username
pioreactor. If not, try reinstalling the image. - Are you on an older Windows machine? You may need to install a DNS service, but also see workarounds here.
Can I plug a monitor into the Raspberry Pi's HDMI port?
Our current software turns off all external displays (for power and compute reasons), so any external monitor attached to the Pi won't work.
I'd like to have the leader not be a worker, and only a standalone leader. Can I do that?
Sure, we have a custom image that only has the leader software on it. Instead of choose Leader + Worker in the Raspberry Pi imager, choose Leader.