Adding the Temperature Expansion Upgrade kit
You can improve your Pioreactor temperature sensing capabilities with the Temperature Expansion Kit. This kit allows for faster temperature response times, more granular temperature data, and increasing the maximum culture temperature. Below are instructions on how to assemble the new hardware to your existing Pioreactor.
Step 0: before you begin #
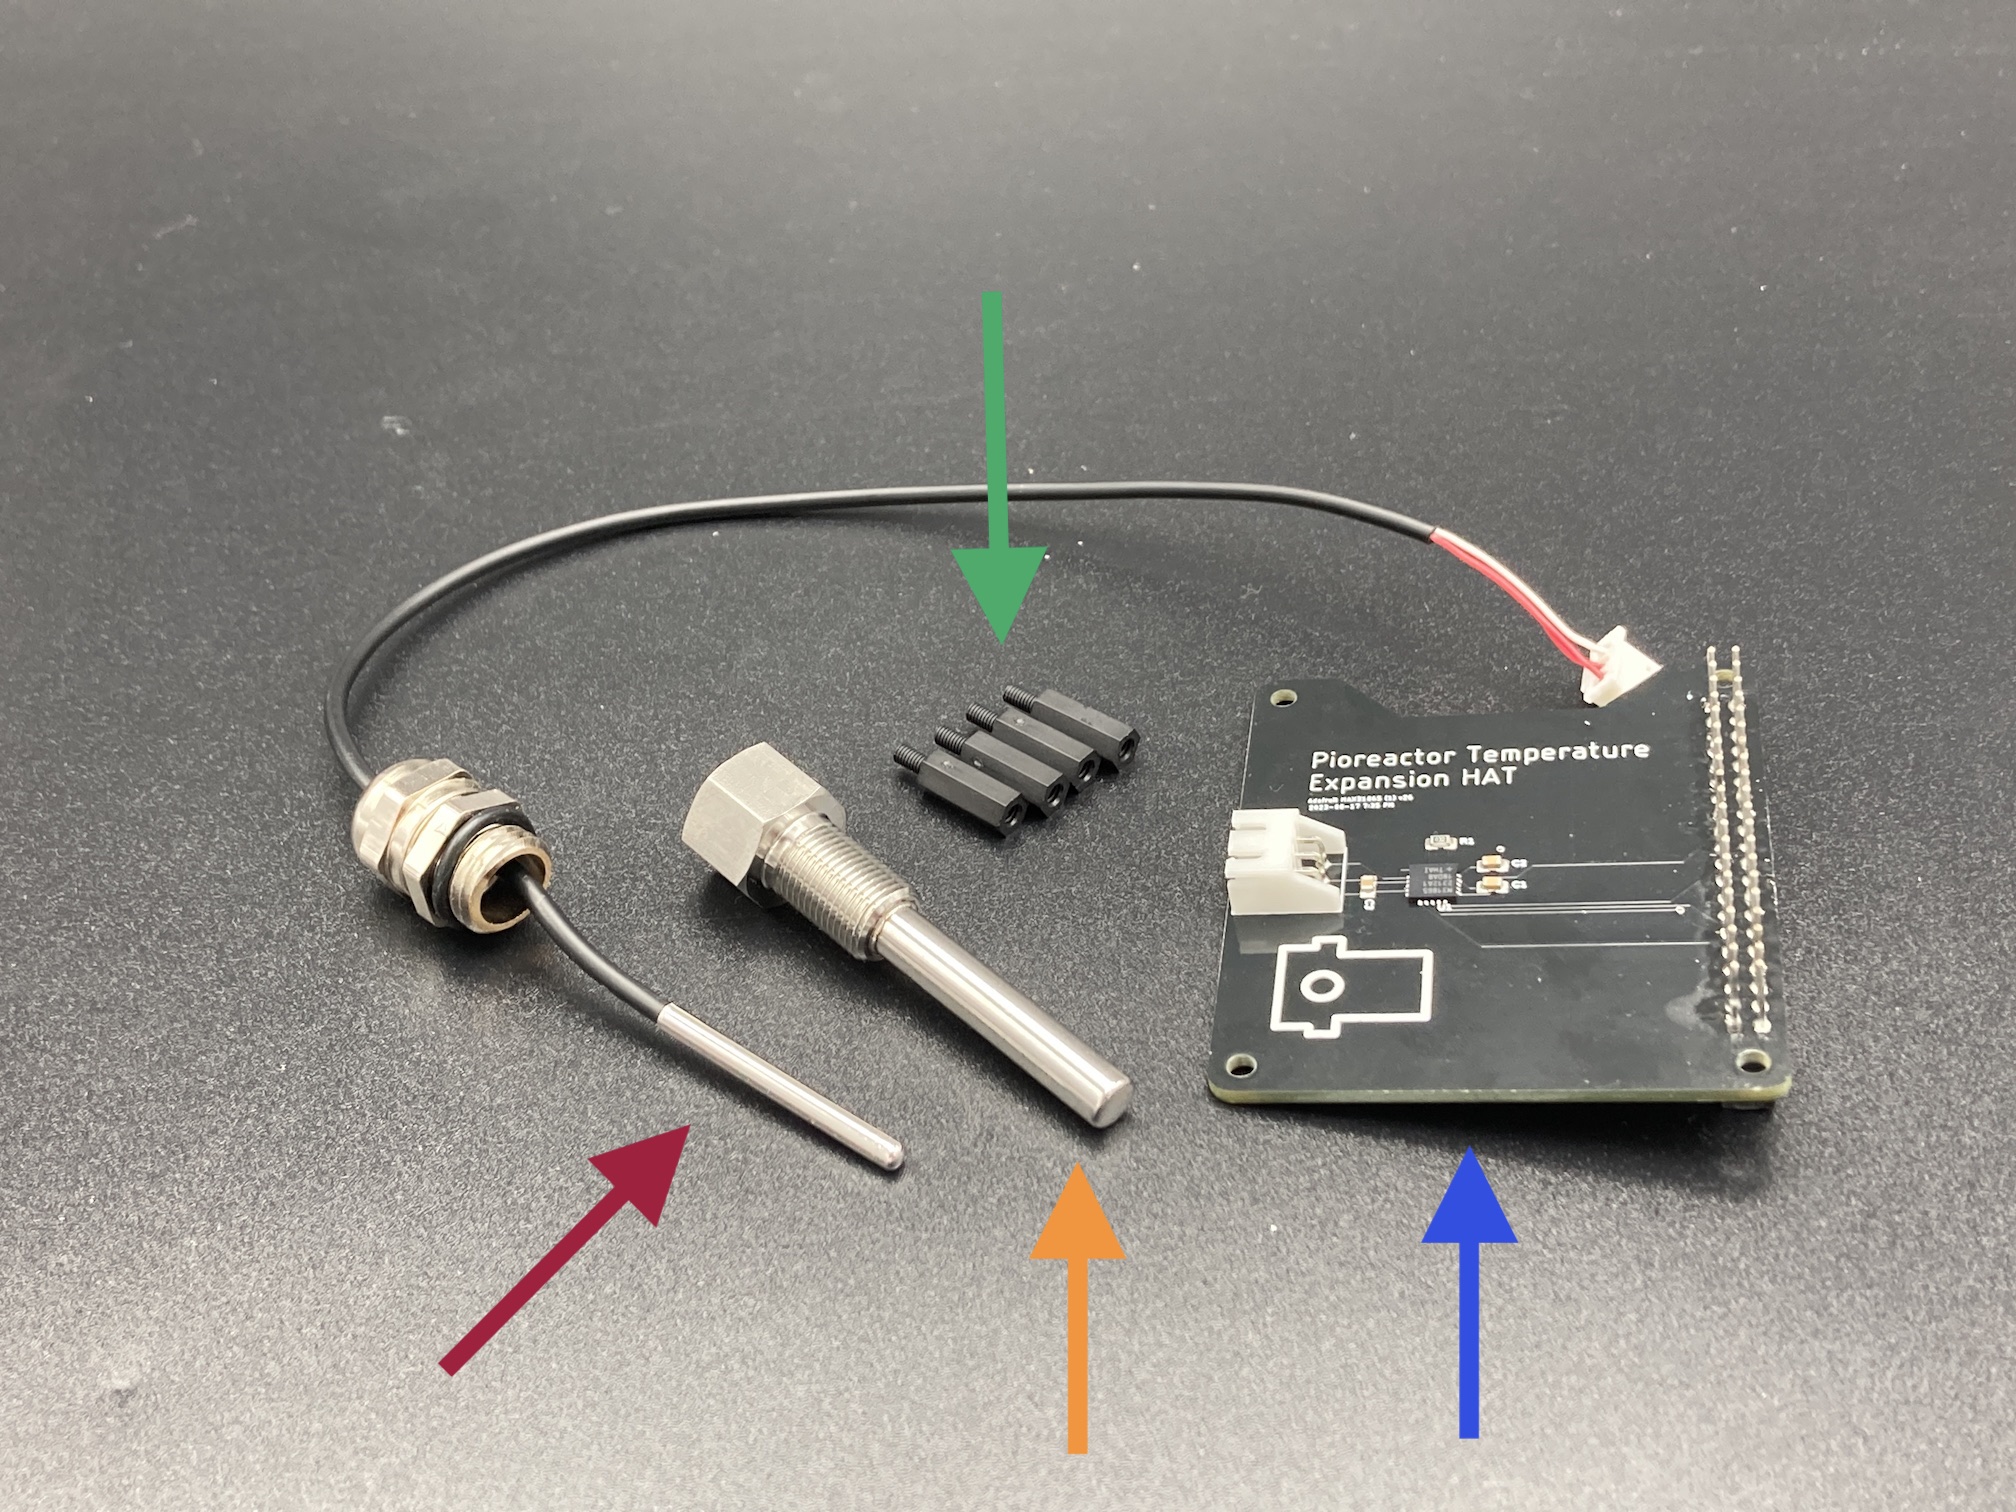
What's needed to upgrade your Pioreactor with the Pioreactor Expansion Kit:
- Pioreactor Temperature Expansion HAT
- 12mm nylon stand-offs
- thermowell
- Pt1000 probe
- A powered-off Pioreactor.
- A philips head screwdriver
Step 1: Expose the Pioreactor HAT #
- Unplug all wires and cables attached to the Pioreactor HAT.
- Unscrew the four 6mm nylon screws on the top faceplate. Keep these screws nearby.
- Remove the top assembly. Keep this nearby.
Step 2: Attach the new HAT #
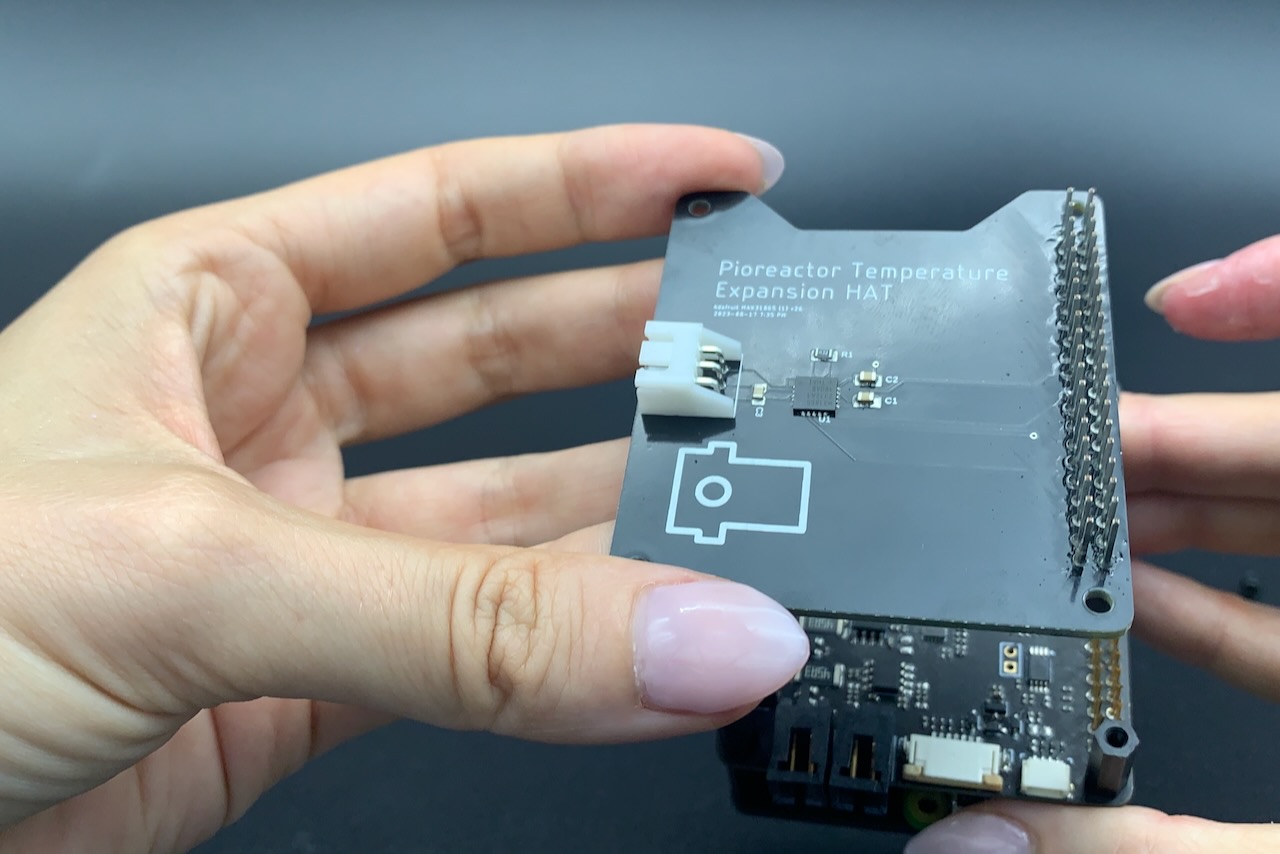
- Place the new Temperature Expansion HAT onto the existing HAT, making sure the GPIO pins are lined up. It will fit snug, and you can apply pressure onto the corners of the boards.
- Tip: if the HAT is still hard to put on, you can screw in the 12mm standoffs to help force the new HAT down further.
- Finish placing the 12mm standoffs in.
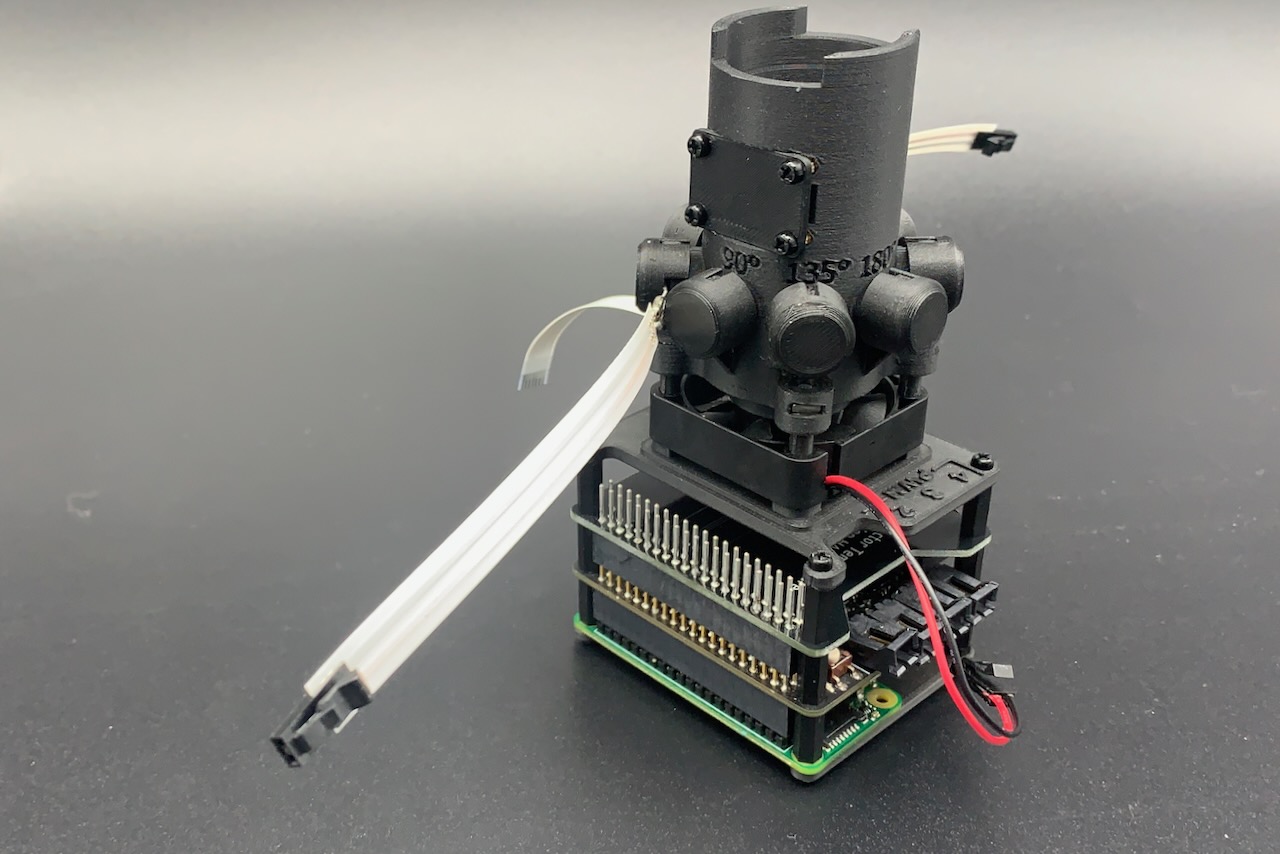
- Place the Pioreactor top assembly back on, and screw back in the 6mm screws.
- Replug in the cables and wires into the original HAT. Normally:
- 90° -> PD channel 2
- REF -> PD channel 1
- IR -> LED channel A
- Stirring fan -> PWM 1 (unlabelled)
- Heater PCB flat-flex cable -> flat-flex connector (unlabelled)
Step 3: Attach the Pt1000 #
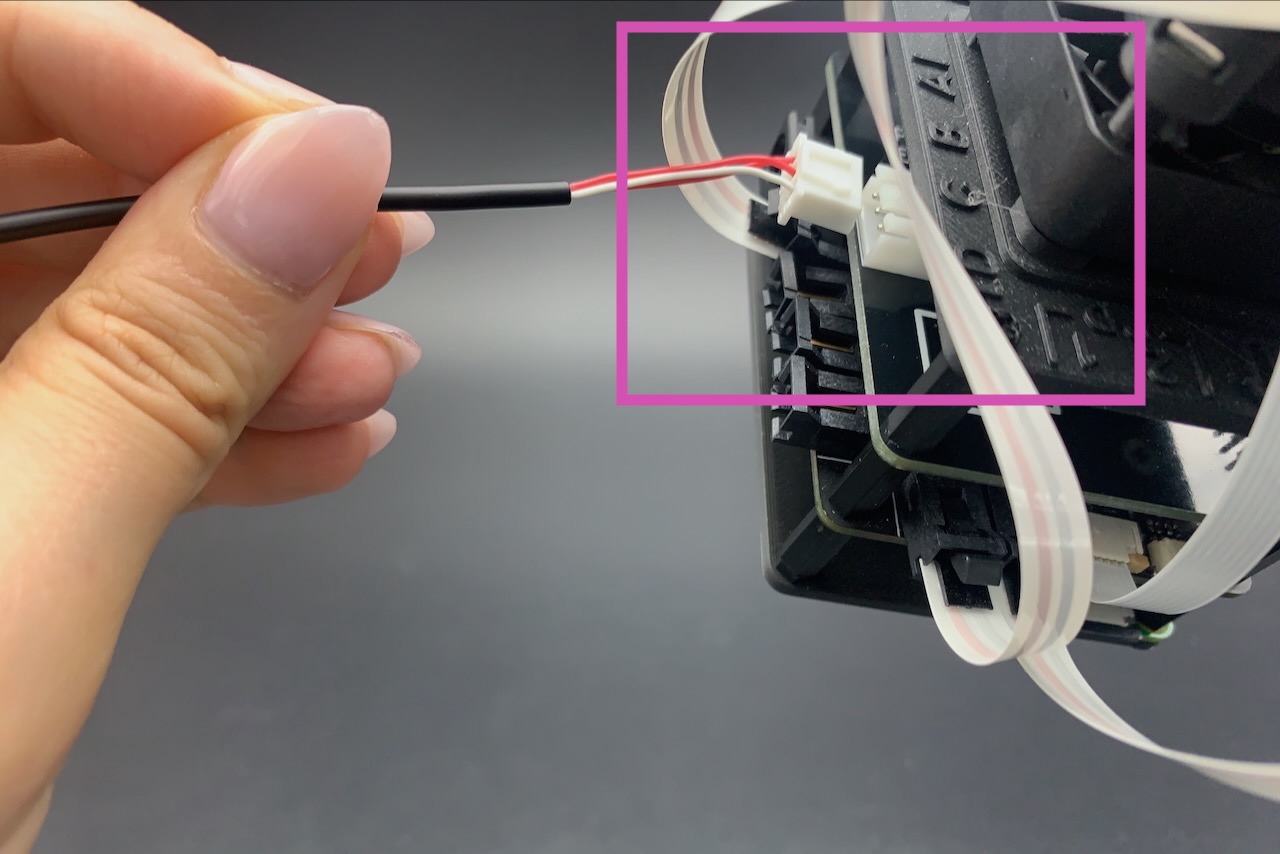
- Attach the Pt1000 probe's connector to the new Temperature Expansion HAT. The connector only has one orientation that works.
- In your Pioreactor's vial, screw in the thermowell.
Make sure when the thermowell is straight when being screwed in (that is, perpendicular to the surface of the cap).
It may be a tight squeeze. To help screw it in if it's difficult:
- Once a few threads are inserted, rotate the thermowell back and forwards a few times slowly to provide more clearance.
- You can use a pair of needle-nose pliers to hold secure the female end of the thermowell (i.e. one tip is inside the thermowell, and one outside), then twist the vial cap.
- If not already done so, screw in the Pt1000 into the thermowell.
- You're done the assembly! Next is to install the software.
- Power up the Pioreactor.
Step 4: Install the software #
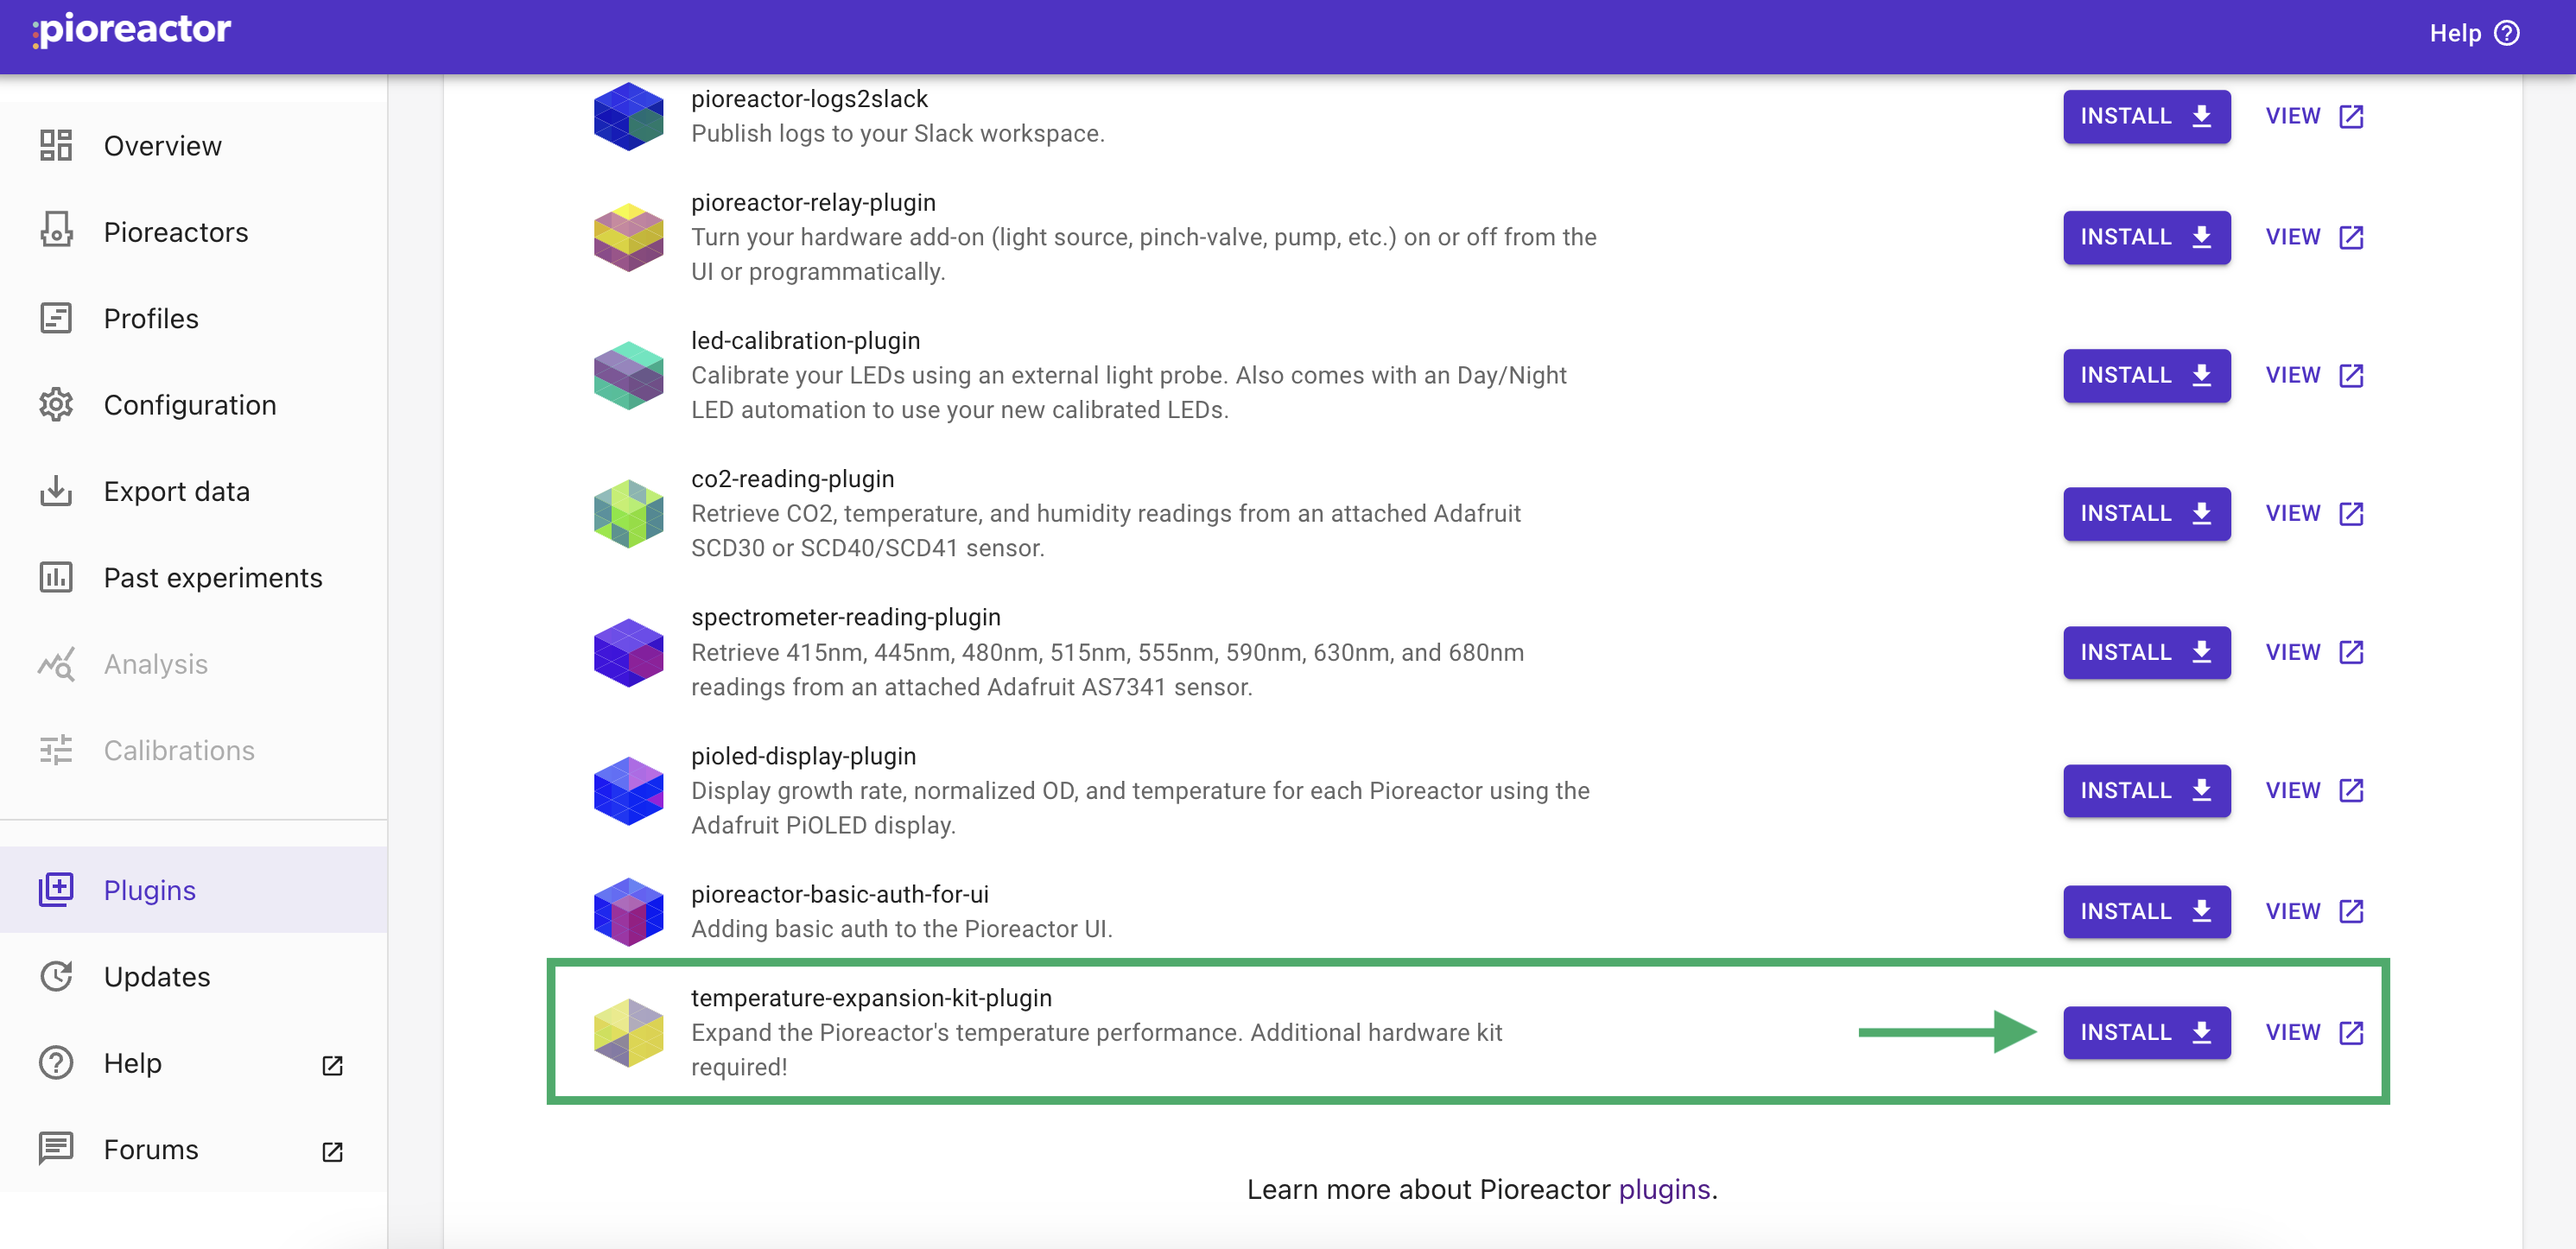
1. If you install the Kit across your entire Pioreactor cluster
- In your PioreactorUI, you can install the temperature-expansion-kit-plugin to all Pioreactors in your cluster.
2. If you installed the Kit on individual Pioreactors
- SSH into the individual Pioreactor, and type
pio plugins install temperature-expansion-kit-plugin
Important: in either case,
Confirm in your configuration that the [temperature_automation.thermostat] values have been updated for the Pioreactors with the new hardware to be (exact values may vary slightly):
Kp=0.017
Ki=0.0
Kd=4.0
You can also update the following configuration:
[od_reading.config]
# 50 or 60 only, depending on geographic location. This improves the accuracy.
local_ac_hz=60
Troubleshooting
I don't have internet access - how can I install the plugin?
- First, get the file latest .whl file here onto any computer that can SSH into the Pioreactor.
- To get this .whl file onto a Pioreactor, use either
scp, or FileZilla. - Once the .whl file is on the Pioreactor, use
pio plugins install temperature-expansion-kit-plugin --source <location of whl file>
I'm seeing "Record null temperature. Is the Pt1000 probe connected?" and the wire is connected.
- Try unplugging and plugging the probe back into the HAT.
- Try restarting the Pioreactor.
- If the error persists, contact us at
hello@pioreactor.com