Setting up an experiment
Creating an experiment
To create your first experiment, open the experiment selector in the top-left corner of the UI and choose Start a new experiment. This appears as the first item in the dropdown above your other experiments.

On Start a new experiment:
- Enter a unique experiment name.
- Optionally add a description. This can be edited later.
- Optionally add tags. Press
Enteror type a comma after each tag to save it. - If you want to reuse setup details from a previous run, click Populate with previous experiment.
- Click Save.
Tags are useful for grouping related experiments across time. For example, you might tag experiments by strain, media, operator, protocol, or project name.
After saving, you can come back to the experiment later from Experiments. Tags make it easier to find related runs when your list grows.
Assigning Pioreactors to your experiment
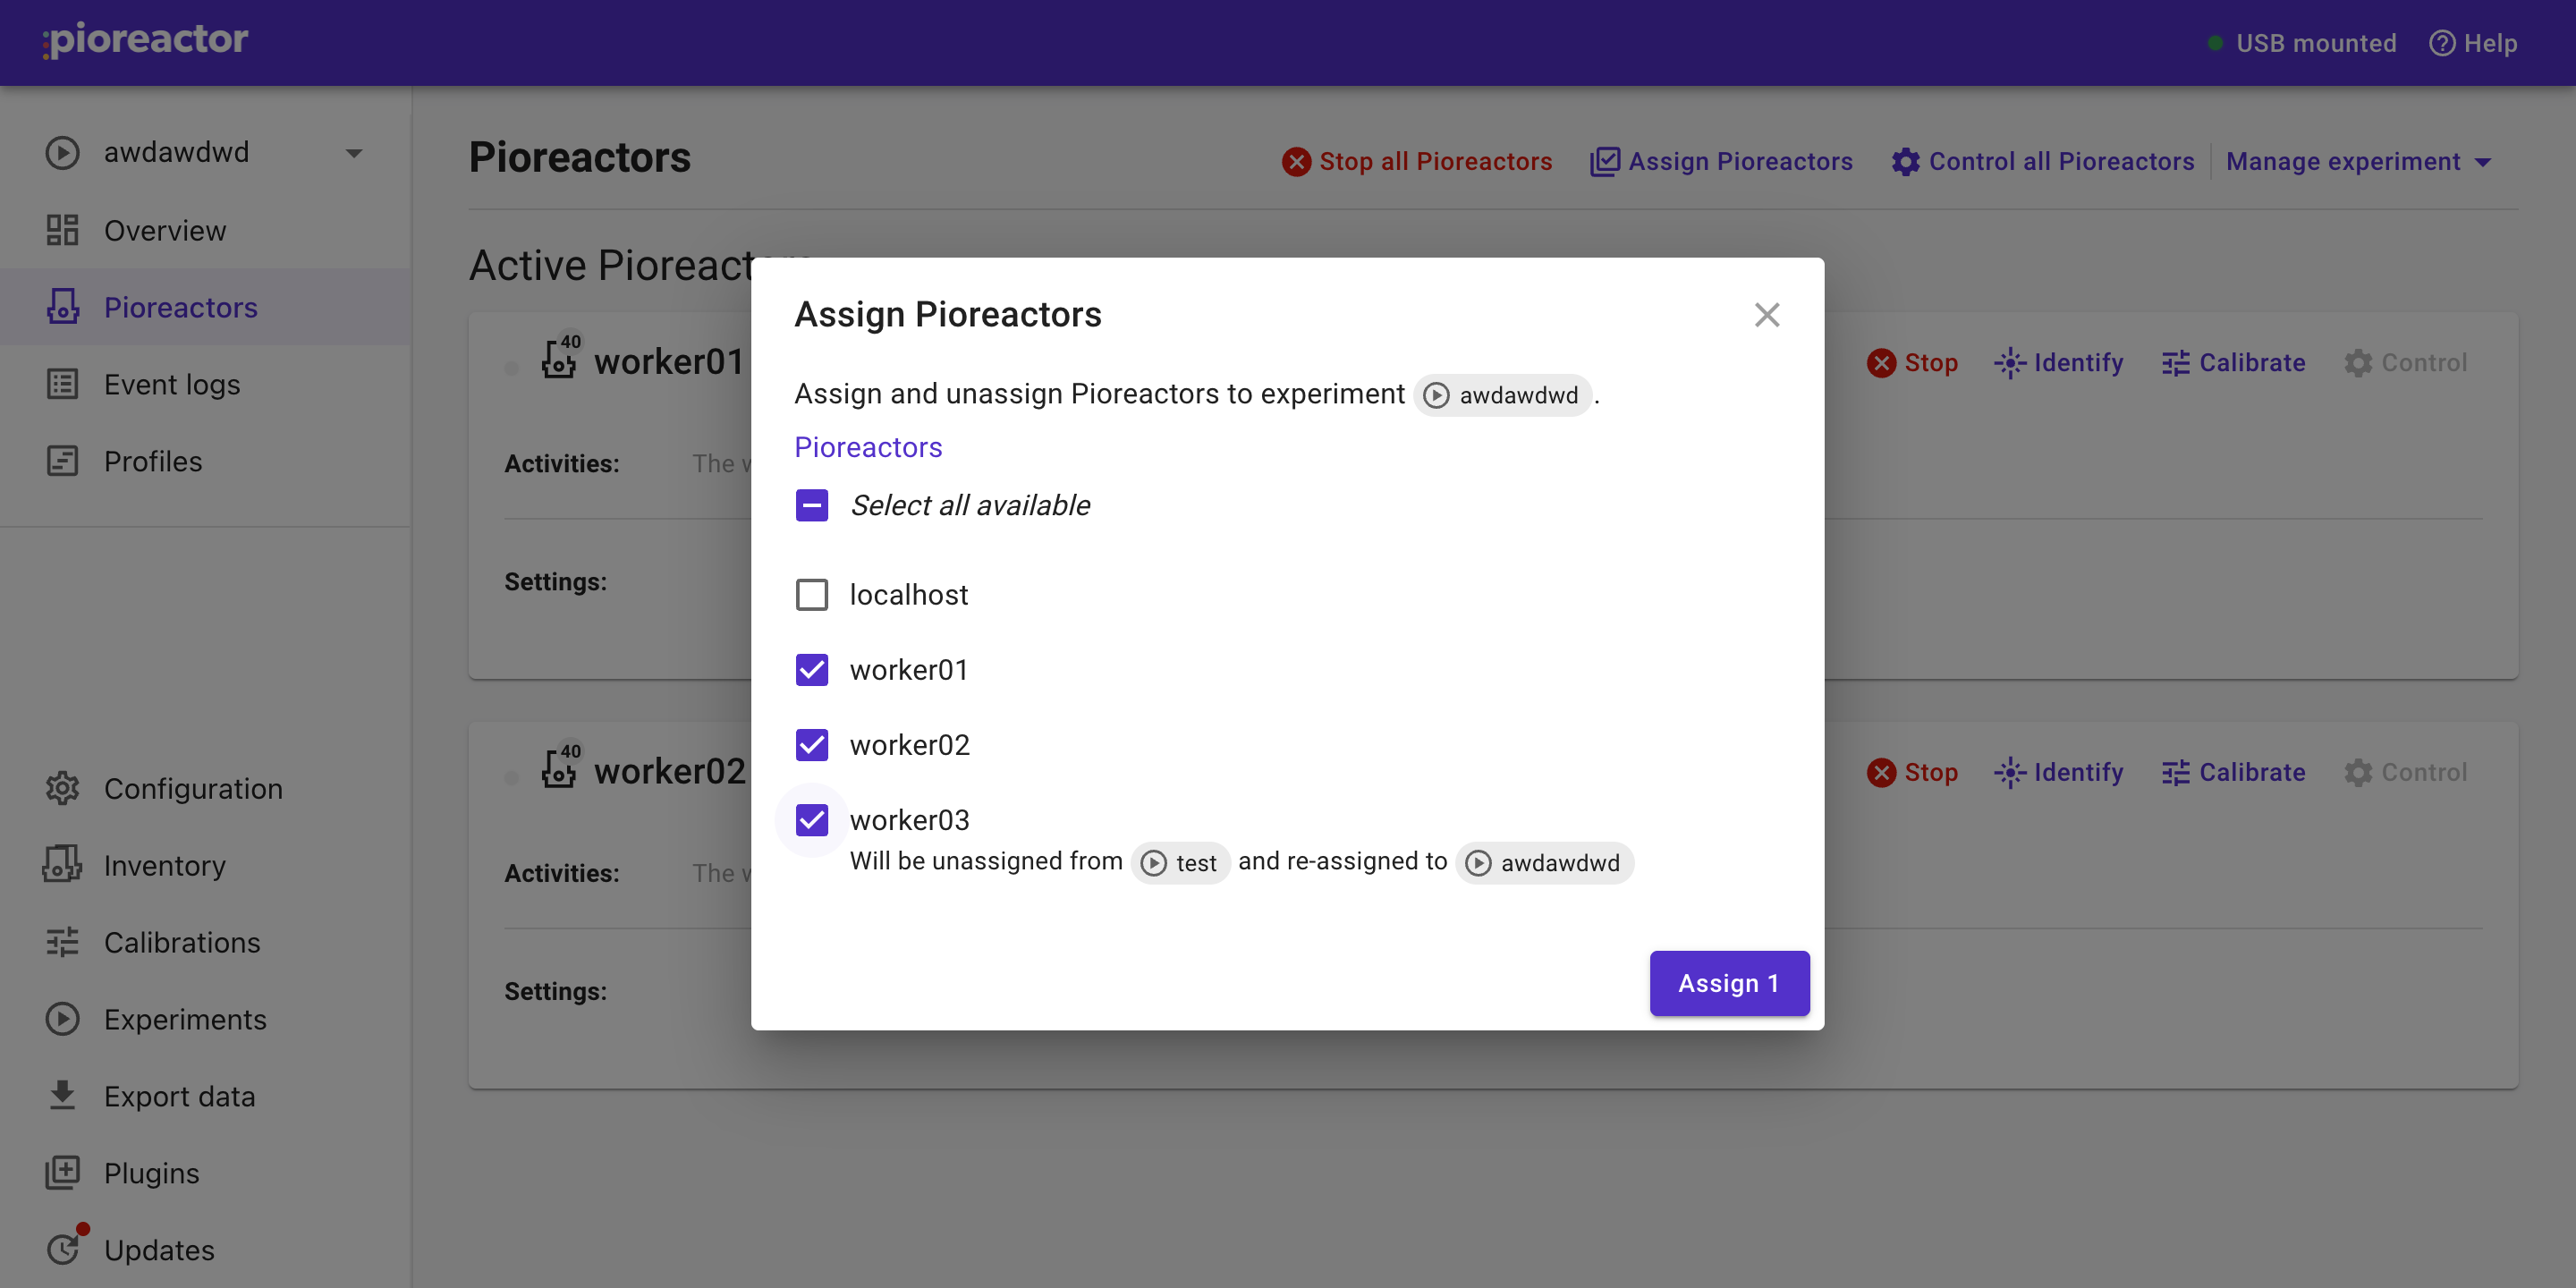
The Pioreactors tab displays the active and inactive Pioreactors assigned to the current experiment. Click Assign Pioreactors to choose which Pioreactors belong to this experiment.
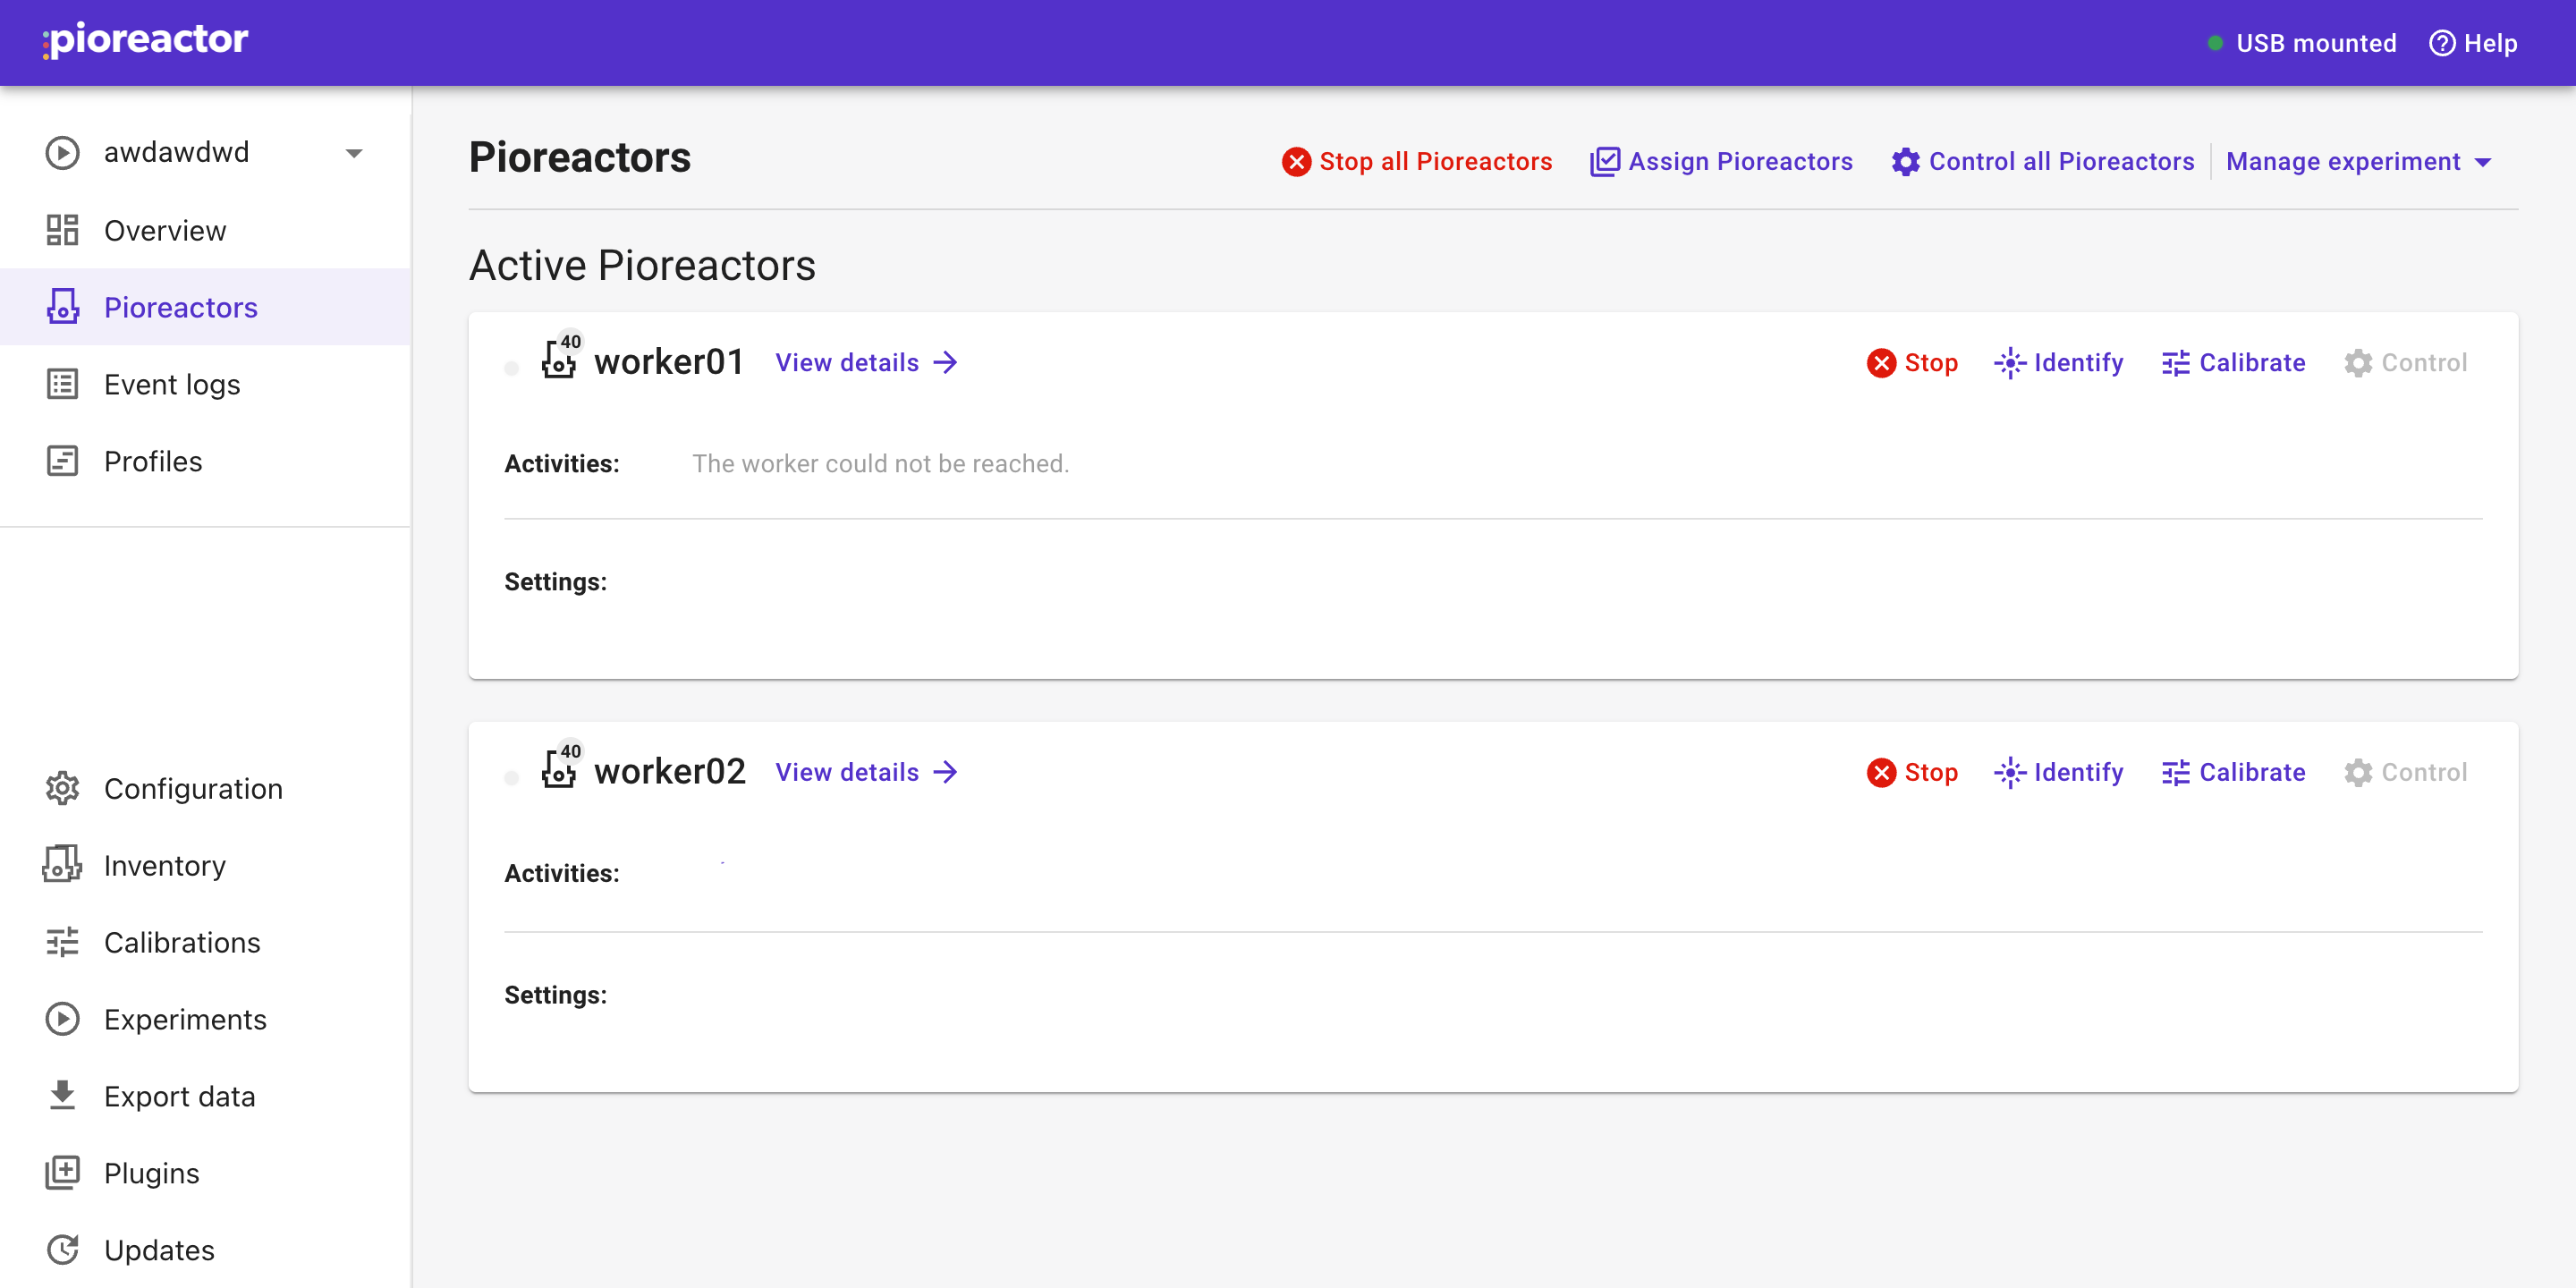
You can run different experiments at the same time by assigning different Pioreactors to each experiment. For example, one experiment can use worker01 and worker02 while another experiment uses worker03.
In the assignment dialog, a Pioreactor that is already assigned to another experiment is shown with that experiment name. Selecting it will unassign it from the other experiment and assign it to the current one.
Unassigning a Pioreactor from an experiment stops its activities for that experiment. This applies whether you unassign it from the Pioreactors tab, reassign it to another experiment, or end the experiment.
Start activities from the Pioreactors page
On the Pioreactors page, you should see at least one Pioreactor under Active Pioreactors. You can start an activity by clicking the "Off" label under an activity, or by using the "Control" menu. Once started, you can pause (and then resume) or stop jobs. Clicking the "Control all Pioreactors" button will give you control to start and stop activities on all active Pioreactors.
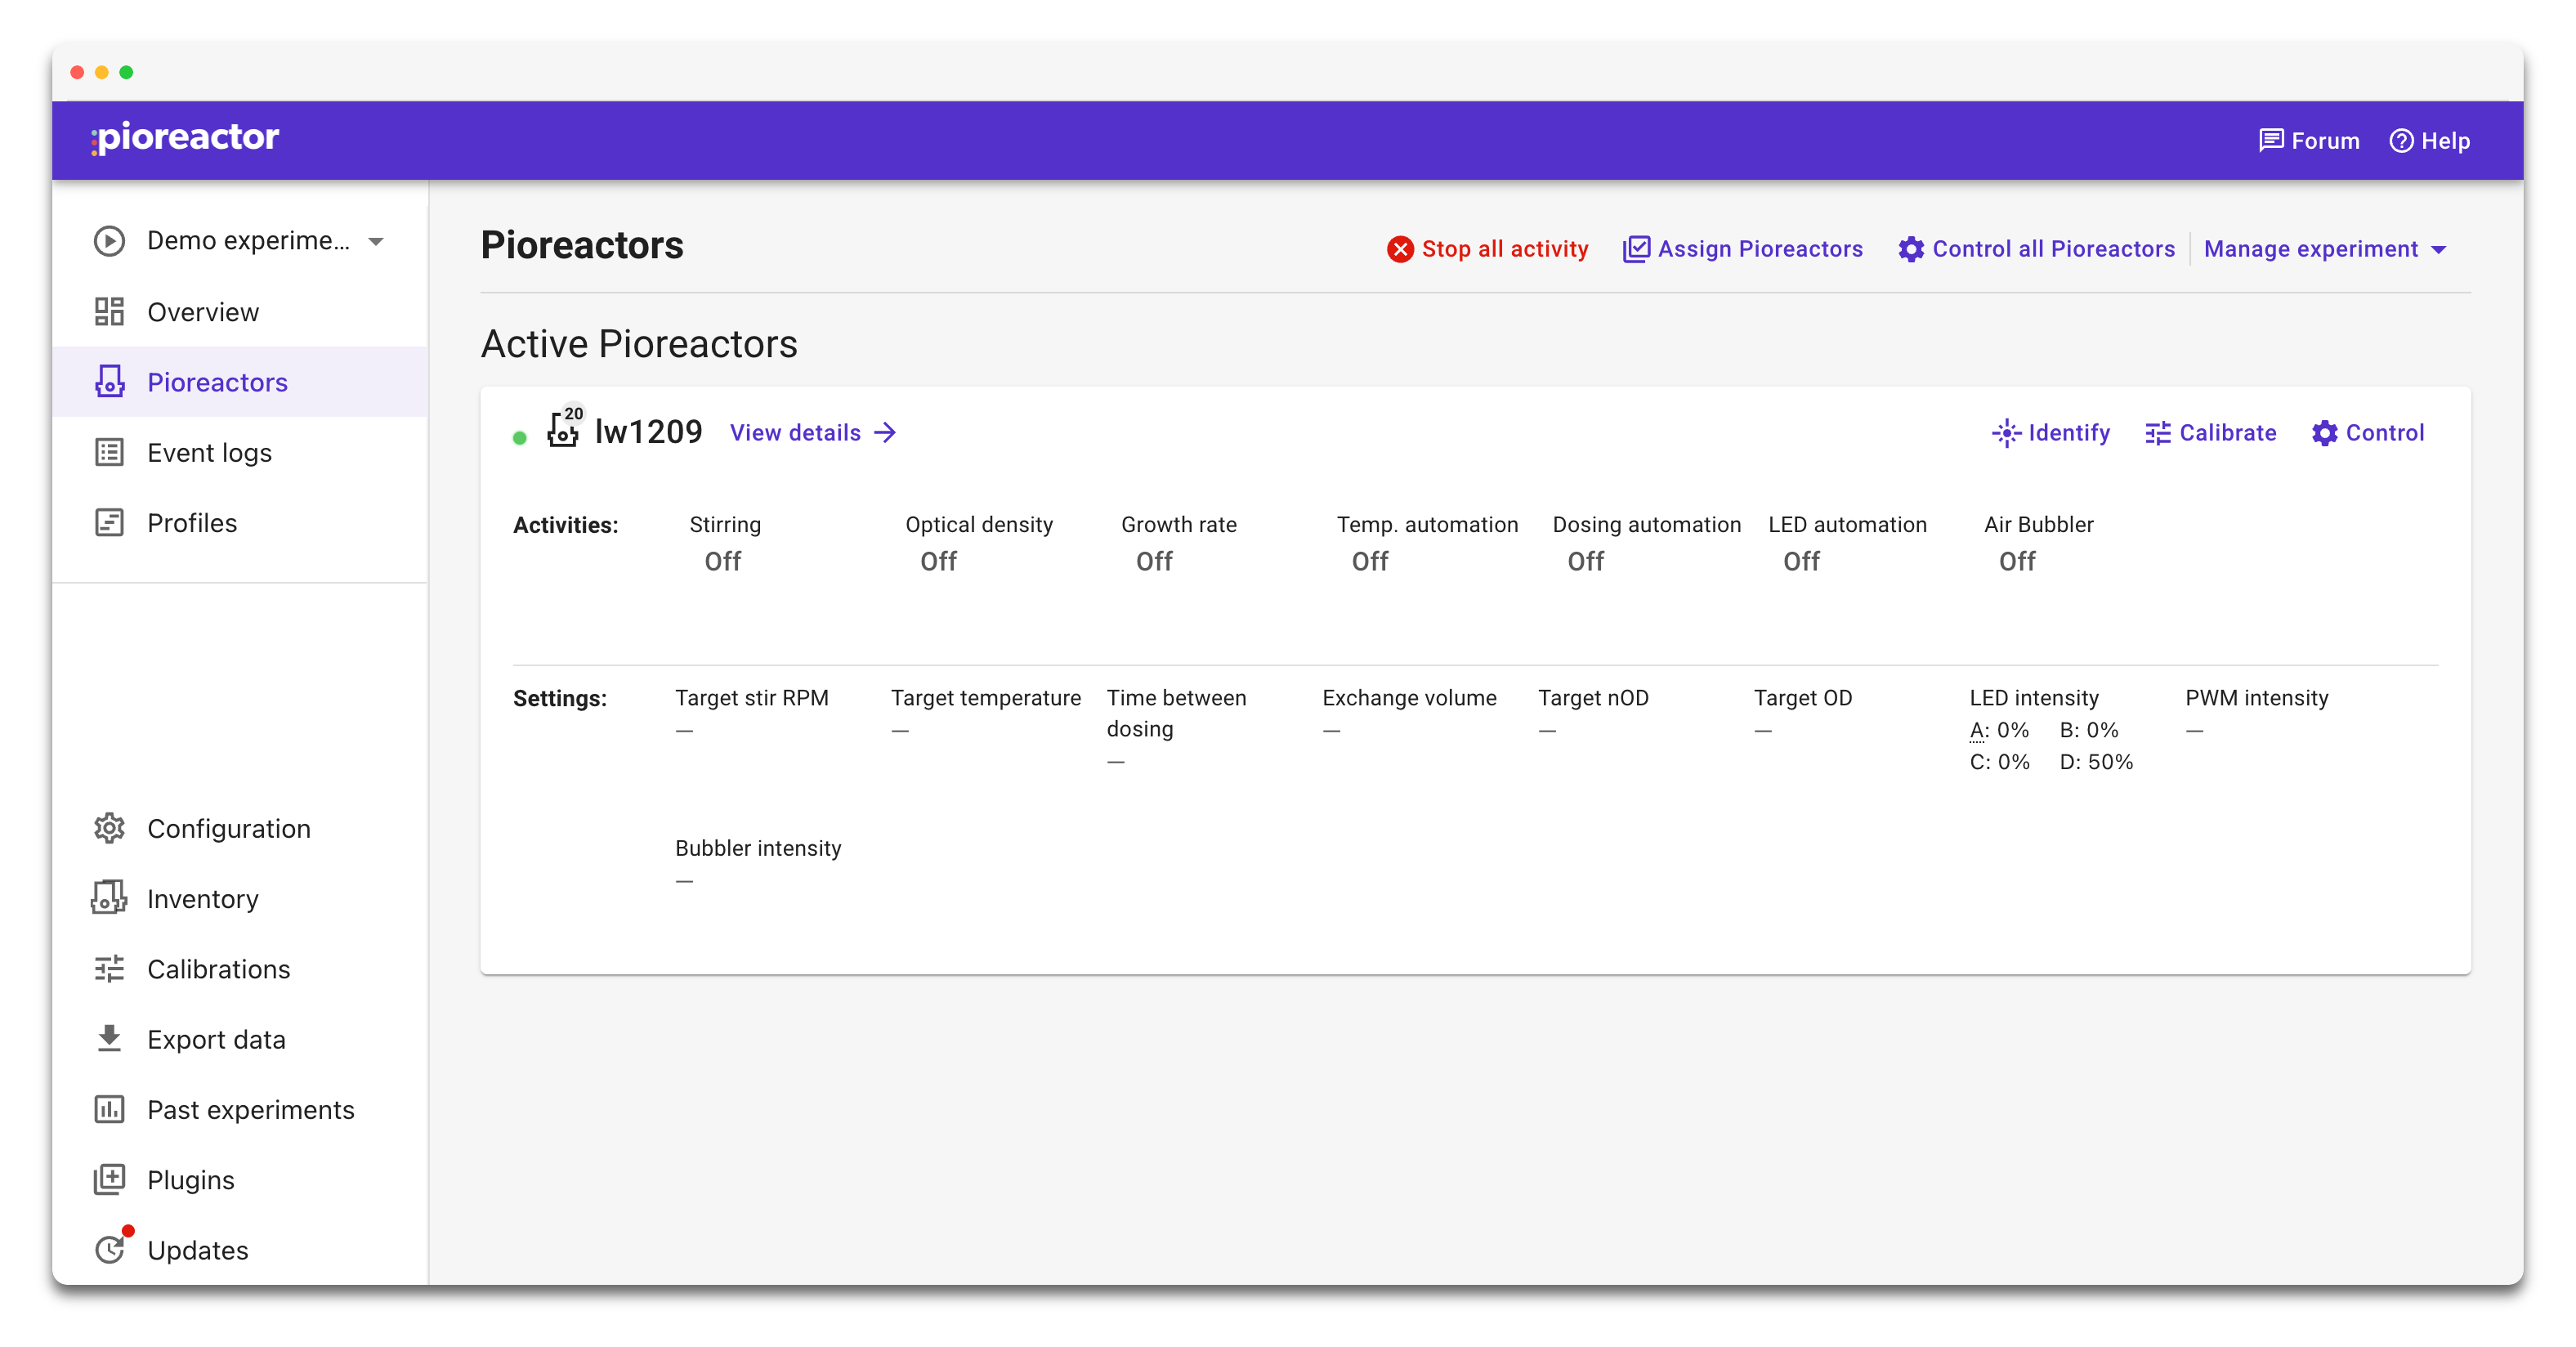

The typical sequence of activities to start is:
- Stirring
- Temperature automation, and selecting Thermostat
- Optical density
- After observing that the optical density looks normal on the Experiment Overview page, Growth rate
- Any other activities. Any of the automations can be started, or custom jobs you've added to your Pioreactor.
Changing settings
If you'd like to change the settings of your activities after you start, navigate back to the Pioreactors tab. You can click a setting directly in a Pioreactor card to jump to that control. For example, click Target stir RPM in the card's Settings row to open the settings panel at stirring.
You can also open settings from Control for a single Pioreactor or Control all Pioreactors, then click the Settings tab.
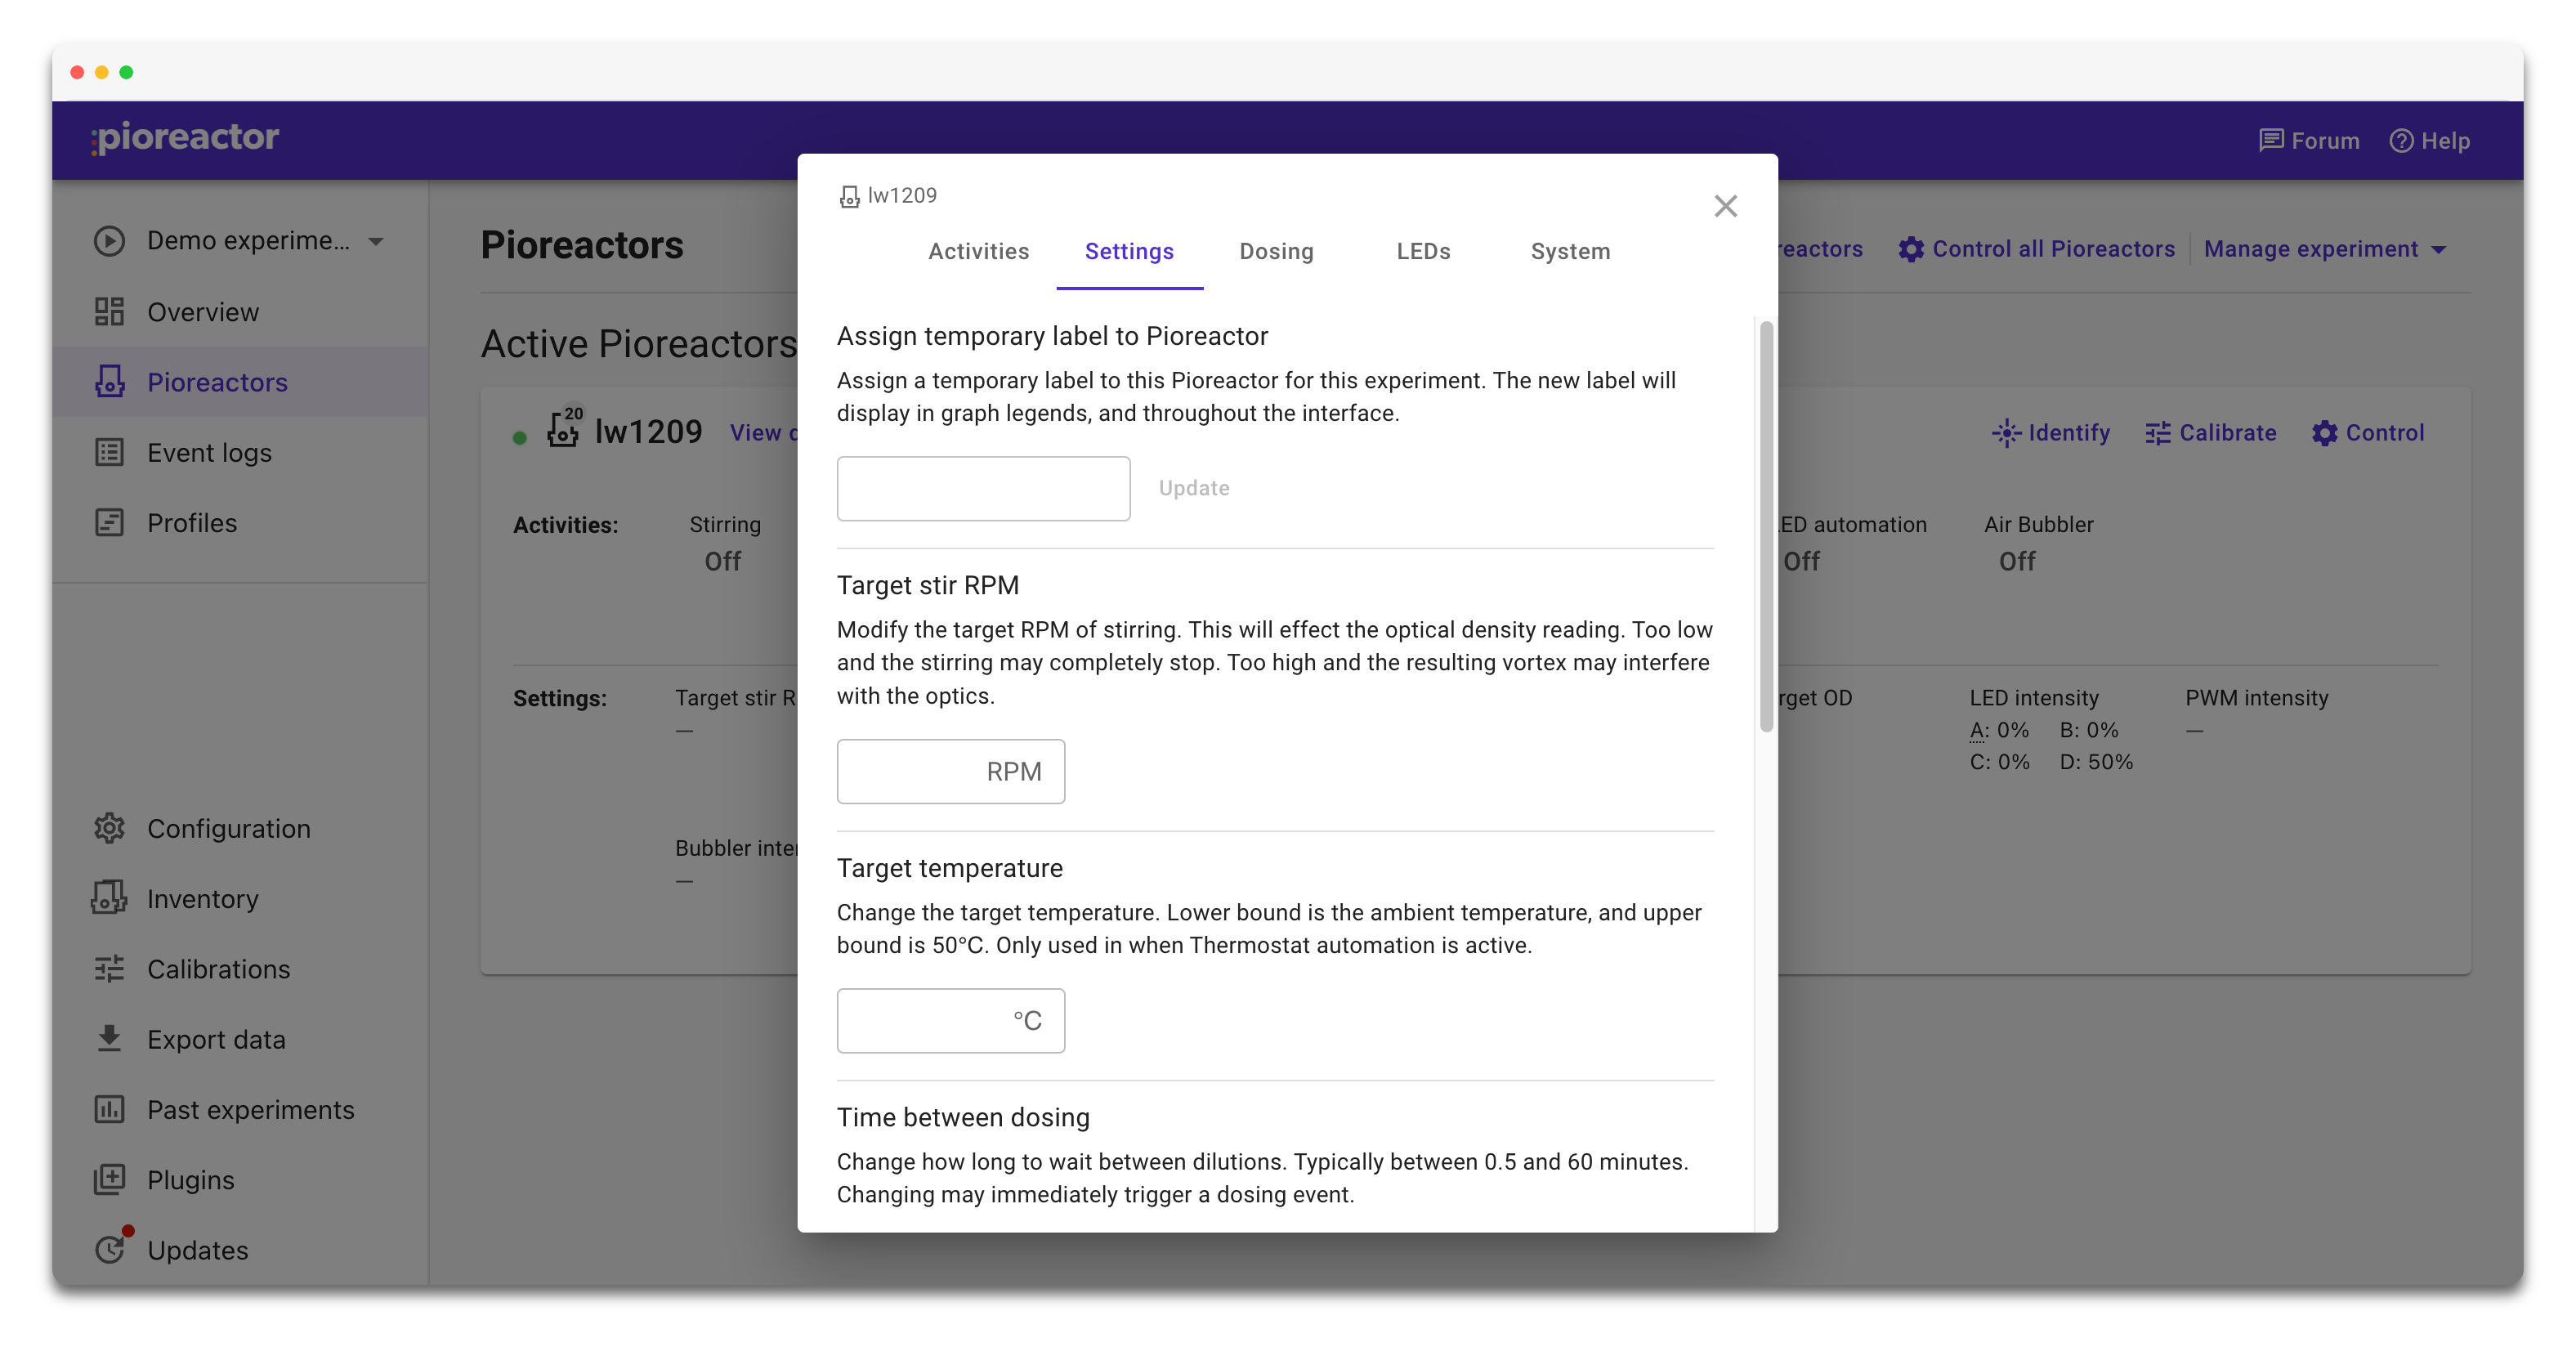
Here you can change the settings of your activities (such as temperature, RPM, and dosing volume) without pausing or stopping the activity.
(Optional) If working with more than one Pioreactor in your cluster, it's useful to assign experiment-specific labels in these settings. These labels appear in the user interface, making progress checking and updating easier. The labels can be changed later. Click "Assign" when done.
Use these labels to keep track of treatments on multiple Pioreactors. For example, labels '15C', '25C' and '35C' can be used to differentiate temperature treatments. These labels will be shown on graphs generated in the Overview page on the website. They can be changed in the UI later, too.
Ending your experiment
On the Overview, Pioreactors, and Profiles tabs, the option to Control experiment is located in the top left corner.
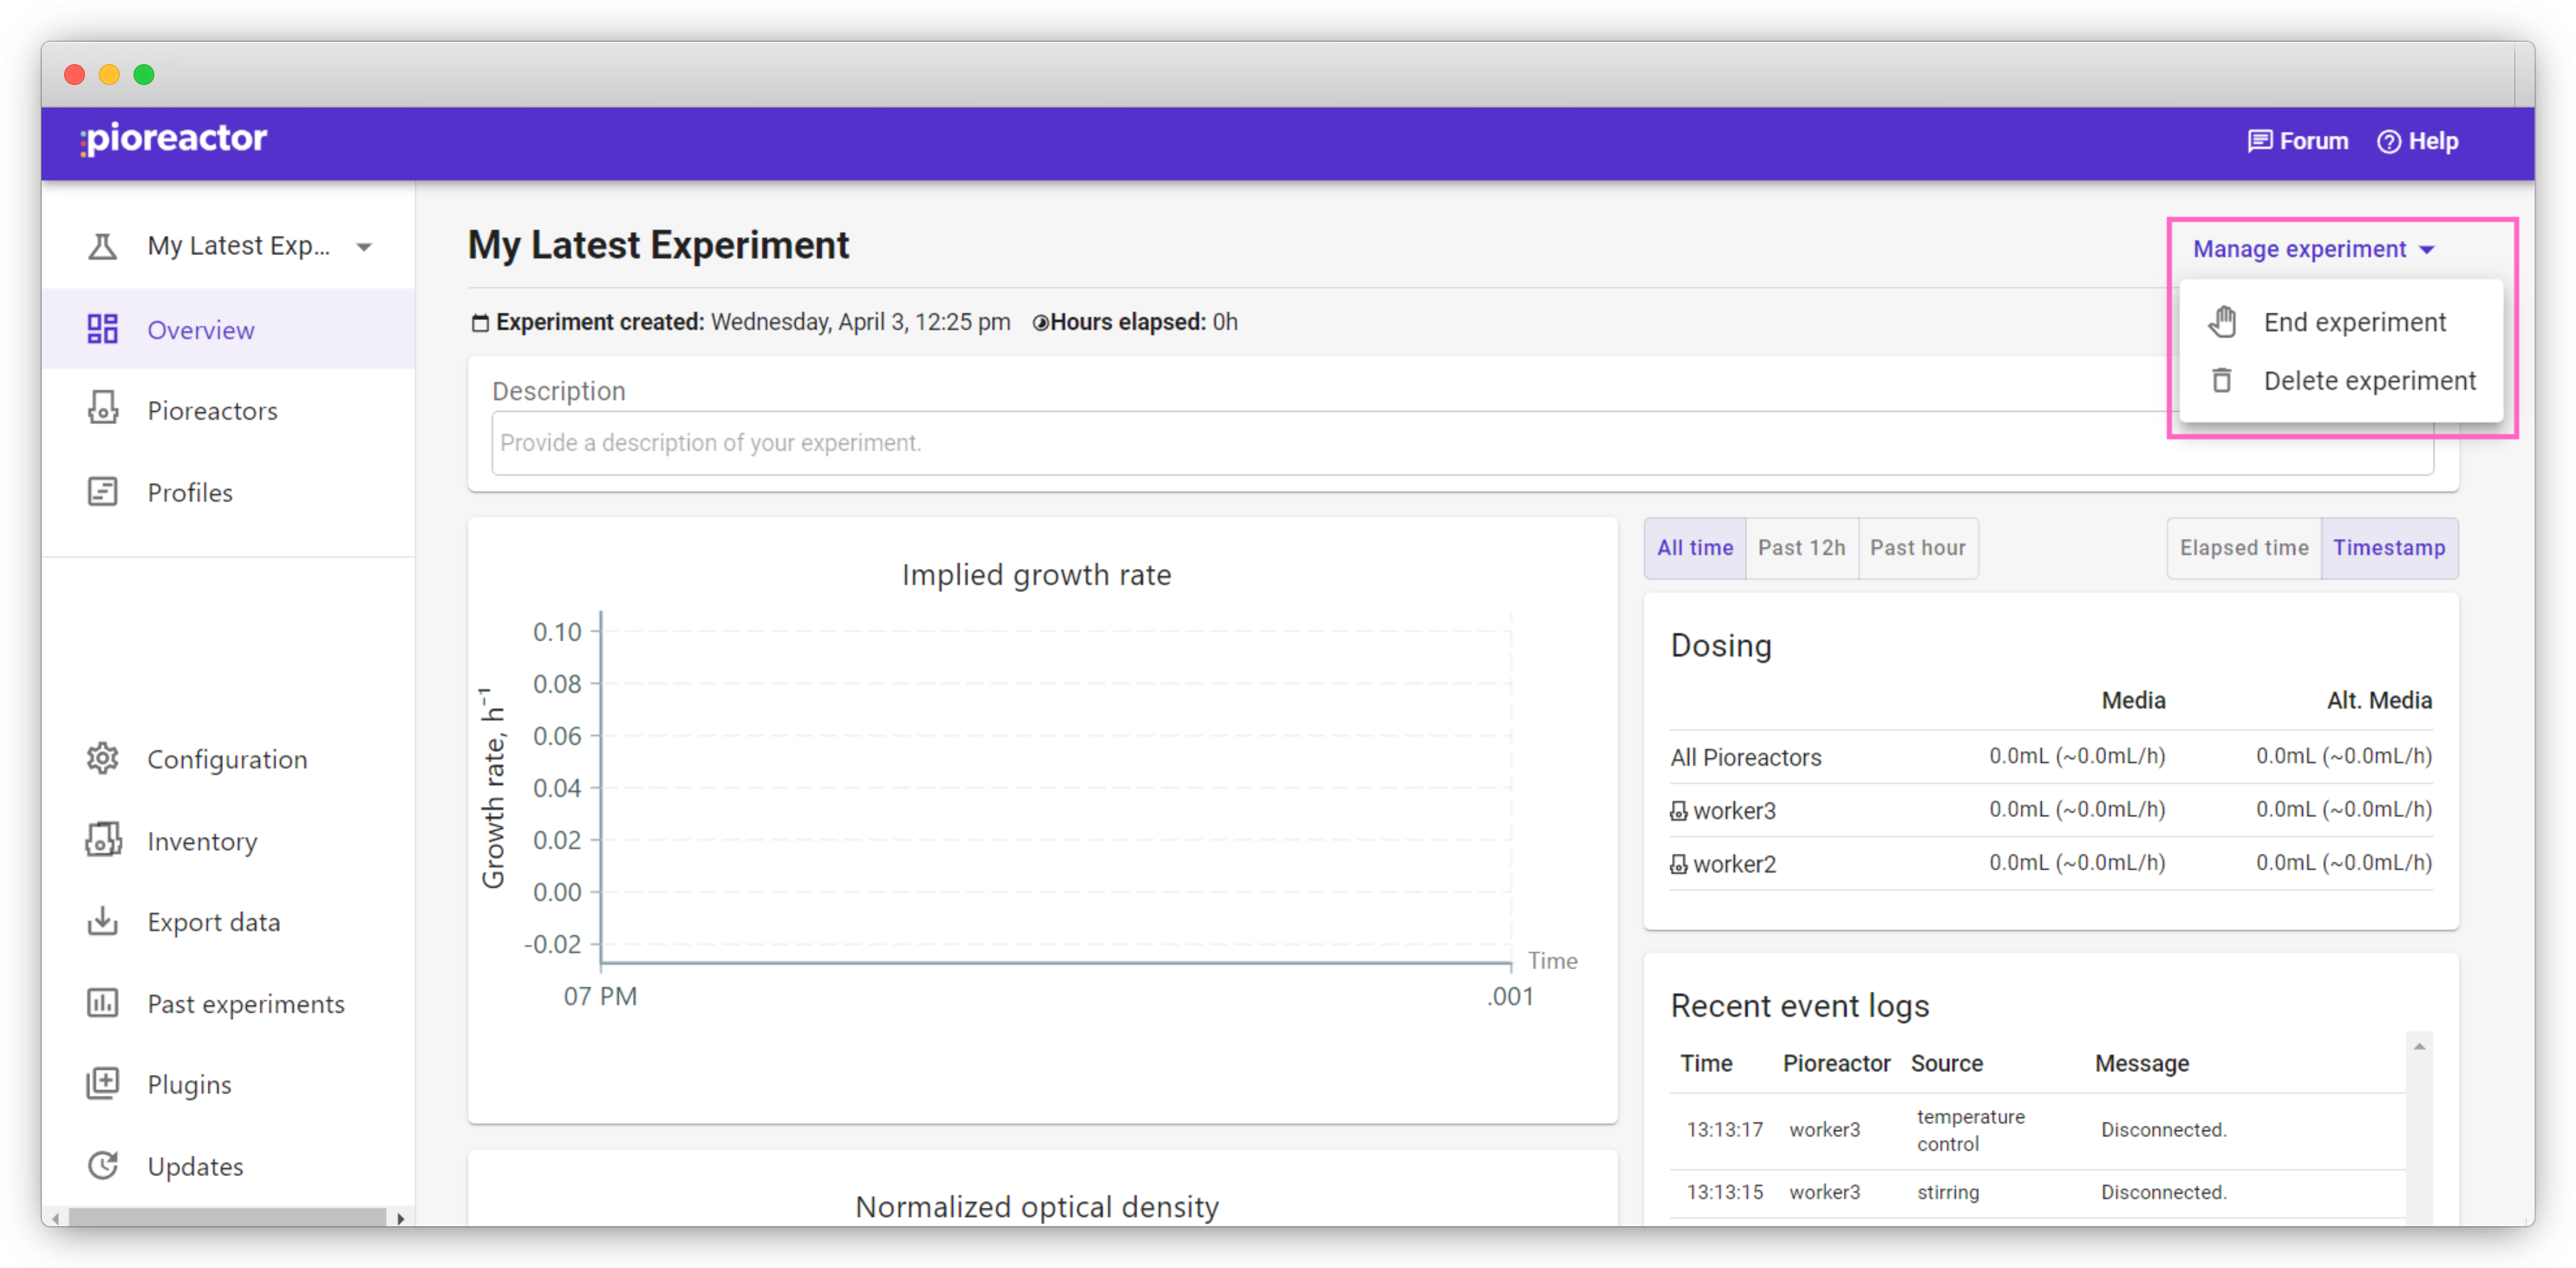
The option End experiment will stop all running activities and unassign all Pioreactors from the experiment.
The option Delete experiment will do the same, while also deleting all experiment data. Note that you will not be able to export any data from a deleted experiment.