Monitoring your experiment
Navigate to the Overview page on the Pioreactor web interface. Here you can view live charts for growth rate, OD, normalized OD, and temperature.
Appearance
Use Appearance in the top bar to choose Light, Dark, or System. System follows your device's appearance setting. The choice is remembered in this browser; it does not change the appearance for other users. Charts and downloaded chart images use the selected appearance.
Choosing and ordering charts
Click the chart settings gear on Overview or in an individual Pioreactor's chart view to open Customize charts. Select the charts to display, clear those you want to hide, and drag selected charts into your preferred order. Click Save to apply the changes.
Selections are saved with the experiment and shared across browsers. Overview and Pioreactor charts have separate selections; the Pioreactor selection applies to the individual Pioreactor chart views in that experiment. To return to the configured chart defaults, click Use defaults, then Save. Defaults come from [ui.overview.charts] in the configuration.
Experiment logs
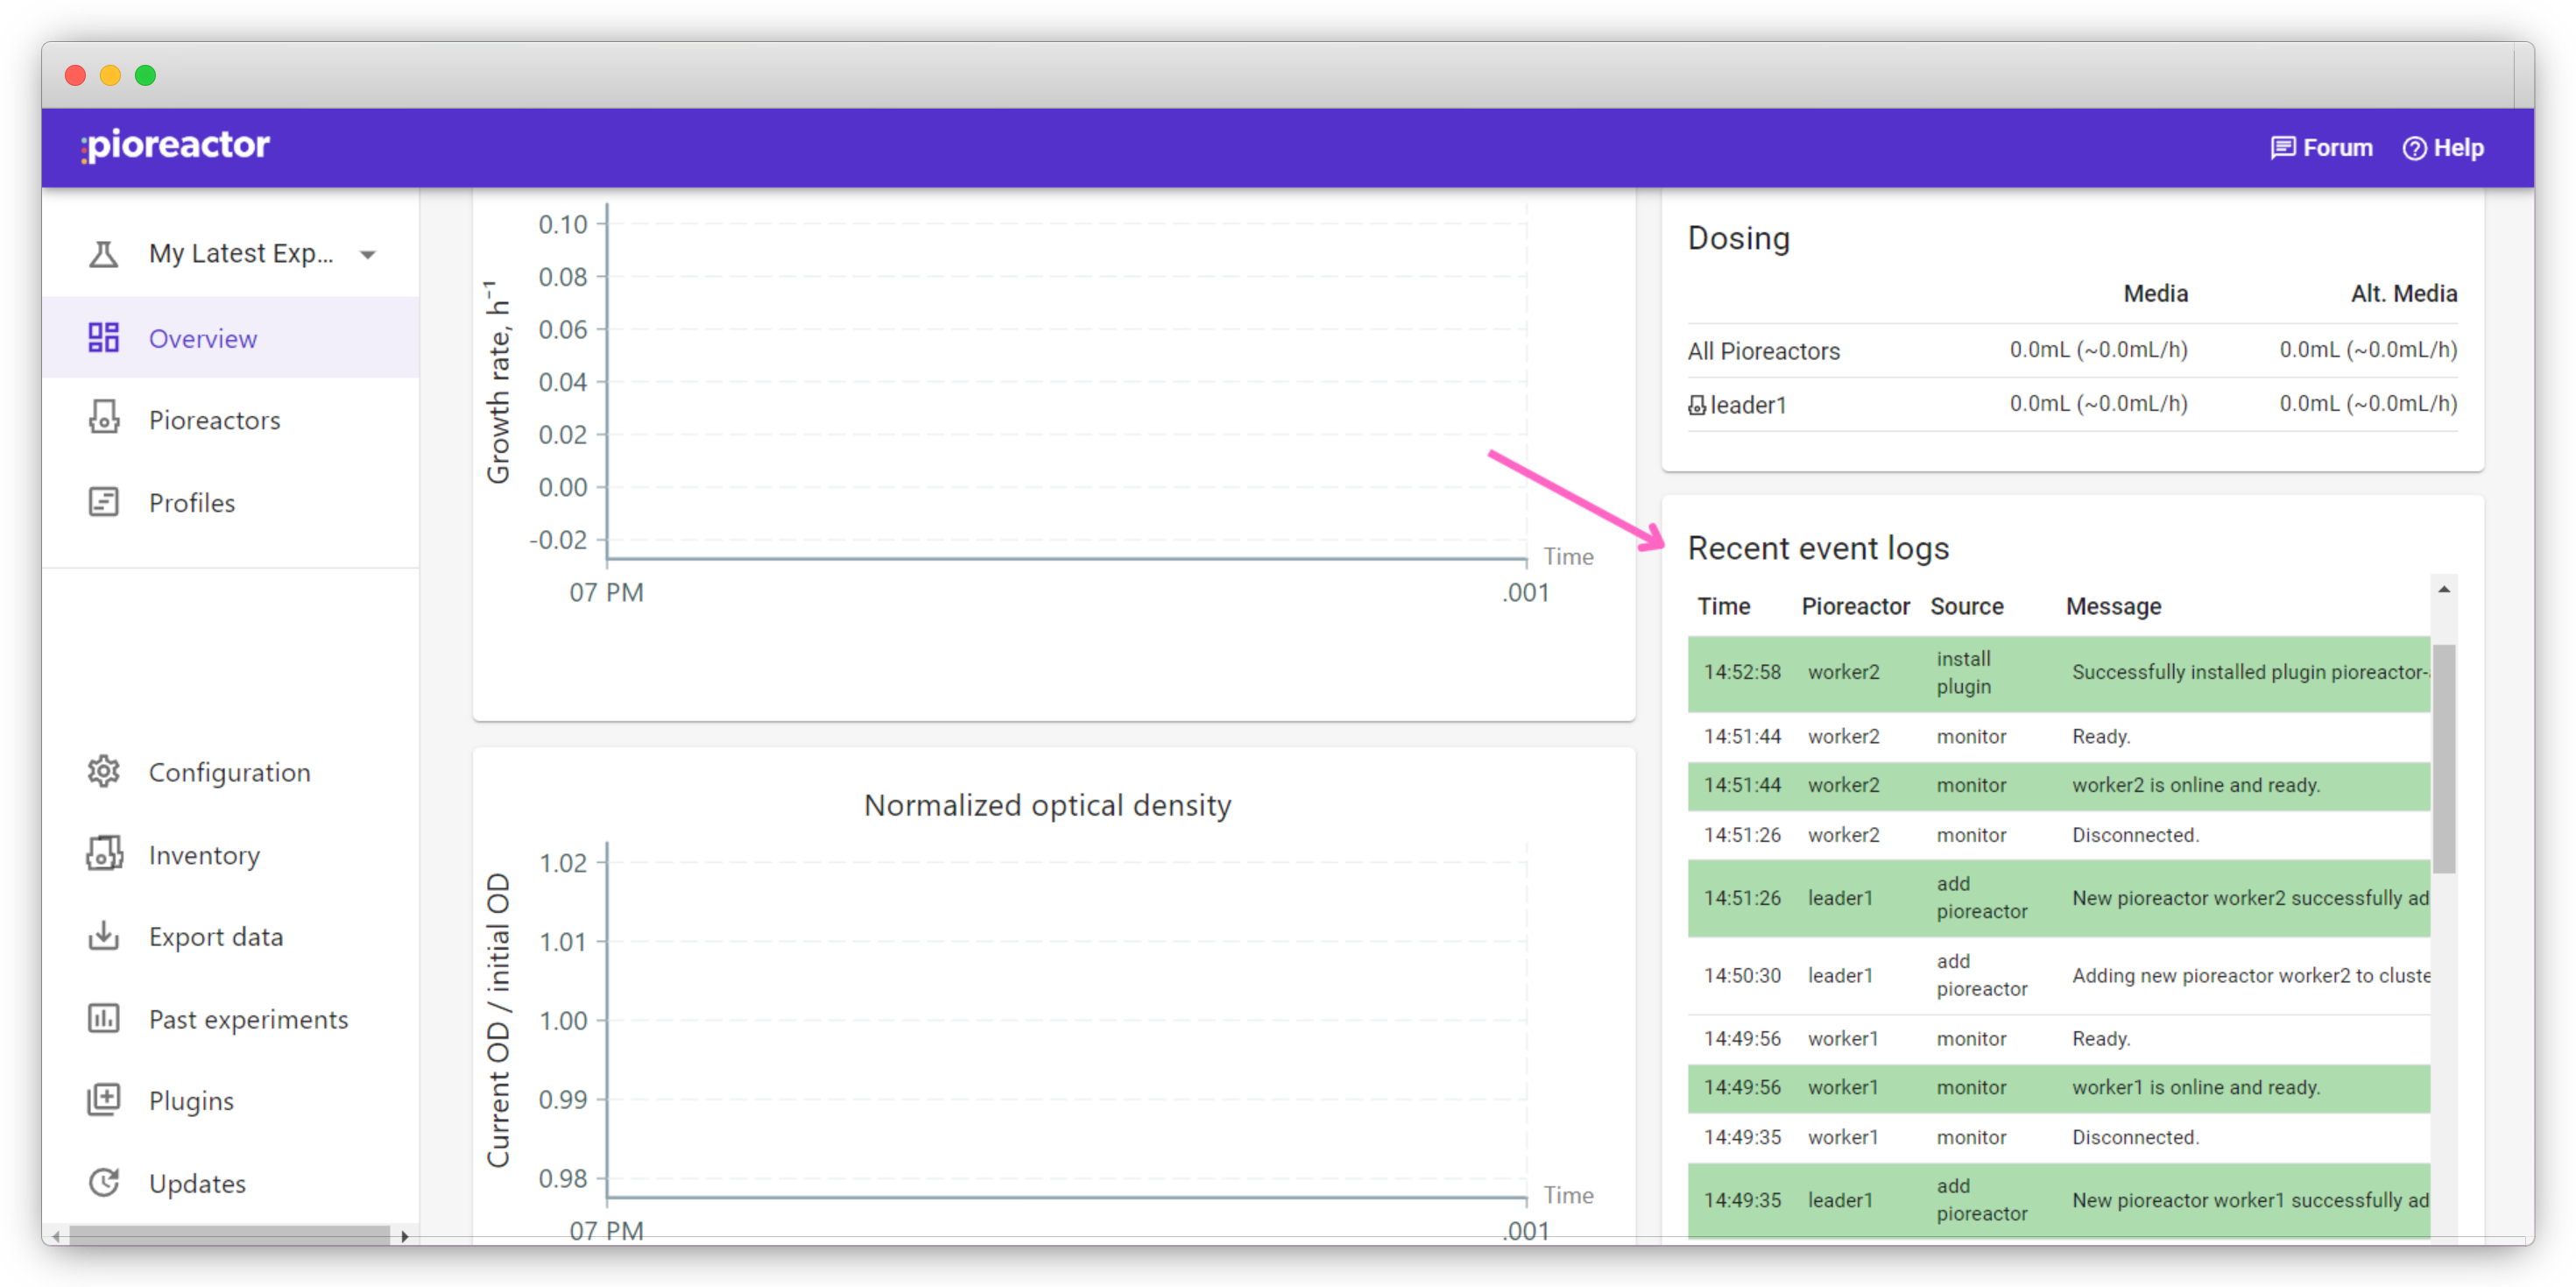
Recent experiment logs are found along the right side of the main Overview page. These logs document any errors, processes, or updates for each Pioreactor. Open Experiment logs in the sidebar to search and review the full history.
Identifying Pioreactors in your cluster
To locate a Pioreactor, click Identify for the corresponding Pioreactor on the Pioreactors page. This will cause the Pioreactor's onboard LED to blink a blue light.
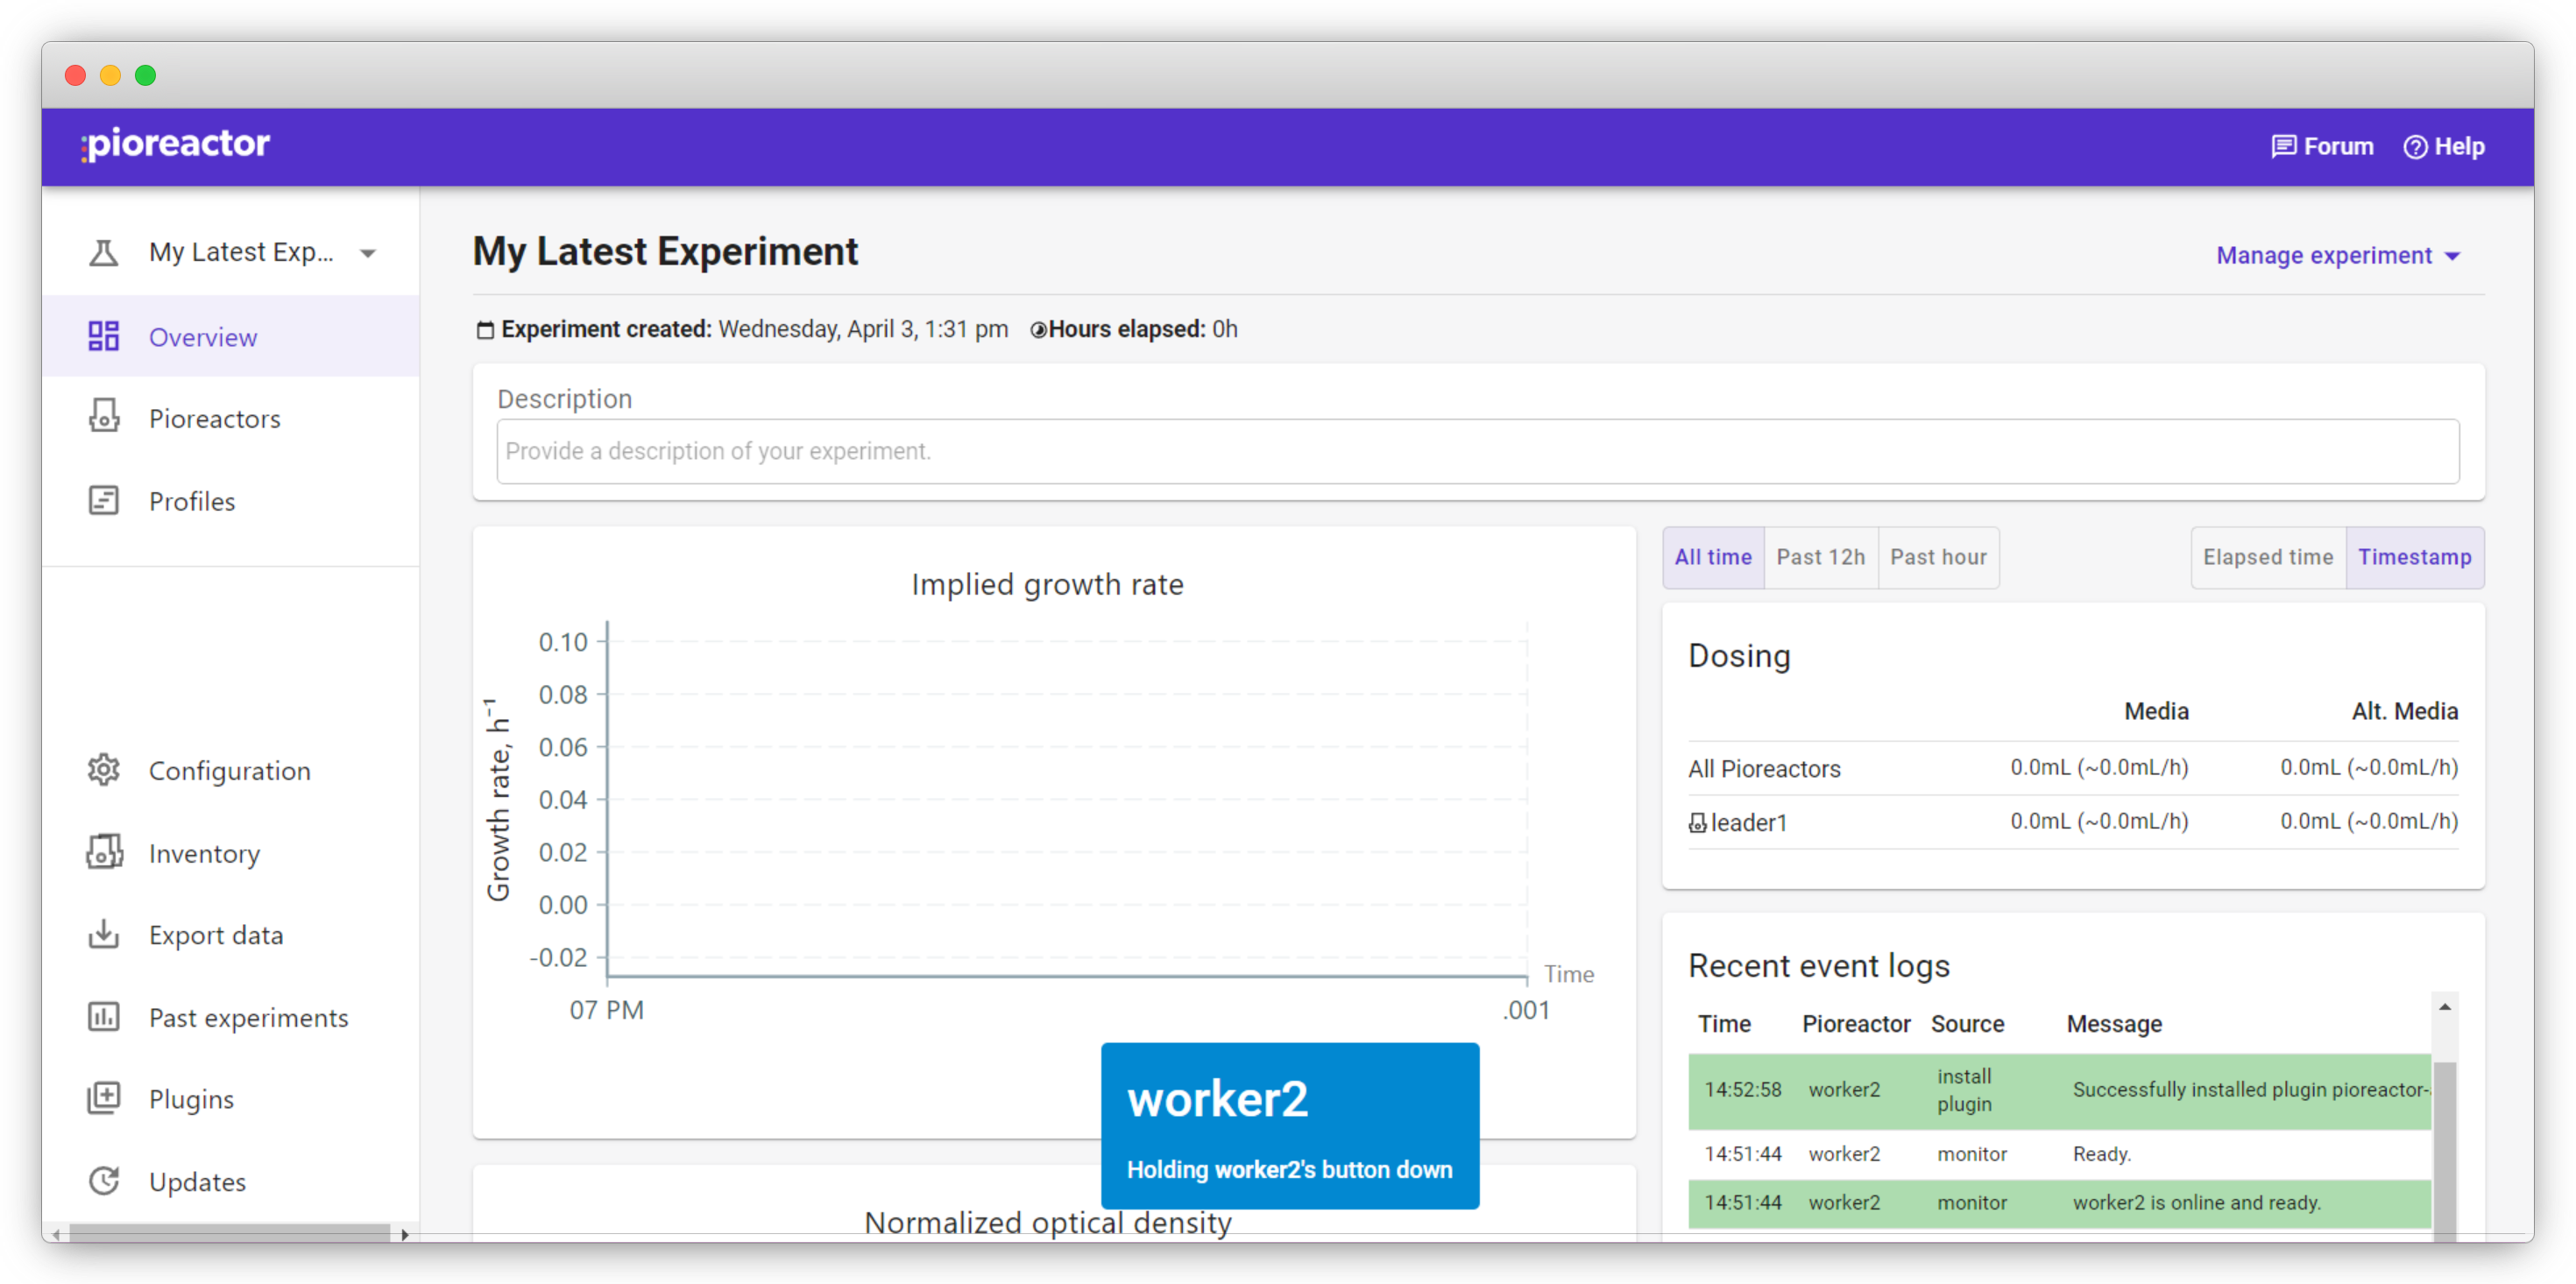
Conversely, you can also find a Pioreactor's name by pressing the white button on the Pioreactor. This causes a tag to come up on the interface for as long as you are holding the button down:
Troubleshooting
Keep an eye on the optical density graph in the Overview page. Initially, you can expect the the OD to be relatively stable. The following are some common issues:
Gradual increase in noise in OD
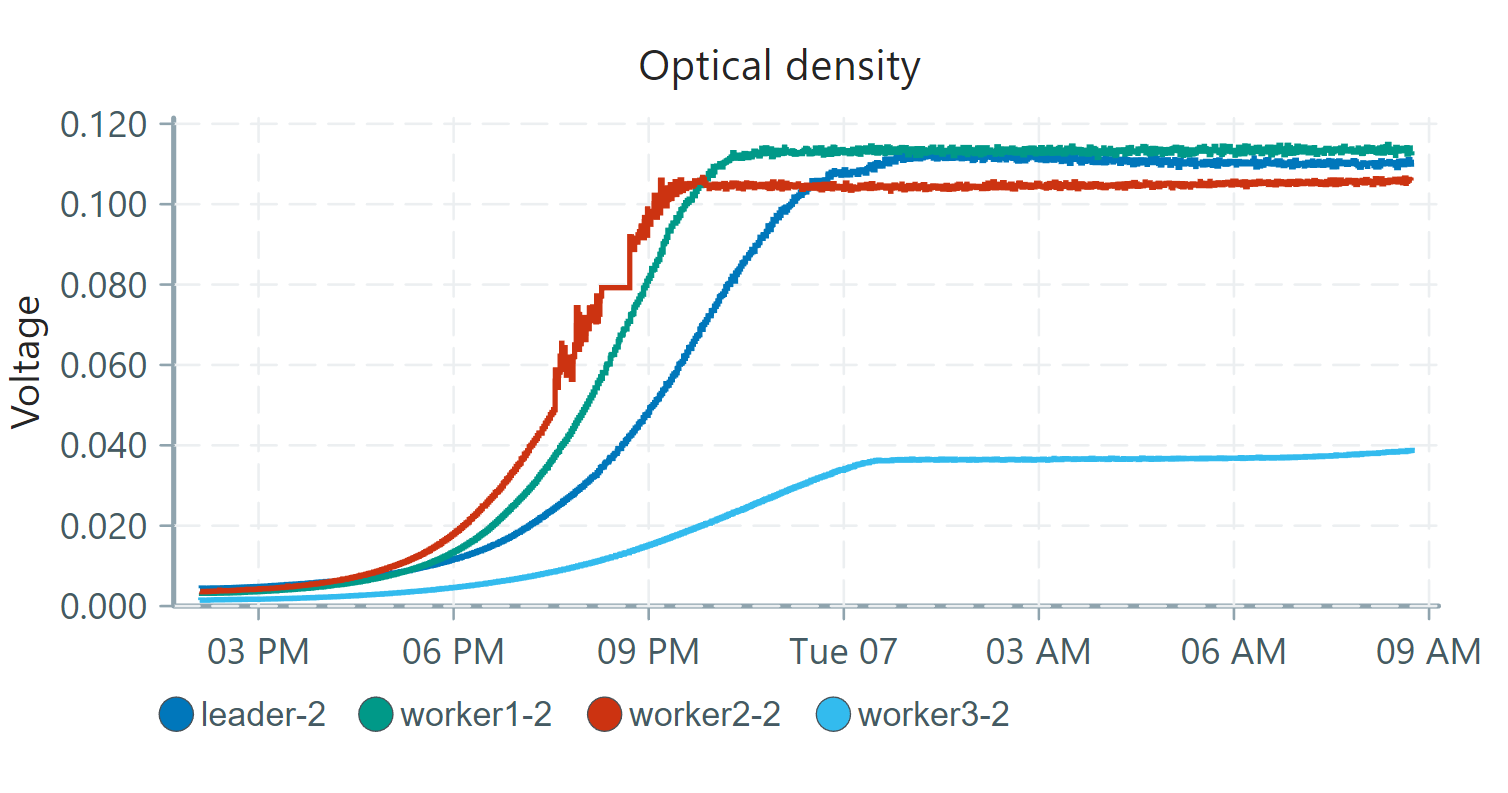
This type of noise is typically caused by bubbling in the media due to metabolism. Noise gradually gets worse as the culture grows, where more metabolism leads to more CO2 bubbles. Thus, you would notice noise build up gradually as the culture becomes larger. To give the gas an escape path, keep the end of at least one tube near the neck of the vial, about 5 cm above the media. If you move the waste / efflux tube, remember that its height sets the maximum liquid volume for dosing automations.
Initial noise in OD
Optical density can decrease early => growth rates can dip negative early on & this is an artifact of turbidity measurements!
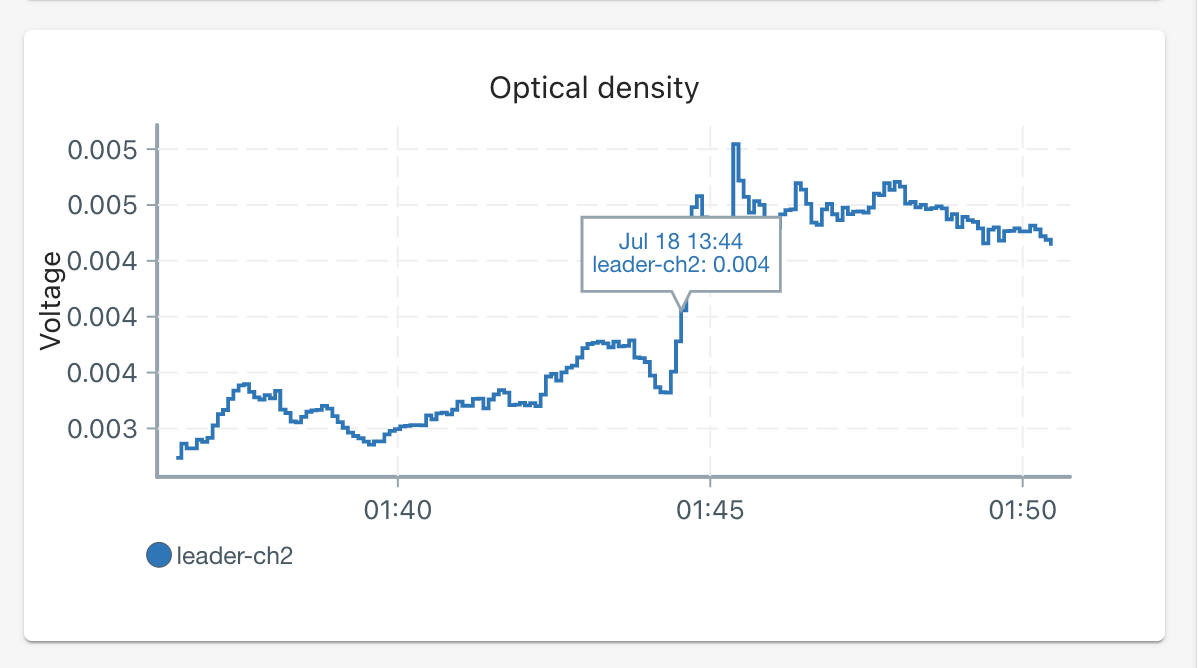
For variations in OD at the beginning, make sure that your stirbar is in the vial!
Random spikes in OD
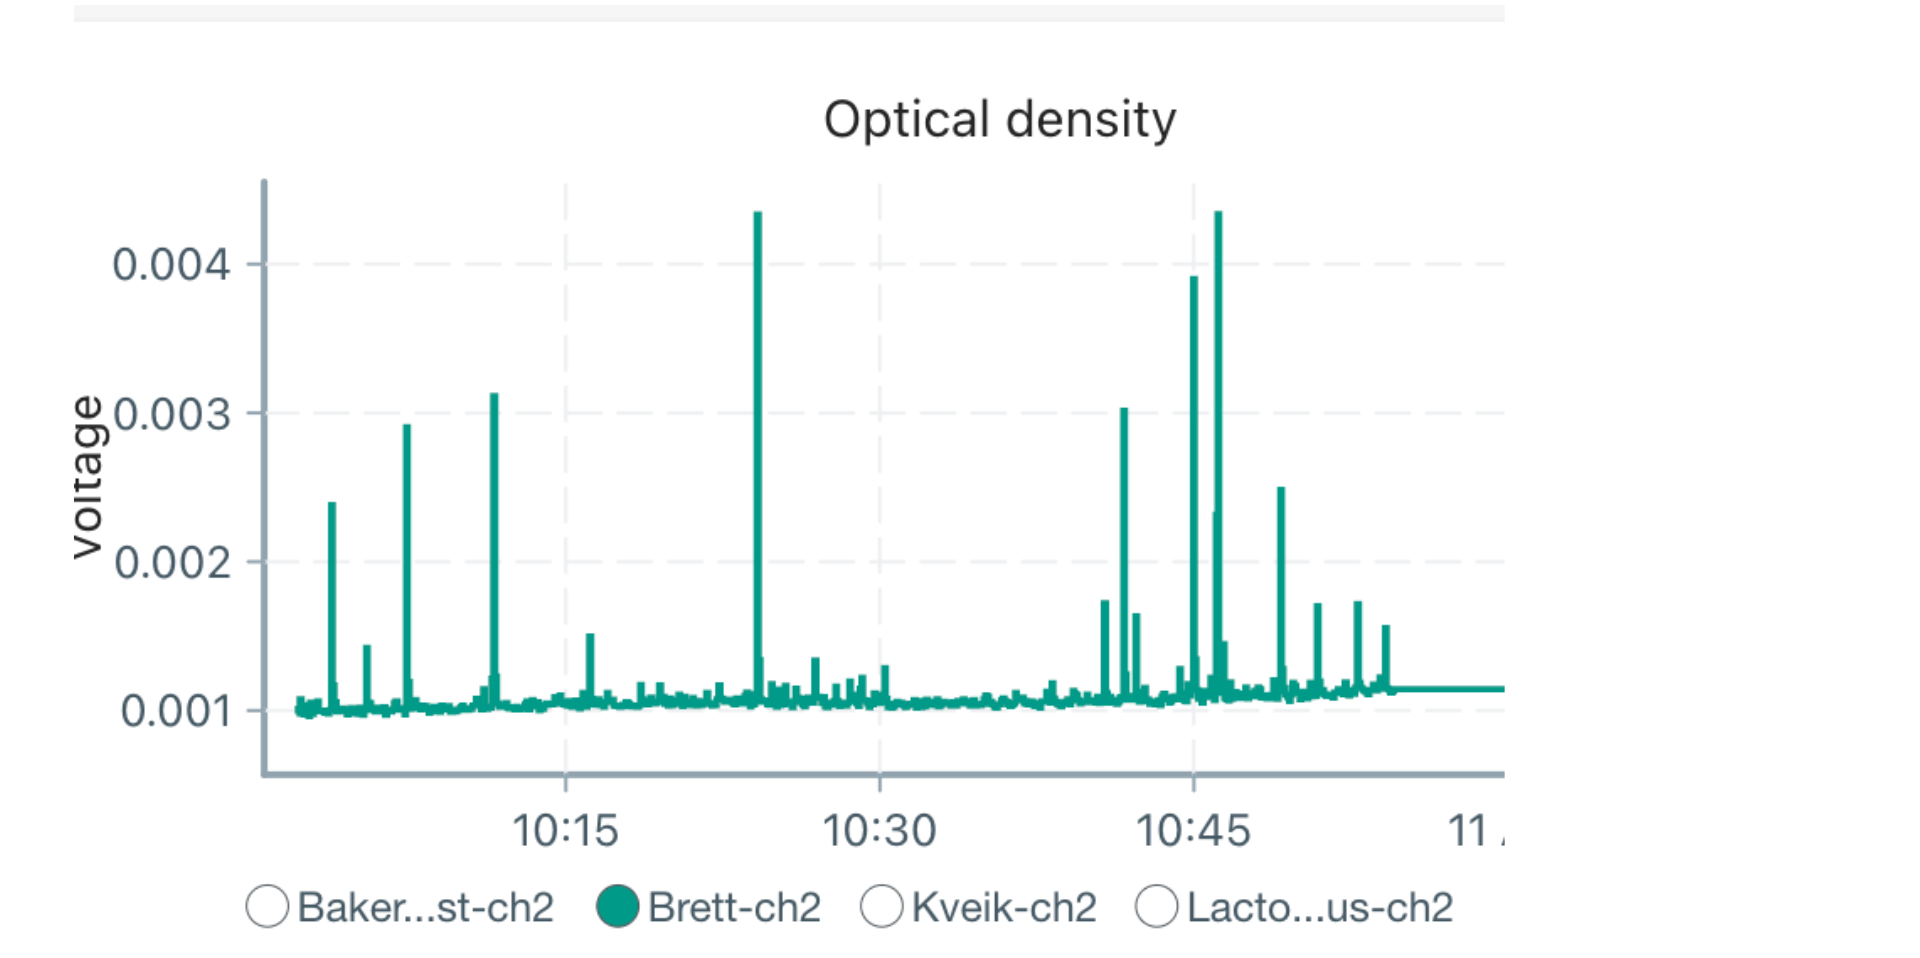
Random, large spikes in OD readings are indicative of solid debris in your vial. Remove the vial and inspect the media for any debris. You may need to remake your vials and start over. Be sure to thoroughly wash and autoclave your vials and rinse any pumps (if being used).
If clumps are to be expected (and unavoidable), you can increase your stirring RPM if allowed in your experiment protocol. This will cause larger clumps to aggregate in the center of the vial, due to a mini "vortex" formed by stirring.
Temperature fluctuations
If your target temperature is close to room temperature, it can be subject to fluctuations based on changes in room temperature. For example, we set our target to 26 degrees C, and worked in a room with no AC:
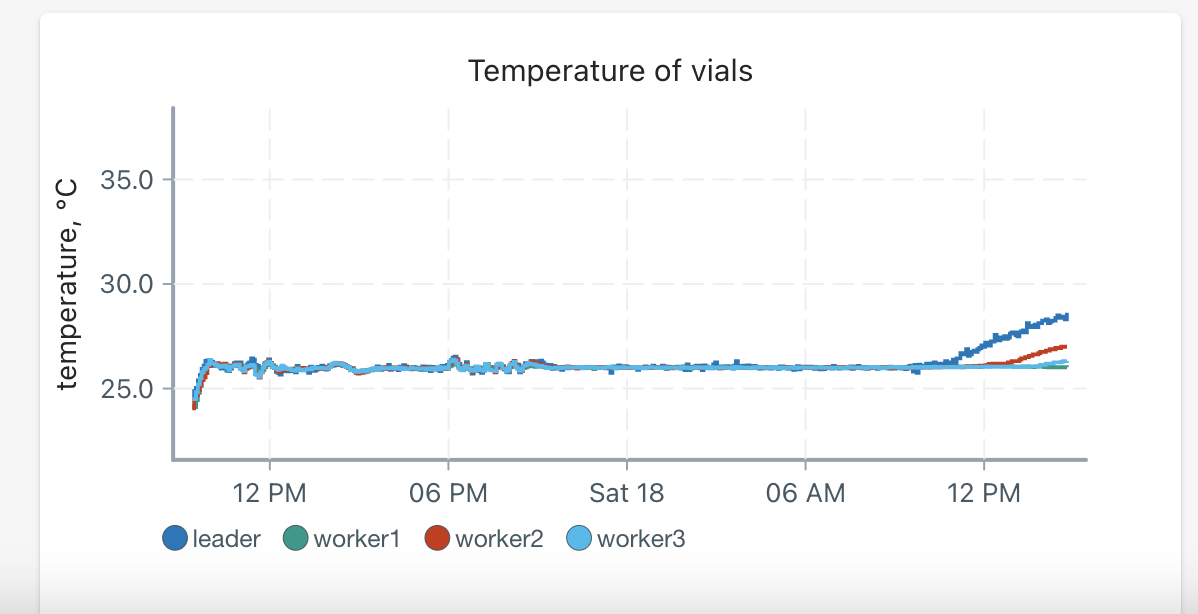
Each Pioreactor had an increase in temperature since the target fell below ambient. Note that the leader unit Pioreactor in the cluster was more sensitive to increases in ambient temperature since it requires more processing power.
Looking for further help?
If none of these issues apply to your data, feel free to contact us at support@pioreactor.com or post to our forums for further assistance.