Wetware assembly
Step 1: Necessary parts #
You will need:
- Vial holder
- Heating PCB
- Thermal pad (contains blue cover on one side and clear plastic on the other)
- Flat flex cable
- M2.5 4mm screws (2x)
Step 2: Placing the heating pad #
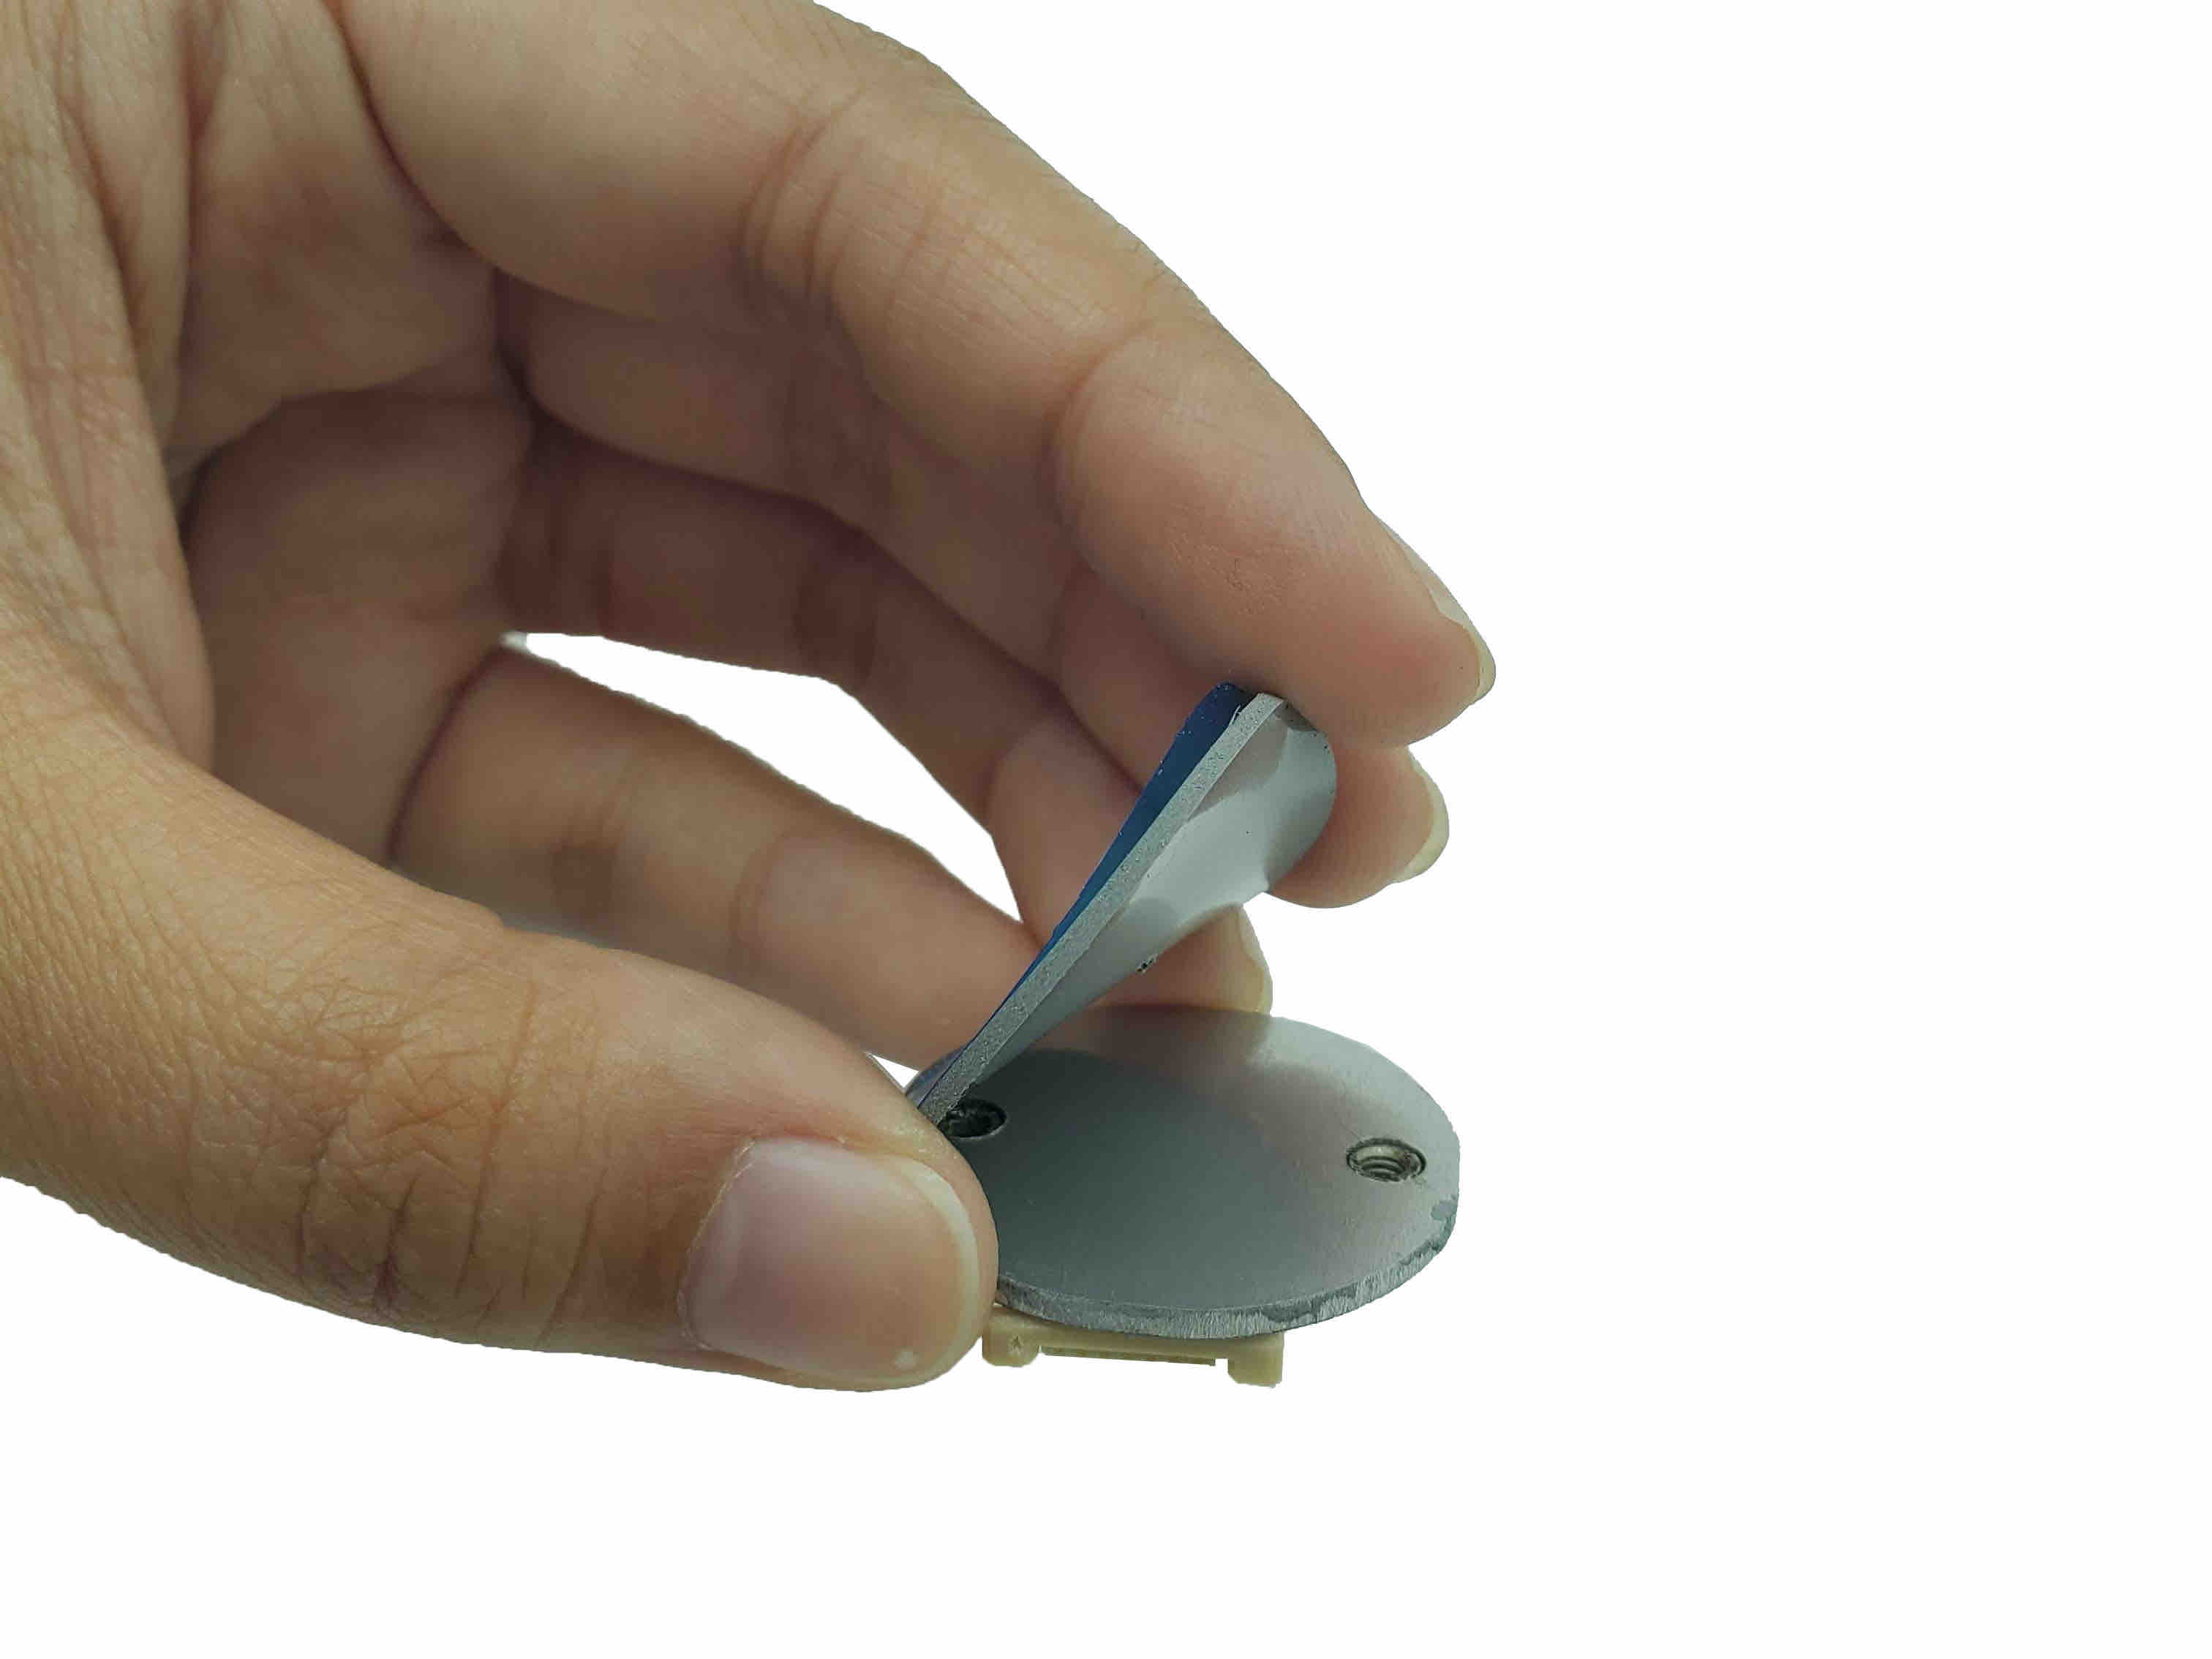
- Remove the clear plastic from one side of the thermal pad.
- Place the side on the flat (aluminum) part of the heating PCB. Apply downwards pressure to secure it.
- Remove the blue protective plastic on top of the thermal pad.
- Flip the PCB over. On the white-&-beige cable connector, pull the beige-colored tabs outward to open it.
- Insert the flex cable blue side down, copper side up, into the cable connector.
- Then push the beige tabs back in to secure the flex cable.
Step 3: Securing the heating PCB into the vial holder #
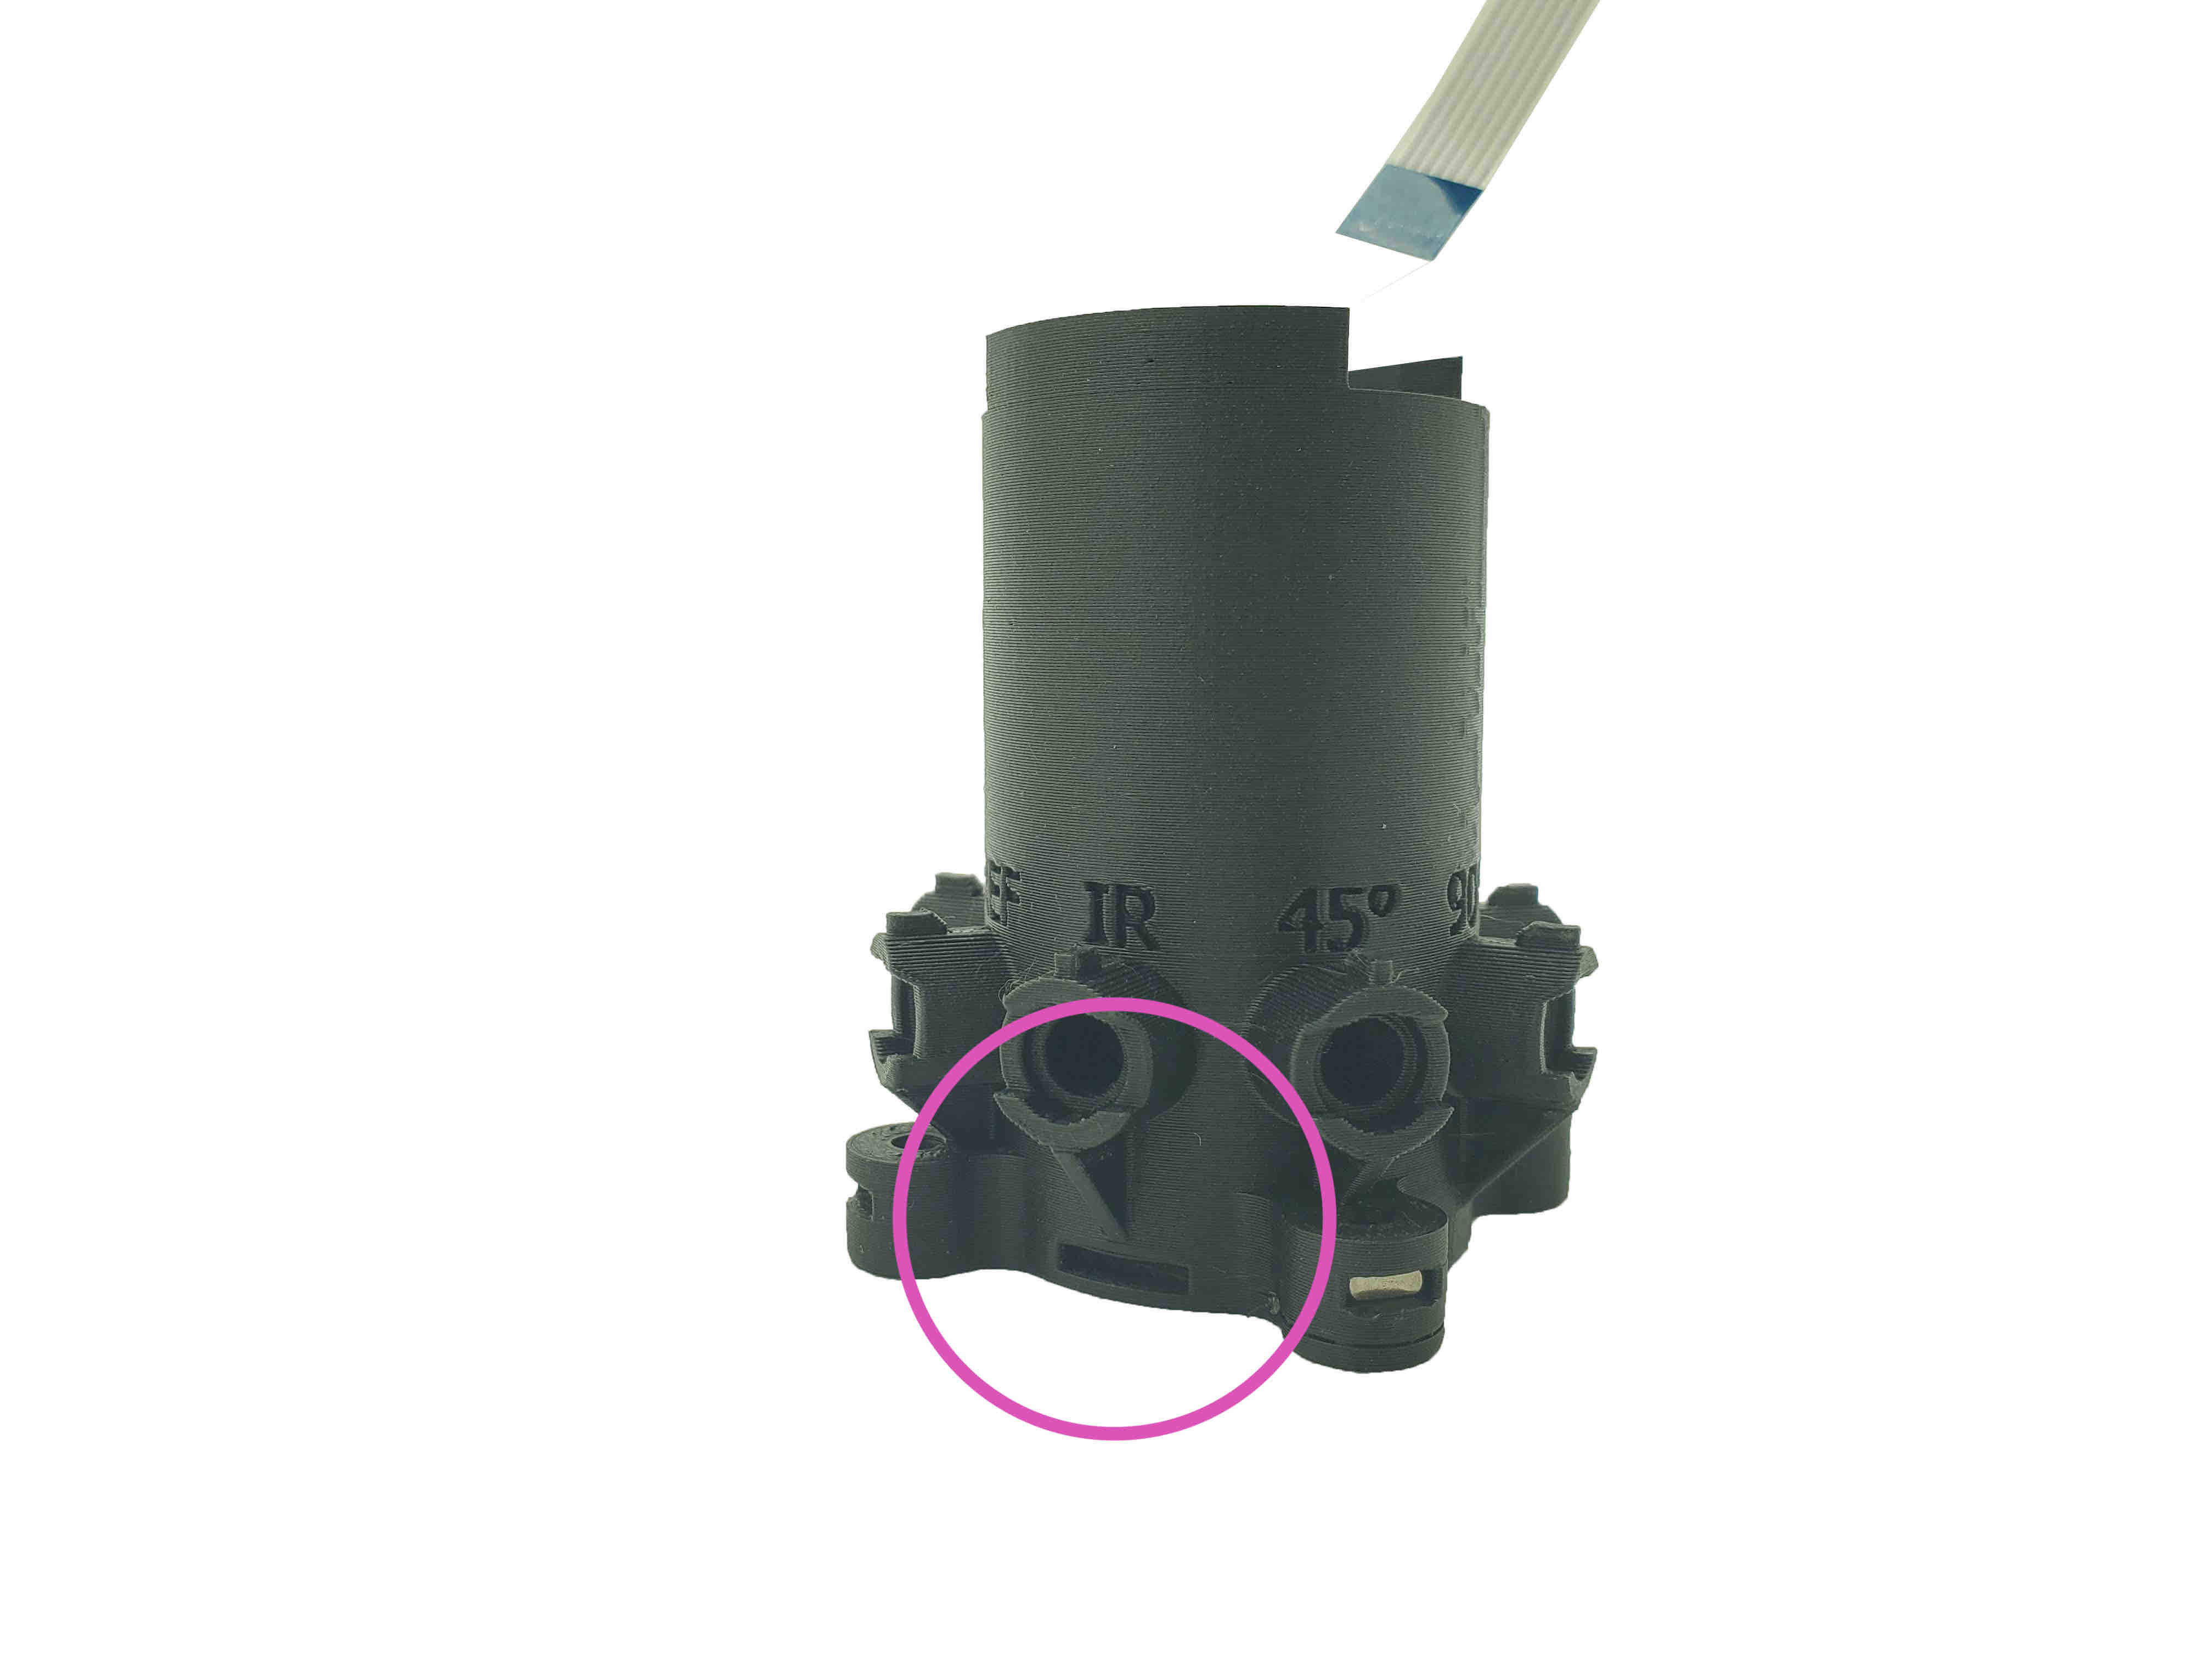
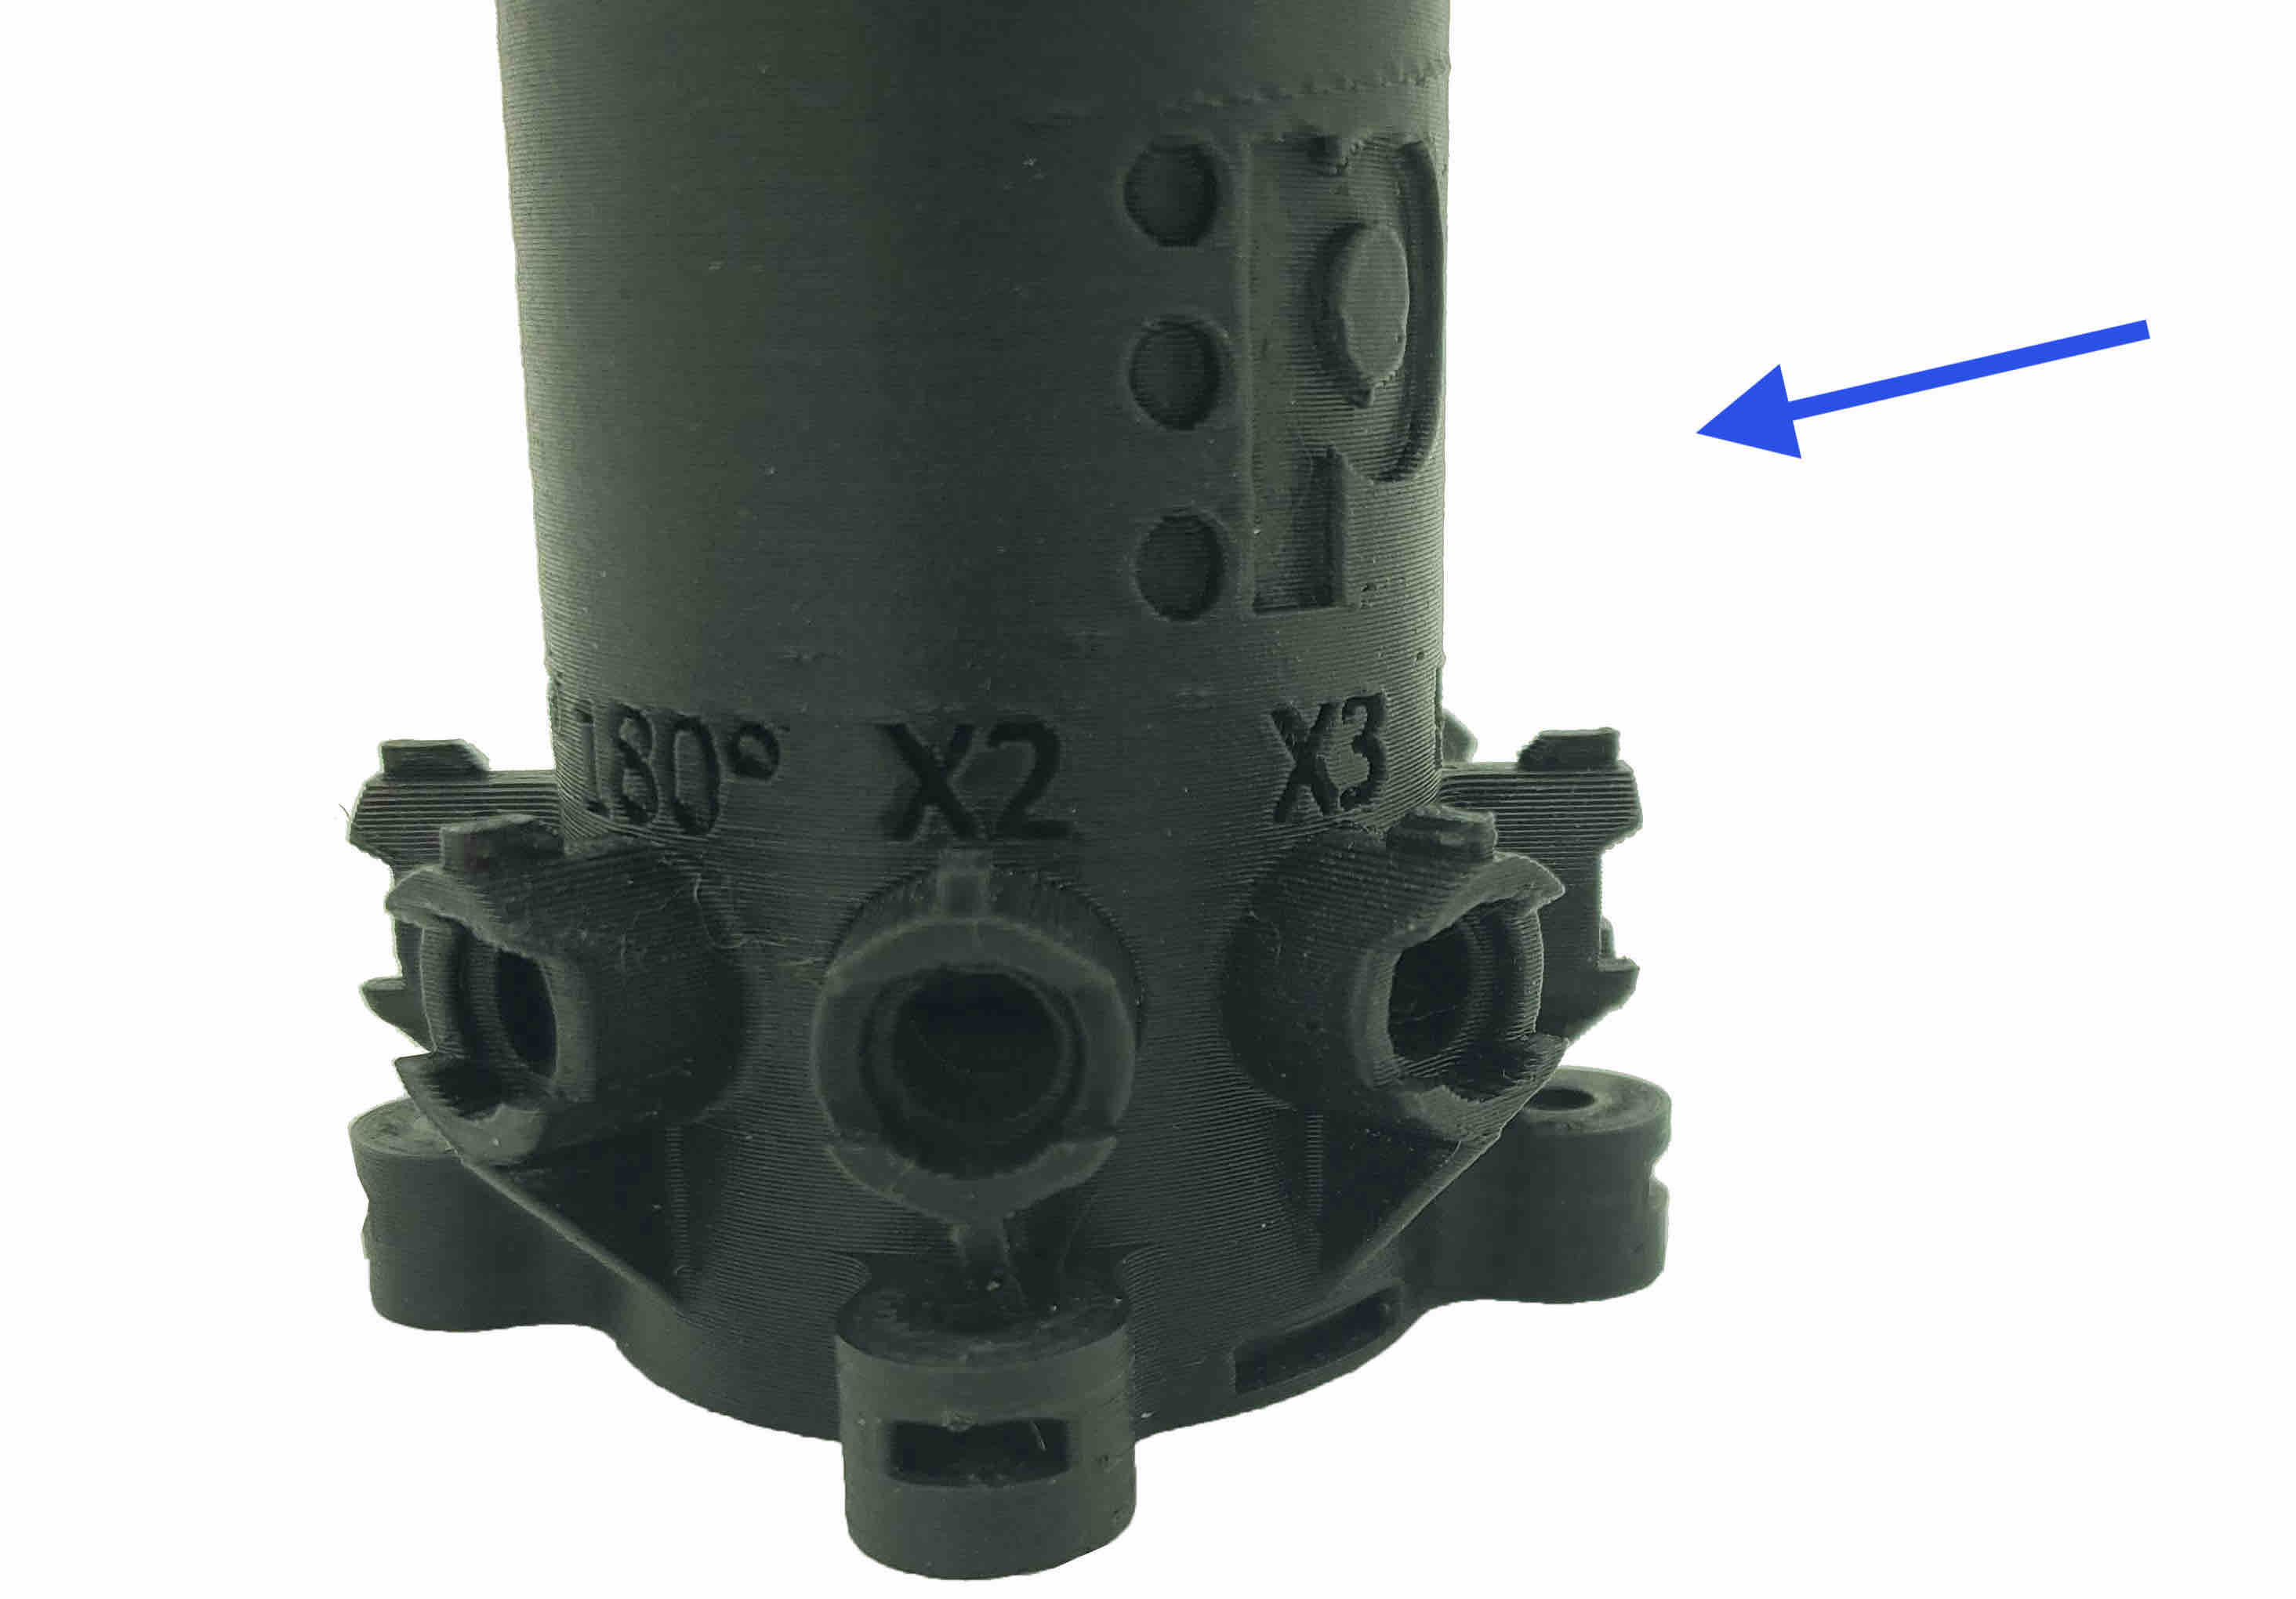
- Identify the slot on the vial holder where the flex cable will go through.
- Insert the flex cable in the vial holder, and through the slot, with the blue side of the cable facing upwards.
- Pull the cable through until the heating PCB is flat with the bottom of the vial holder.
- Secure the PCB from the bottom using the two M2.5 4mm screws.
- Important: the screw heads should be flush against the bottom of the vial holder, that is, no gap. You may need to unscrew and screw in again, or use pliers.
- Continue to the next page.