Attaching the wetware to the HAT asssembly
Step 1: Necessary parts #
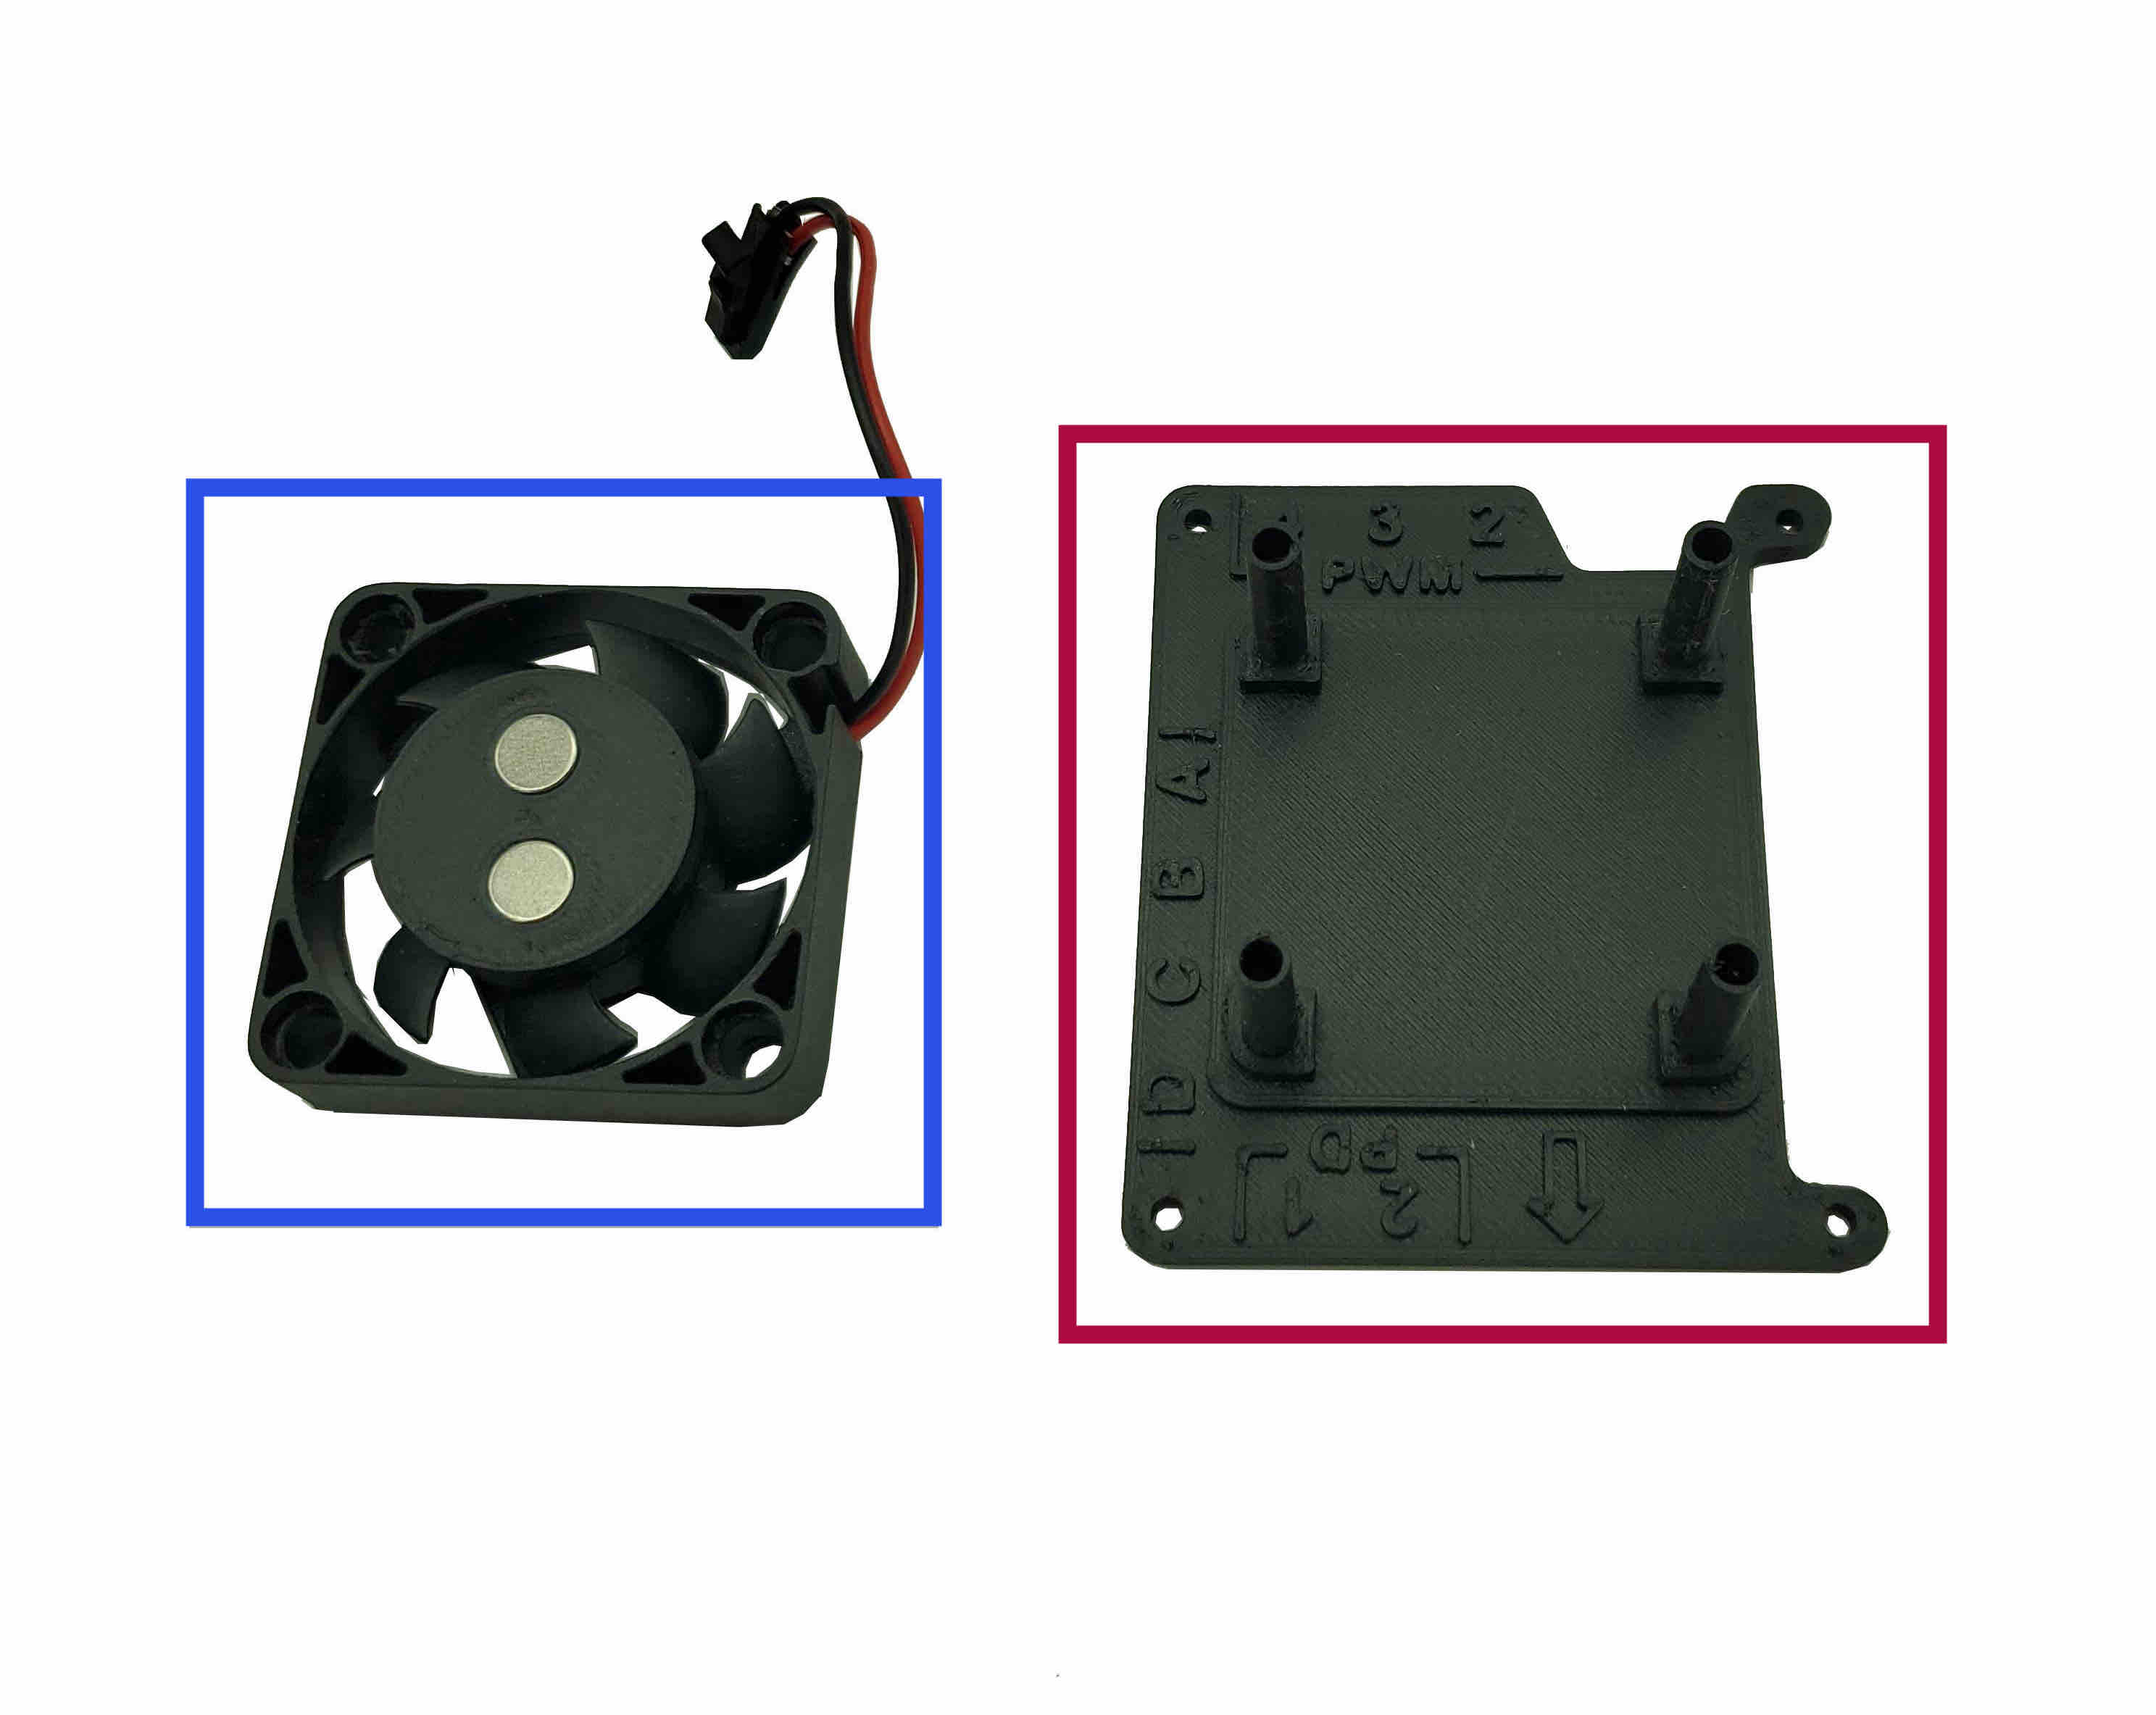
- Fan
-
Top faceplate (will have 4 x 30mm screws in it)
infoThese come assembled - leave them together. If they are not assembled, attach the fan onto the faceplate with the cable oriented toward the side labelled "PWM".
Step 2: Securing the vial holder #
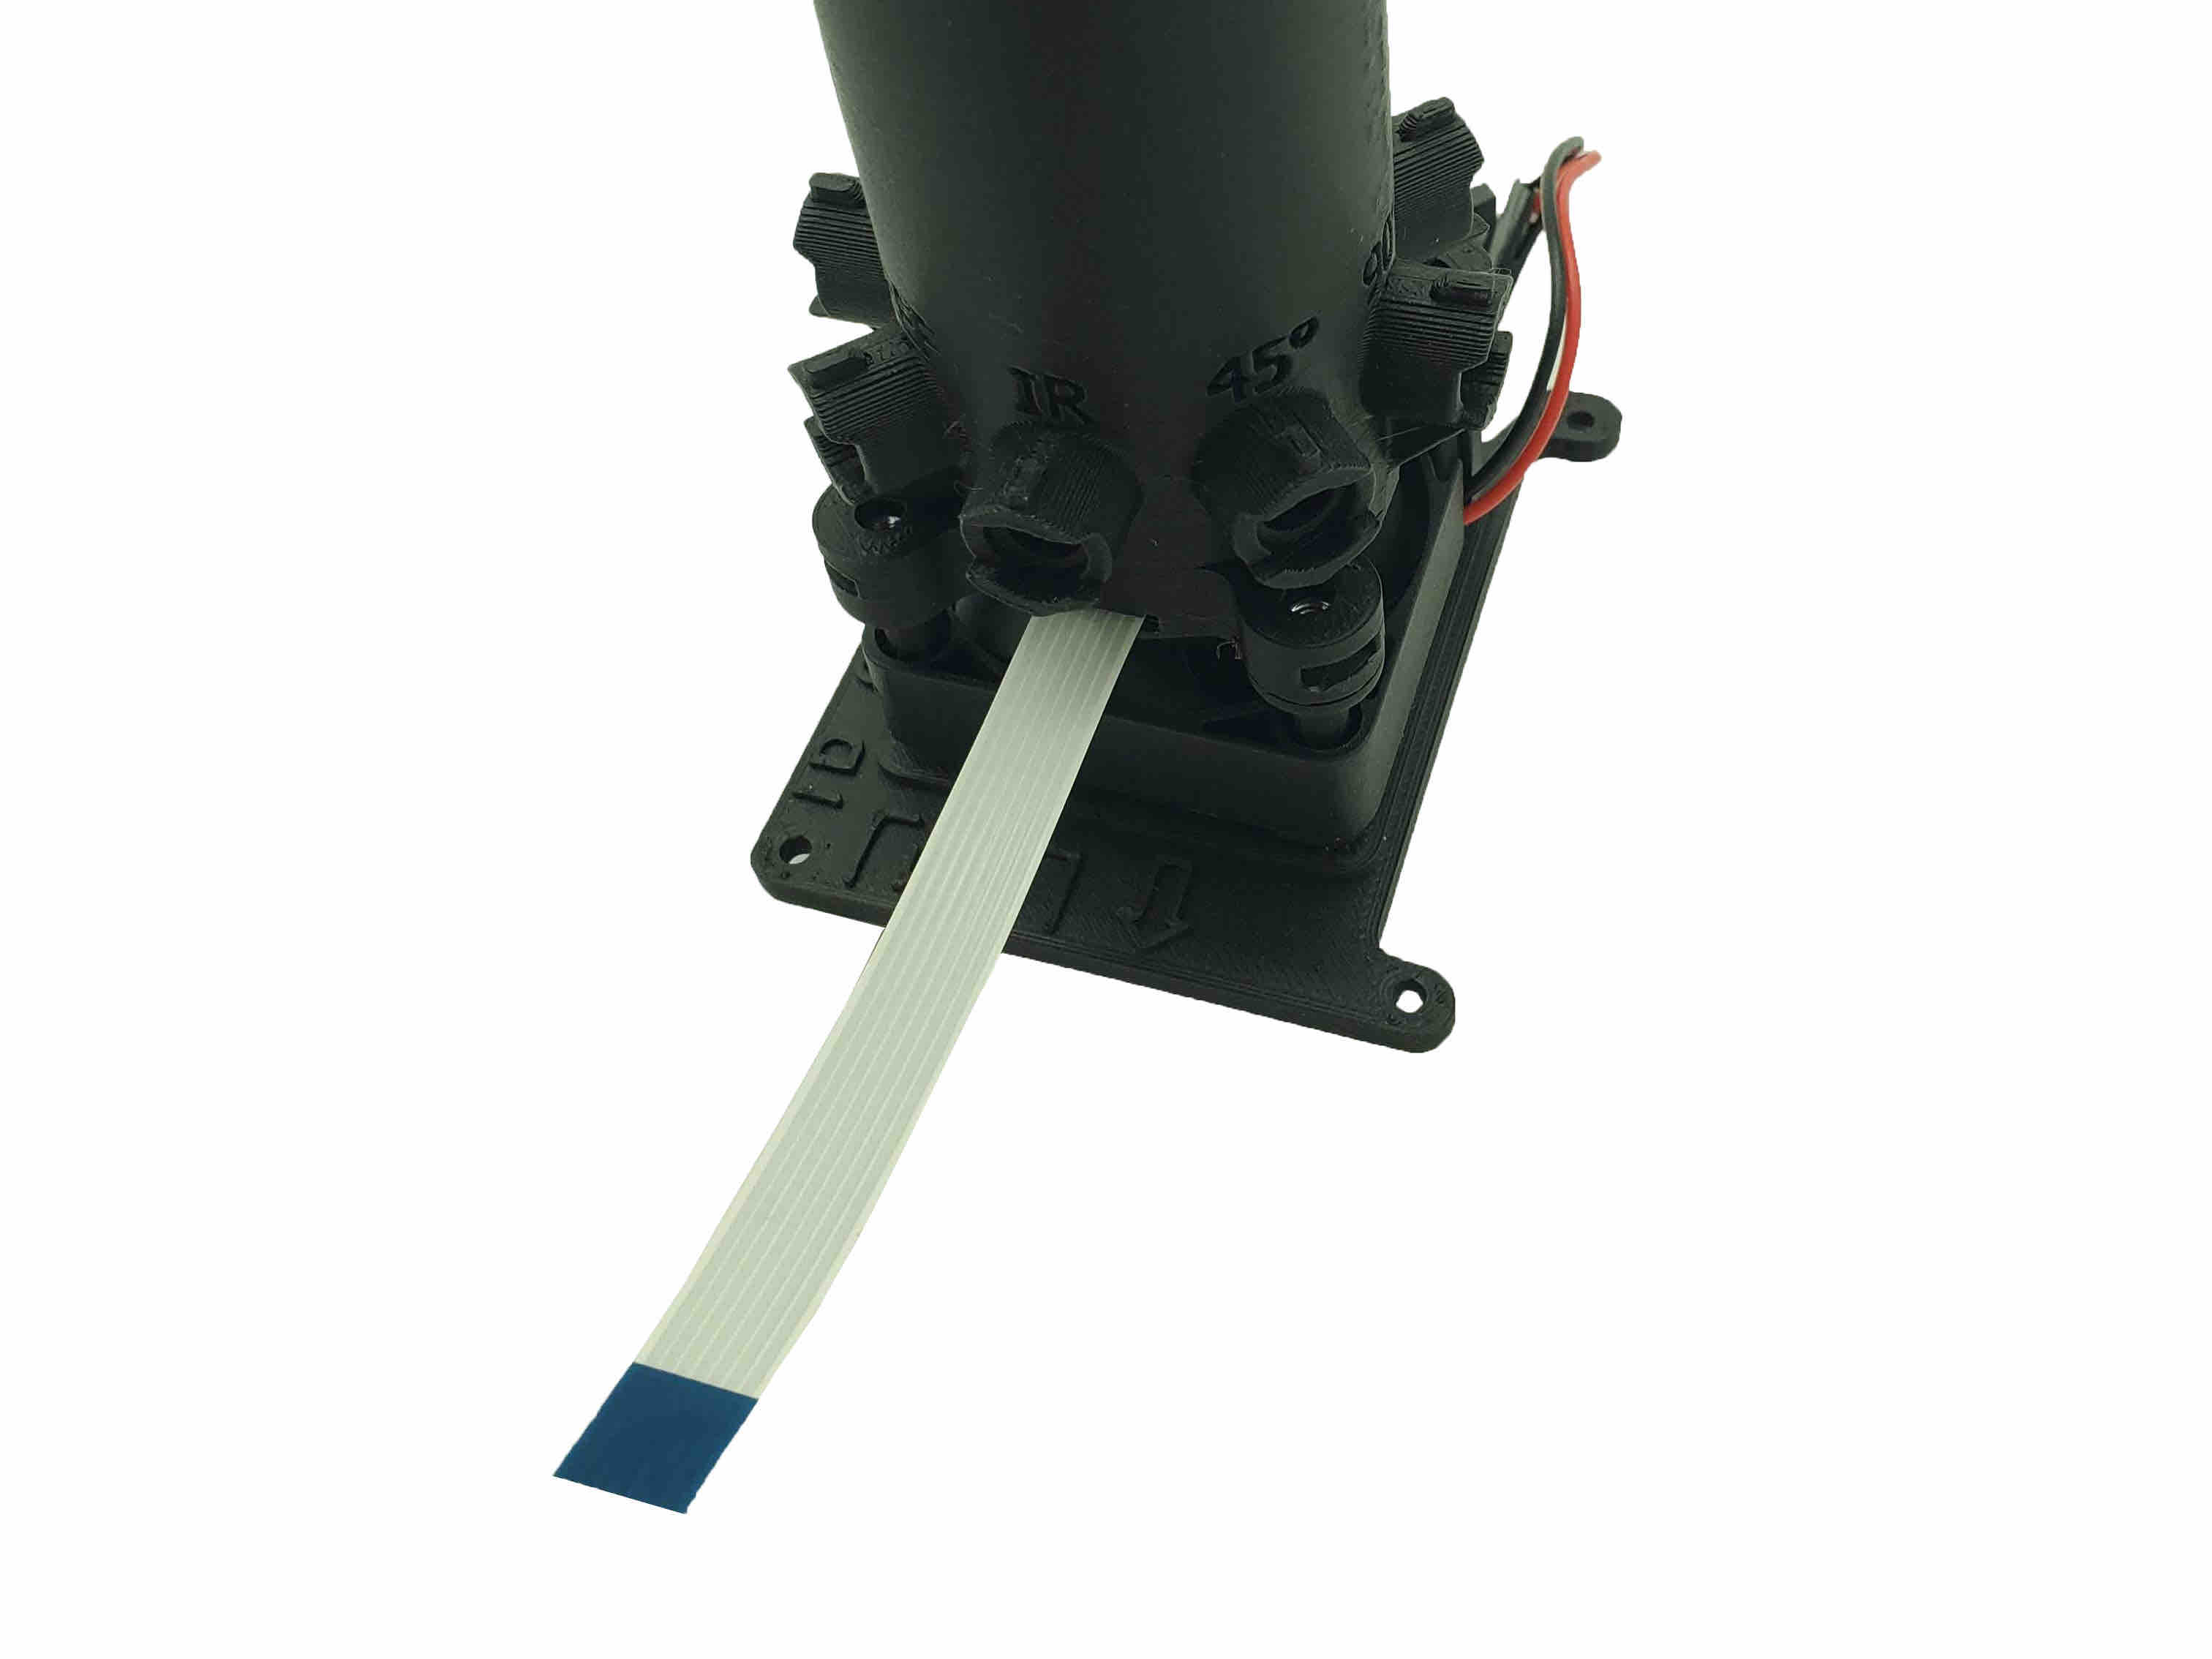
- Place the vial holder on top of the four ends of the 30mm screws. The screw ends should fit into four holes on the bottom of the vial holder. The flat flex cable should follow the arrow on the faceplate.
- Holding it together, finish screwing the bottom of the faceplate. The screws will enter square nuts in the vial holder. Do not overtighten.
- The screw heads will be flush with the faceplate, and there should be no screw threads showing between the vial holder and the faceplate.
- Use the screwdriver to check that the fan can spin freely without rubbing against the screws above. Important: If there is contact or near-contact, slightly unscrew the 30mm screws underneath to provide more clearance.
Step 3: Attaching the vial holder to the HAT #
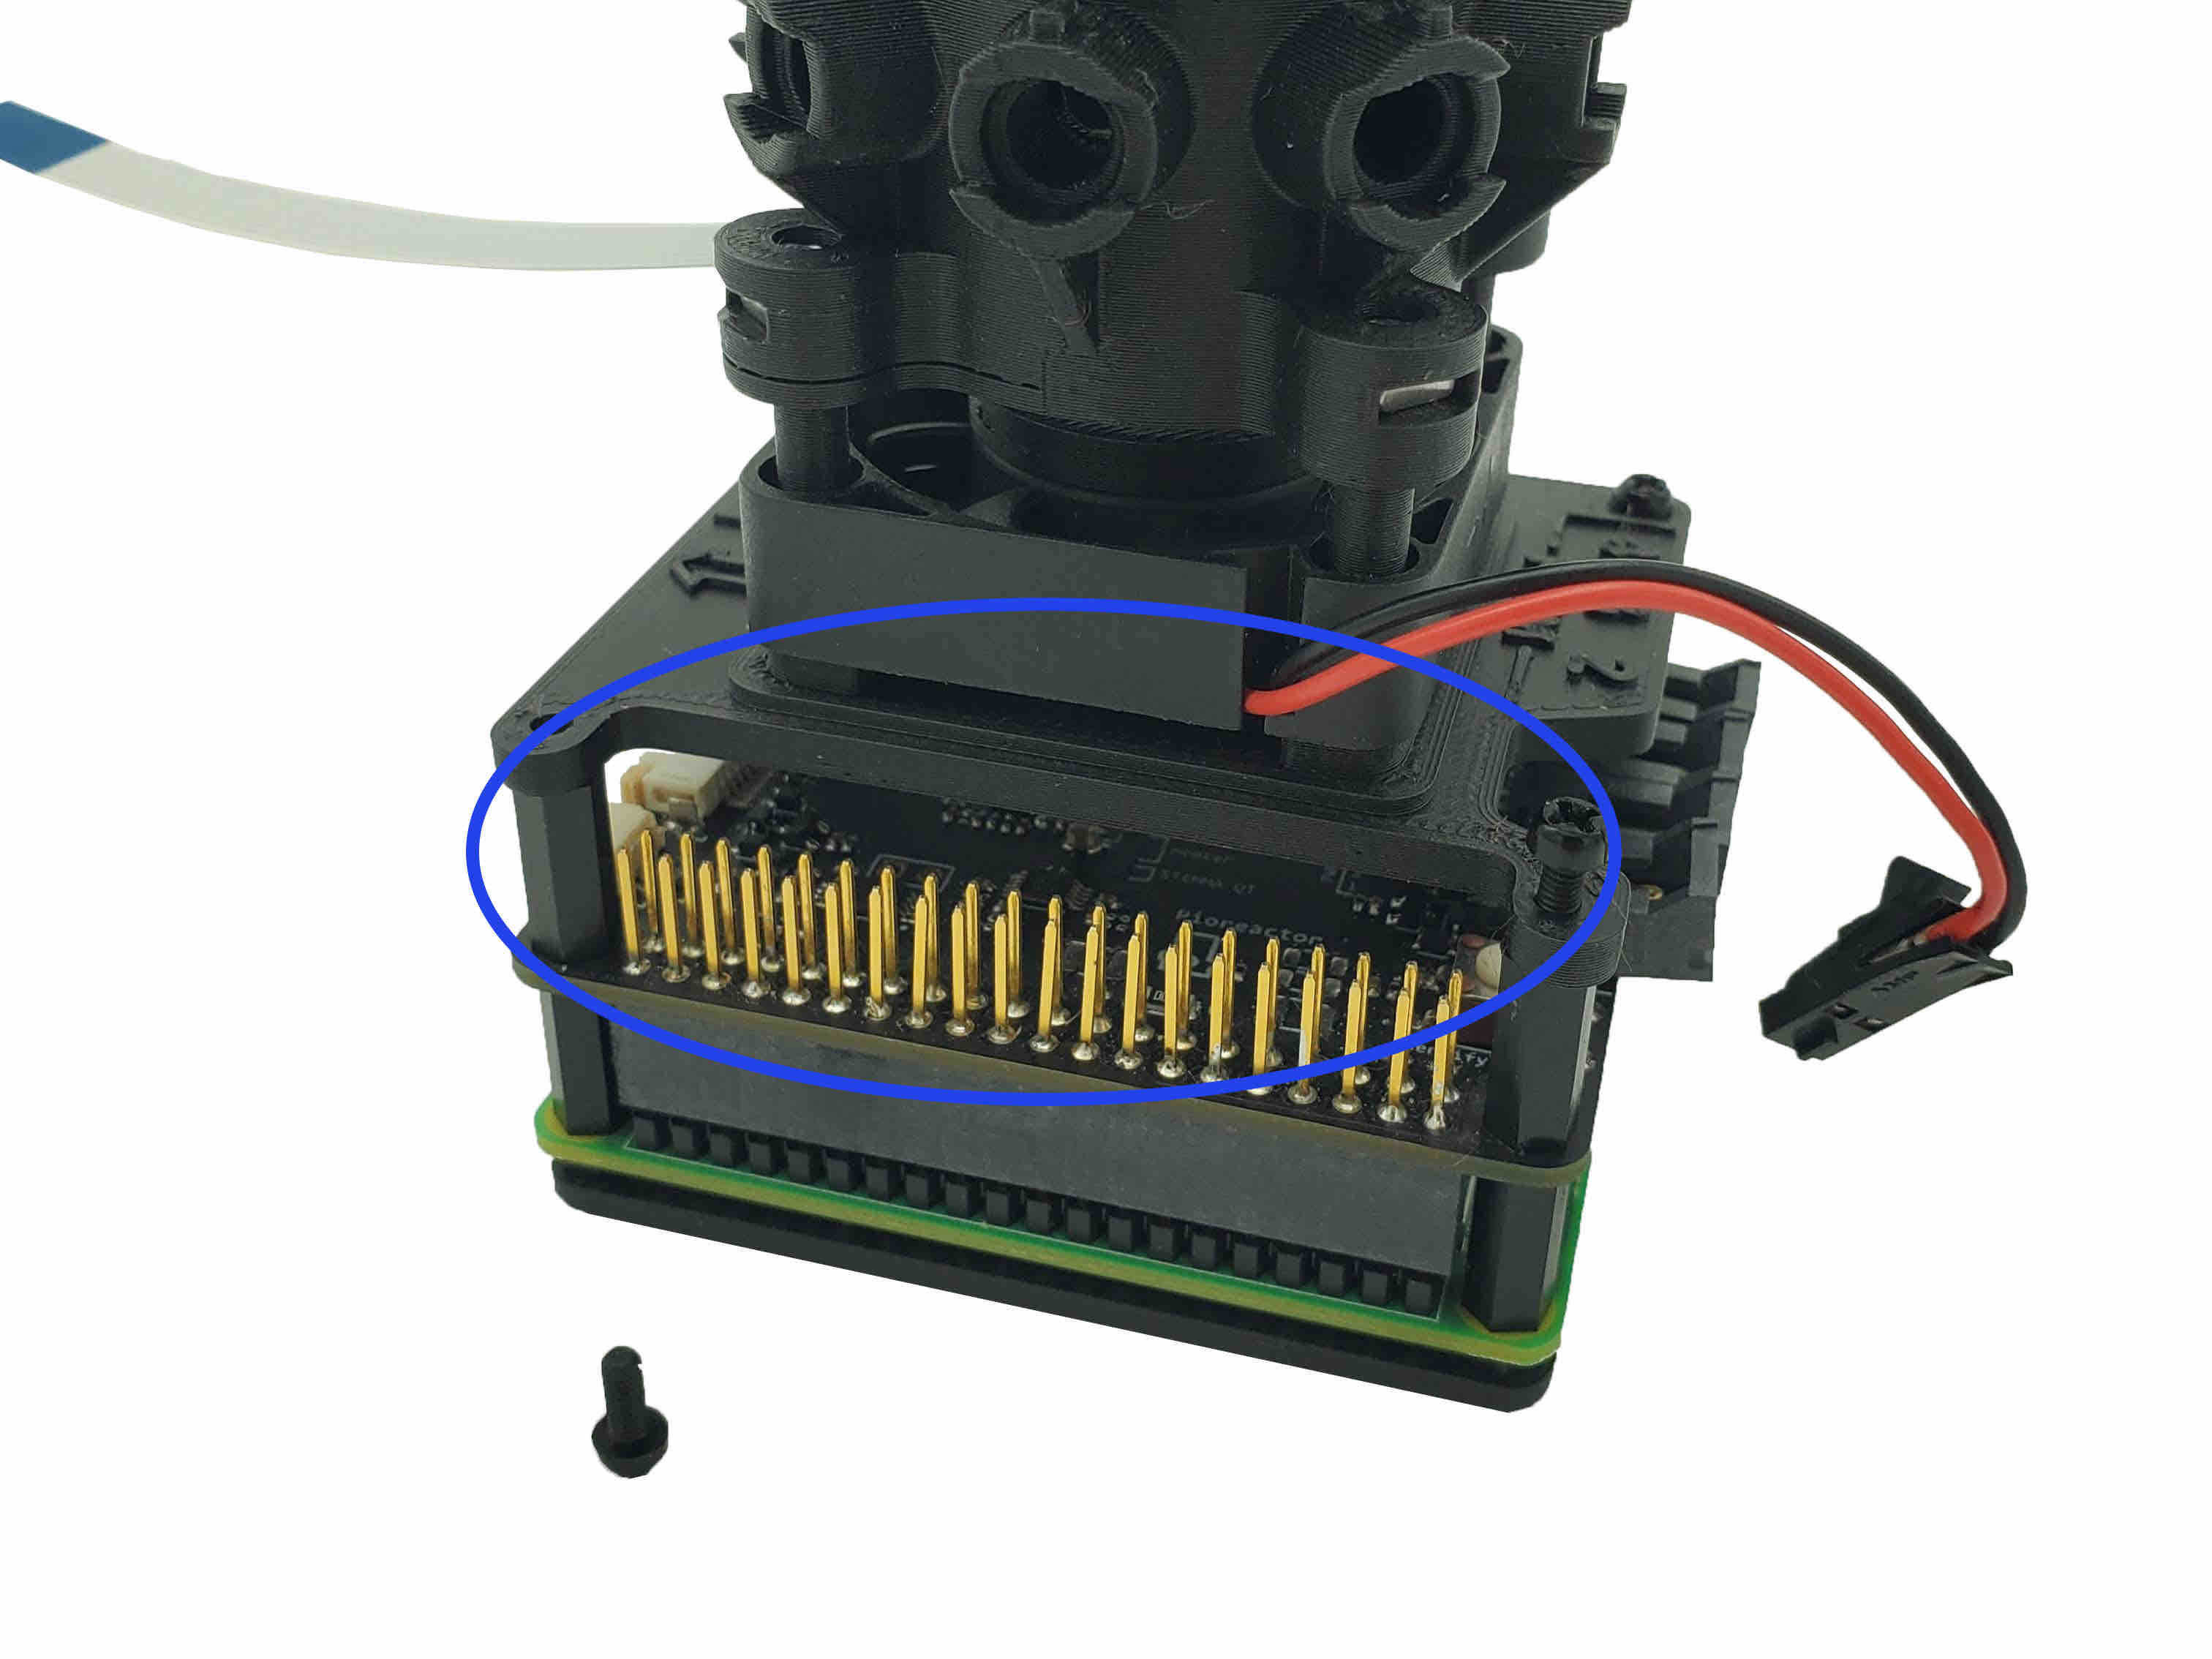
- Place the vial holder assembly onto the Raspberry Pi/HAT.
- The GPIO pins align with the side notch of the faceplate.
- Using the 6mm screws, attach the top and bottom pieces in each corner.
Step 4: Connecting heater and stirring to the HAT #
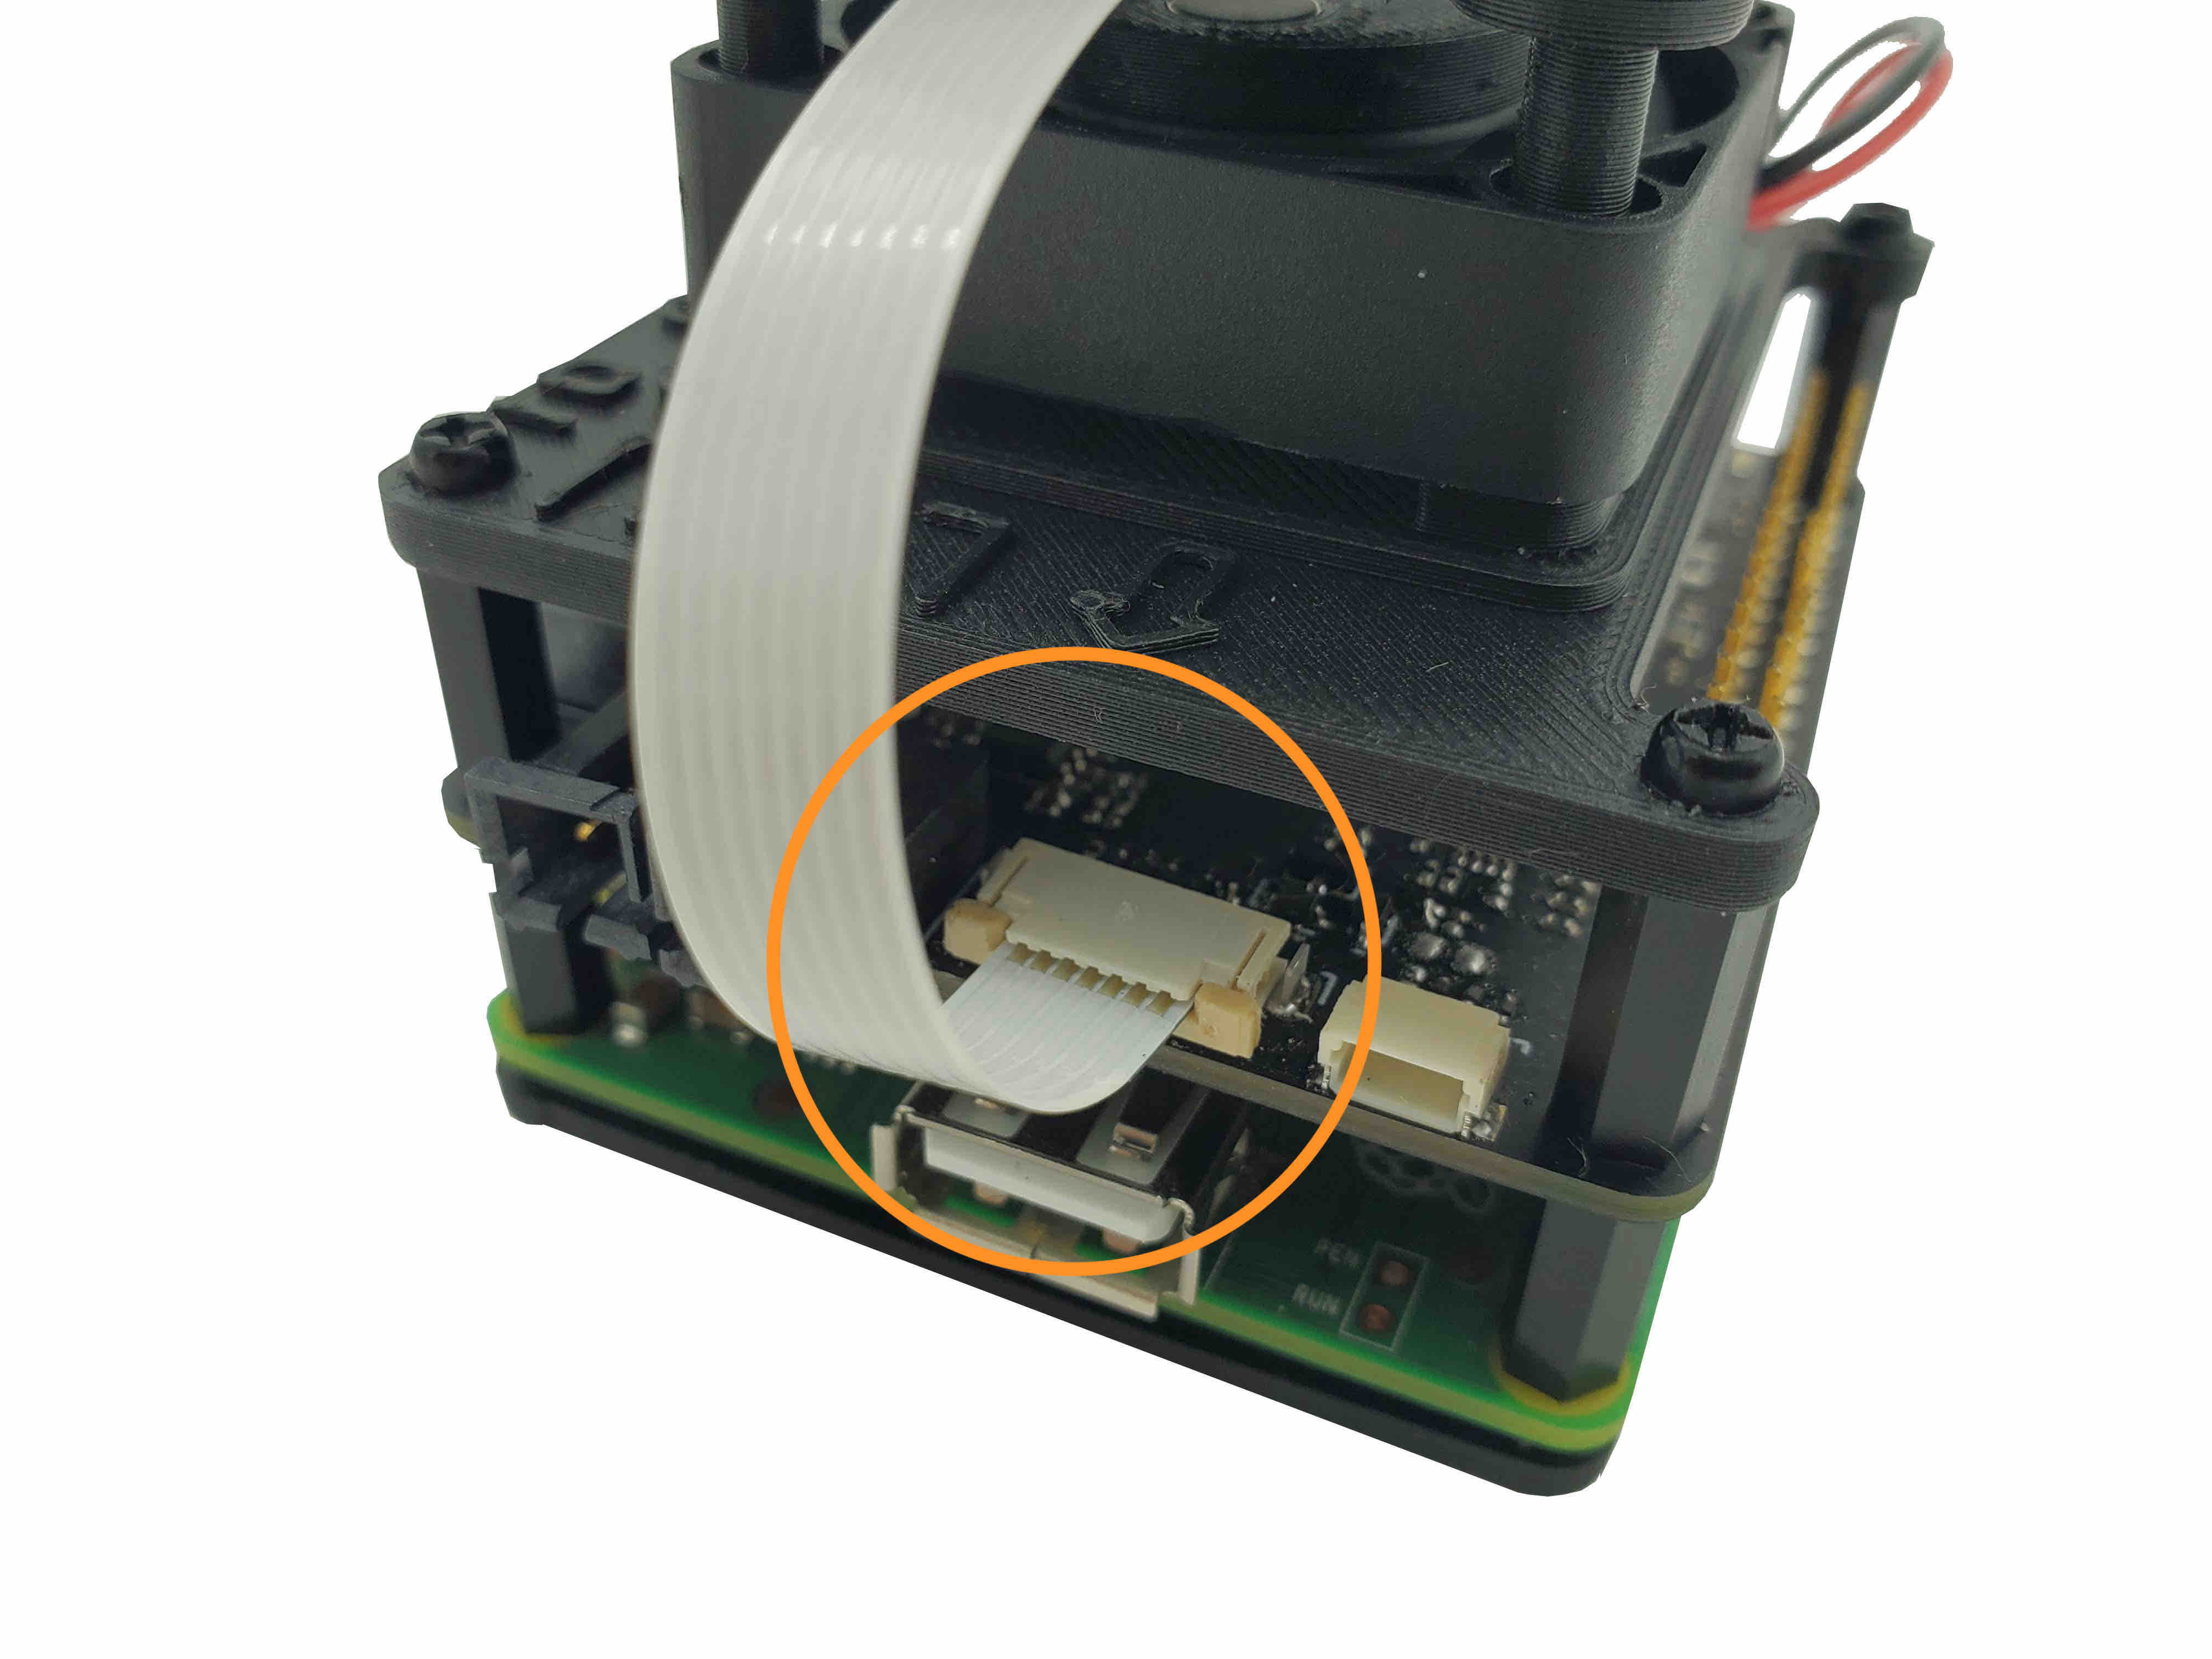
- Open the flat flex cable connector on the HAT by pulling the tabs outward, like done previously.
- Insert the flex cable copper-side up.
- Push the tabs inward to secure the flex cable.
- Insert the stirring power connector into PWM channel 1 (unlabelled).
- Continue to the next page.