Assembling the Raspberry Pi and the HAT
// Removed tab imports; using selection blocks for Pi types
Step 1: Necessary parts #
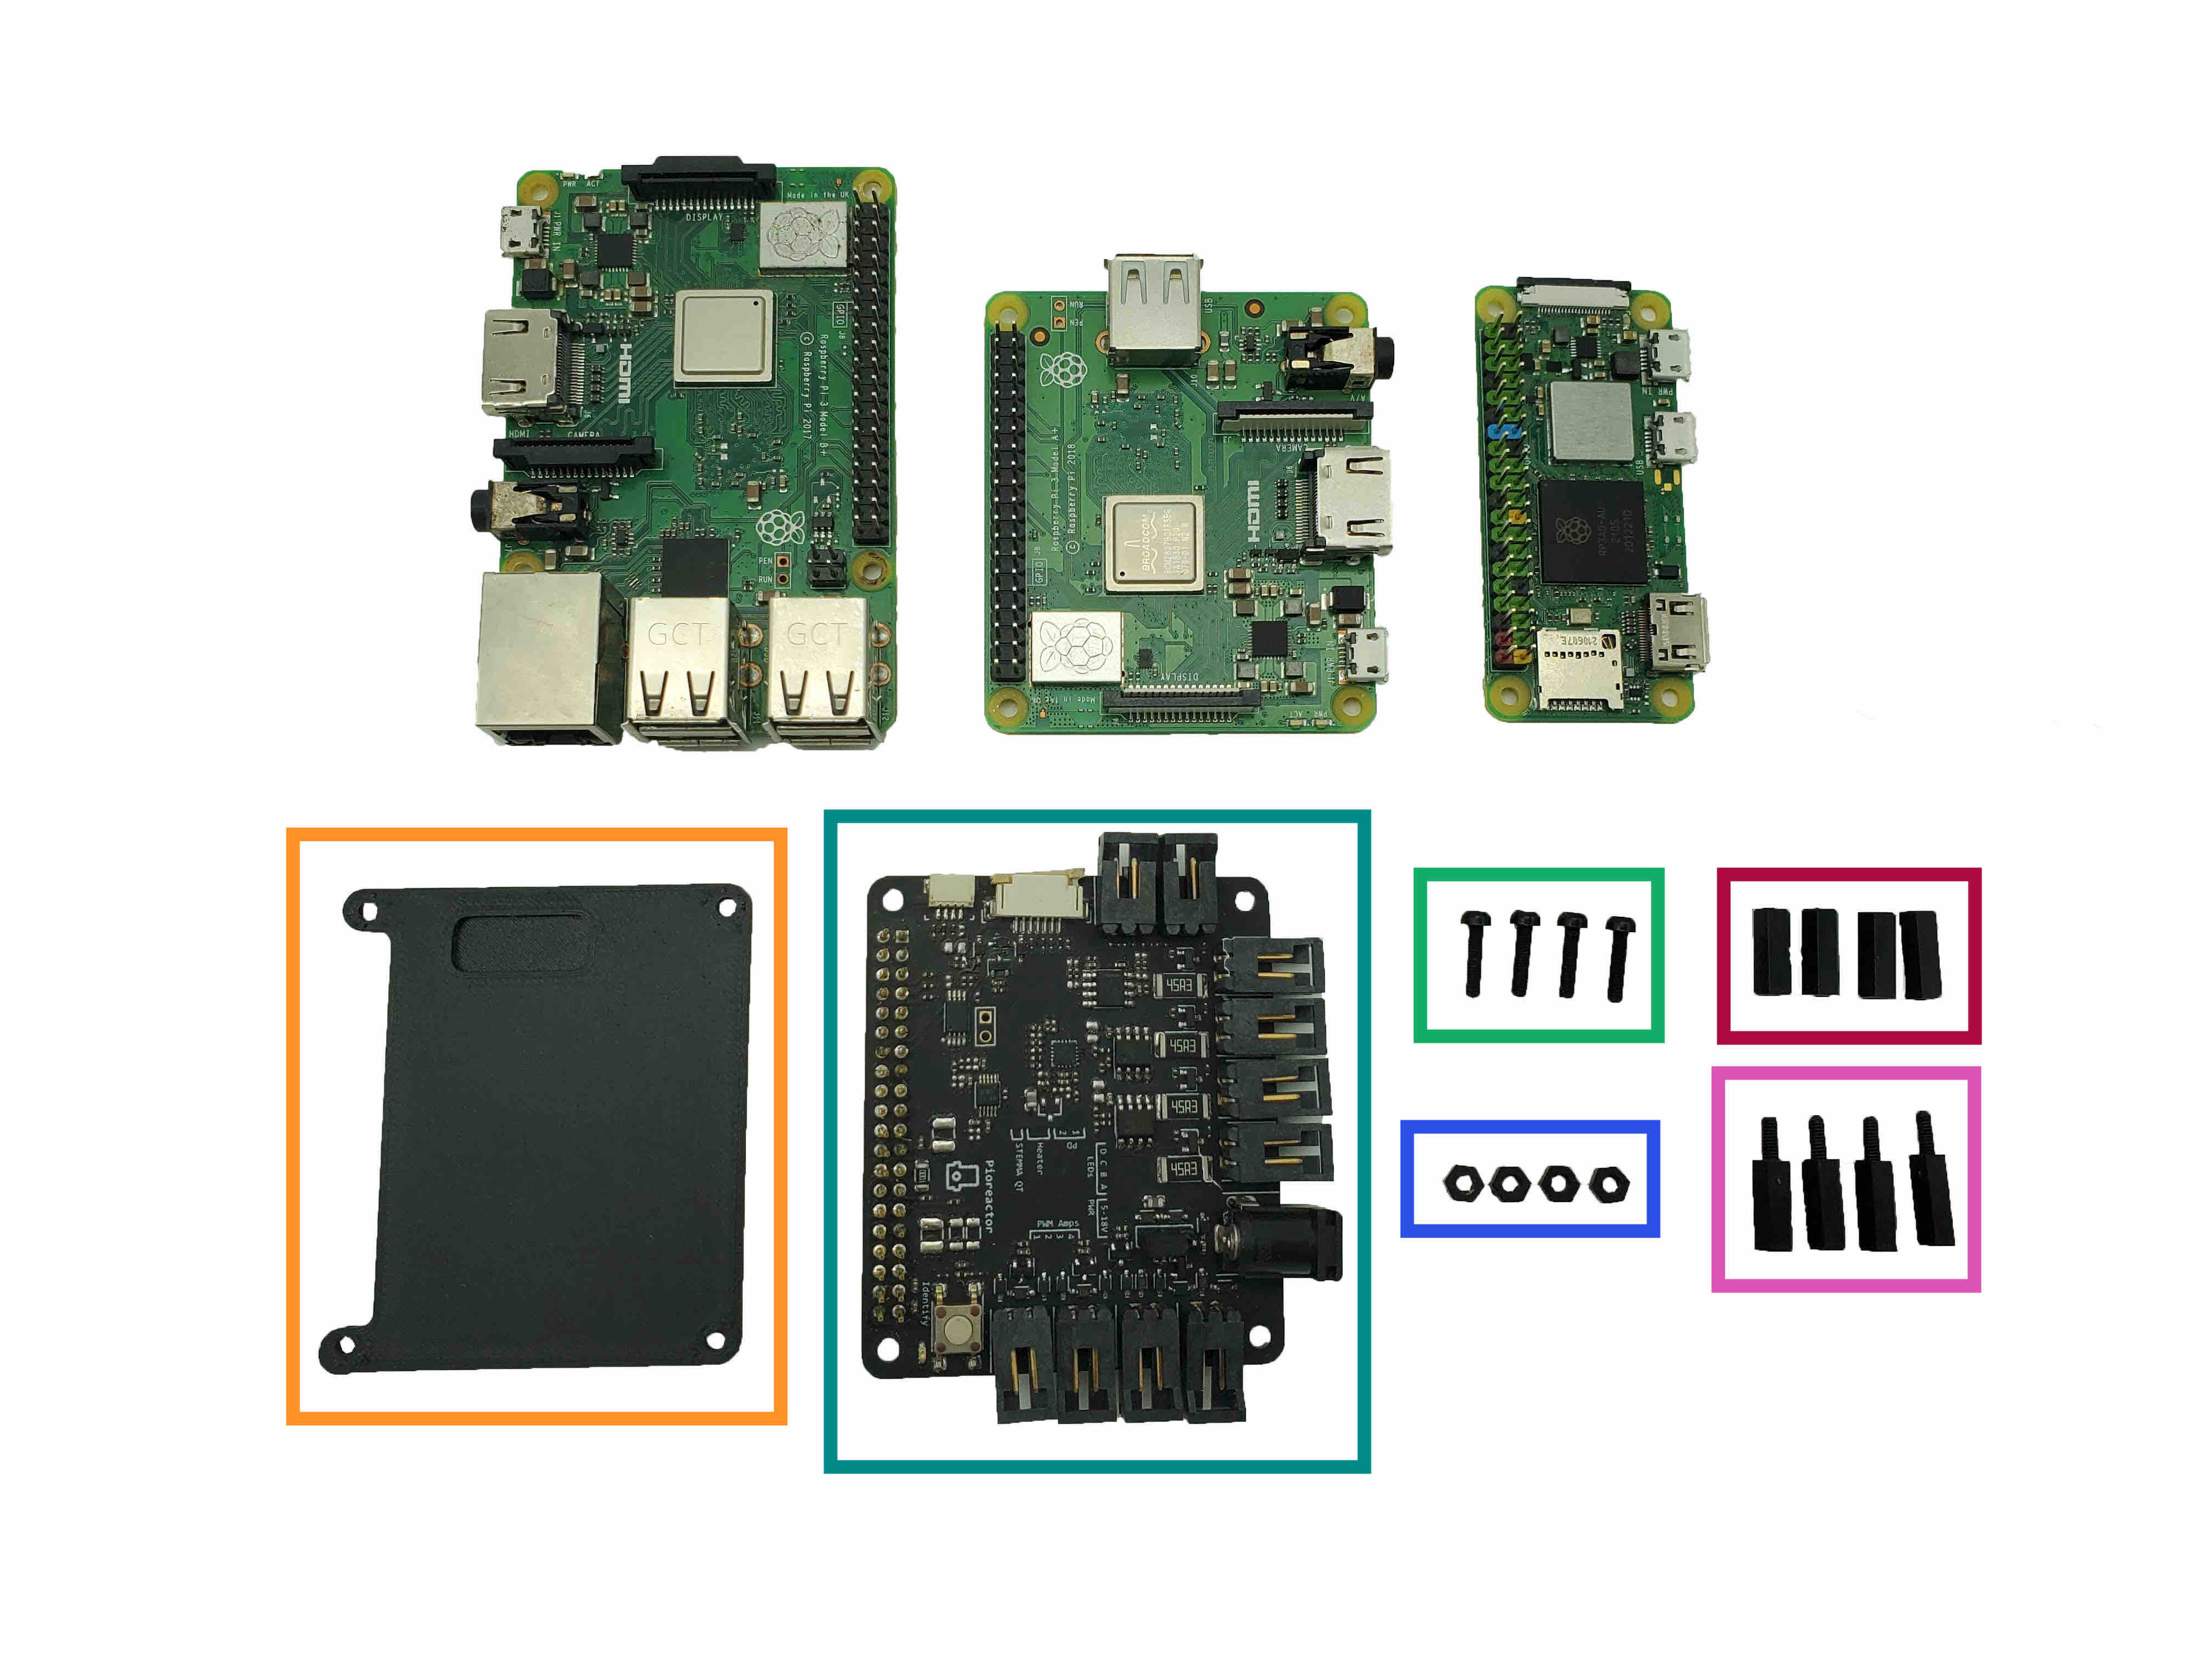
- You will need:
- A Raspberry Pi of your choosing. Displayed are three options - you just need one.
- Hex nuts (4x)
- M2.5 12mm hex standoffs (4x)
- M2.5 12mm hex standoffs-with-6mm-screws (4x)
- M2.5 10mm screws (4x)
- Bottom faceplate
- HAT PCB
- Check the GPIO pins on the HAT PCB to confirm that they are straight and not touching another GPIO pin.
Step 1.5: Identify your Raspberry Pi type #
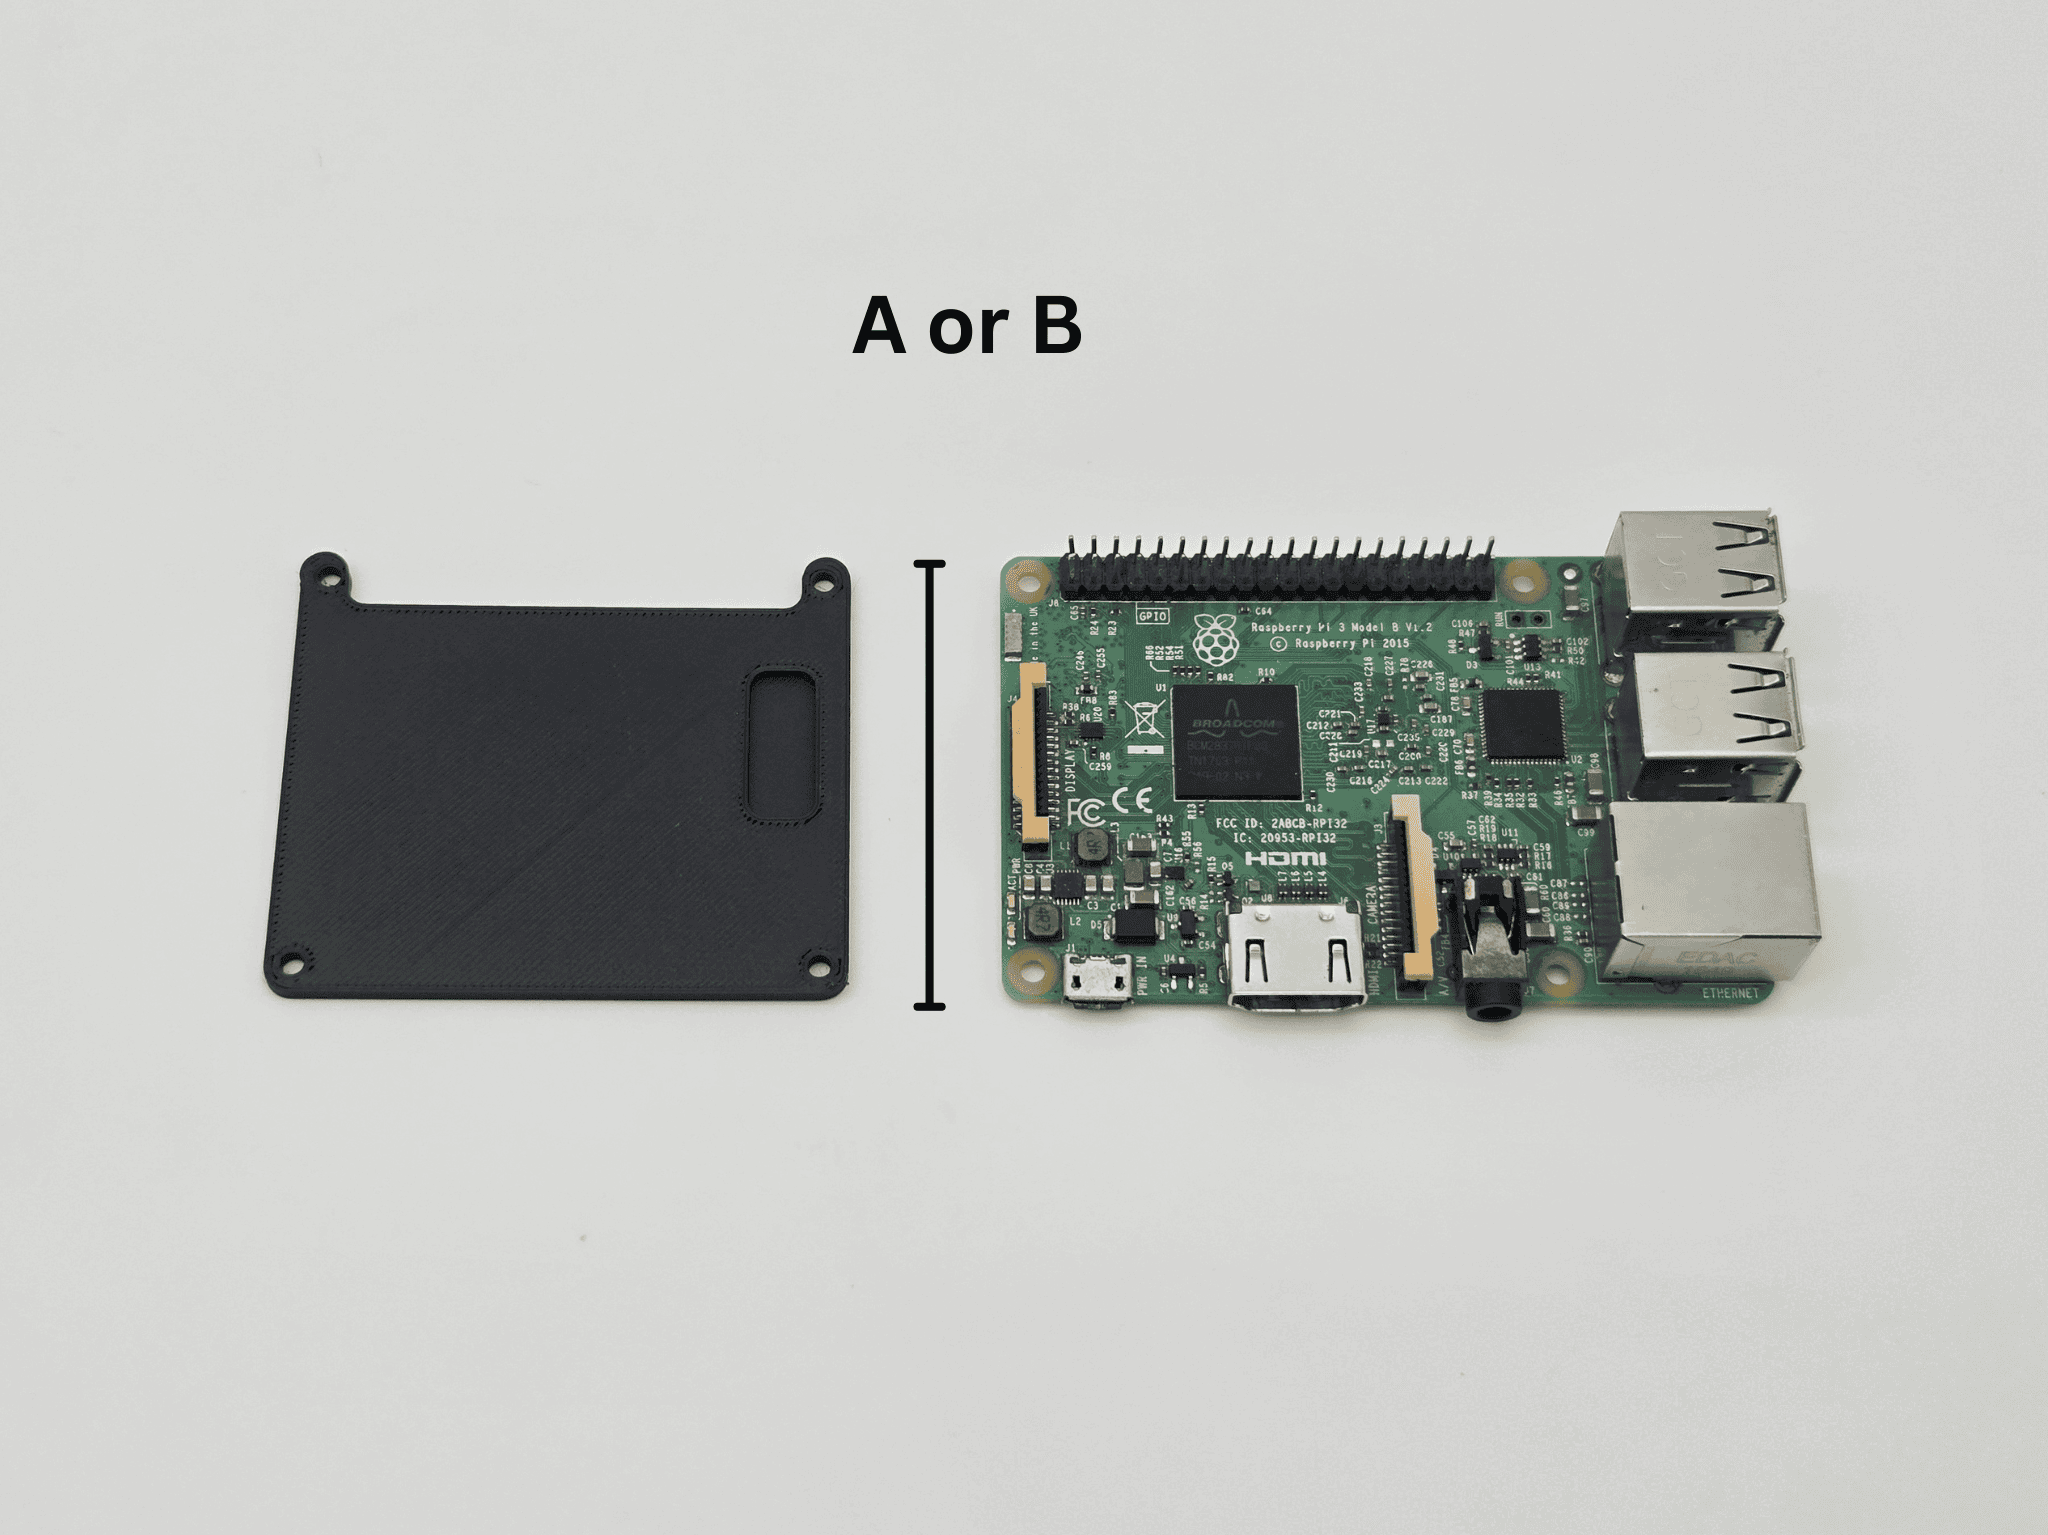
Raspberry Pi types can be identified by the width of the Pi, in comparison to the bottom faceplate.
- For Raspberry Pi A or B assembly (full-sized Pi): Go to section
- For Raspberry Pi Zero / Zero 2 assembly (half-sized Pi): Go to section
Raspberry Pi A or B instructions
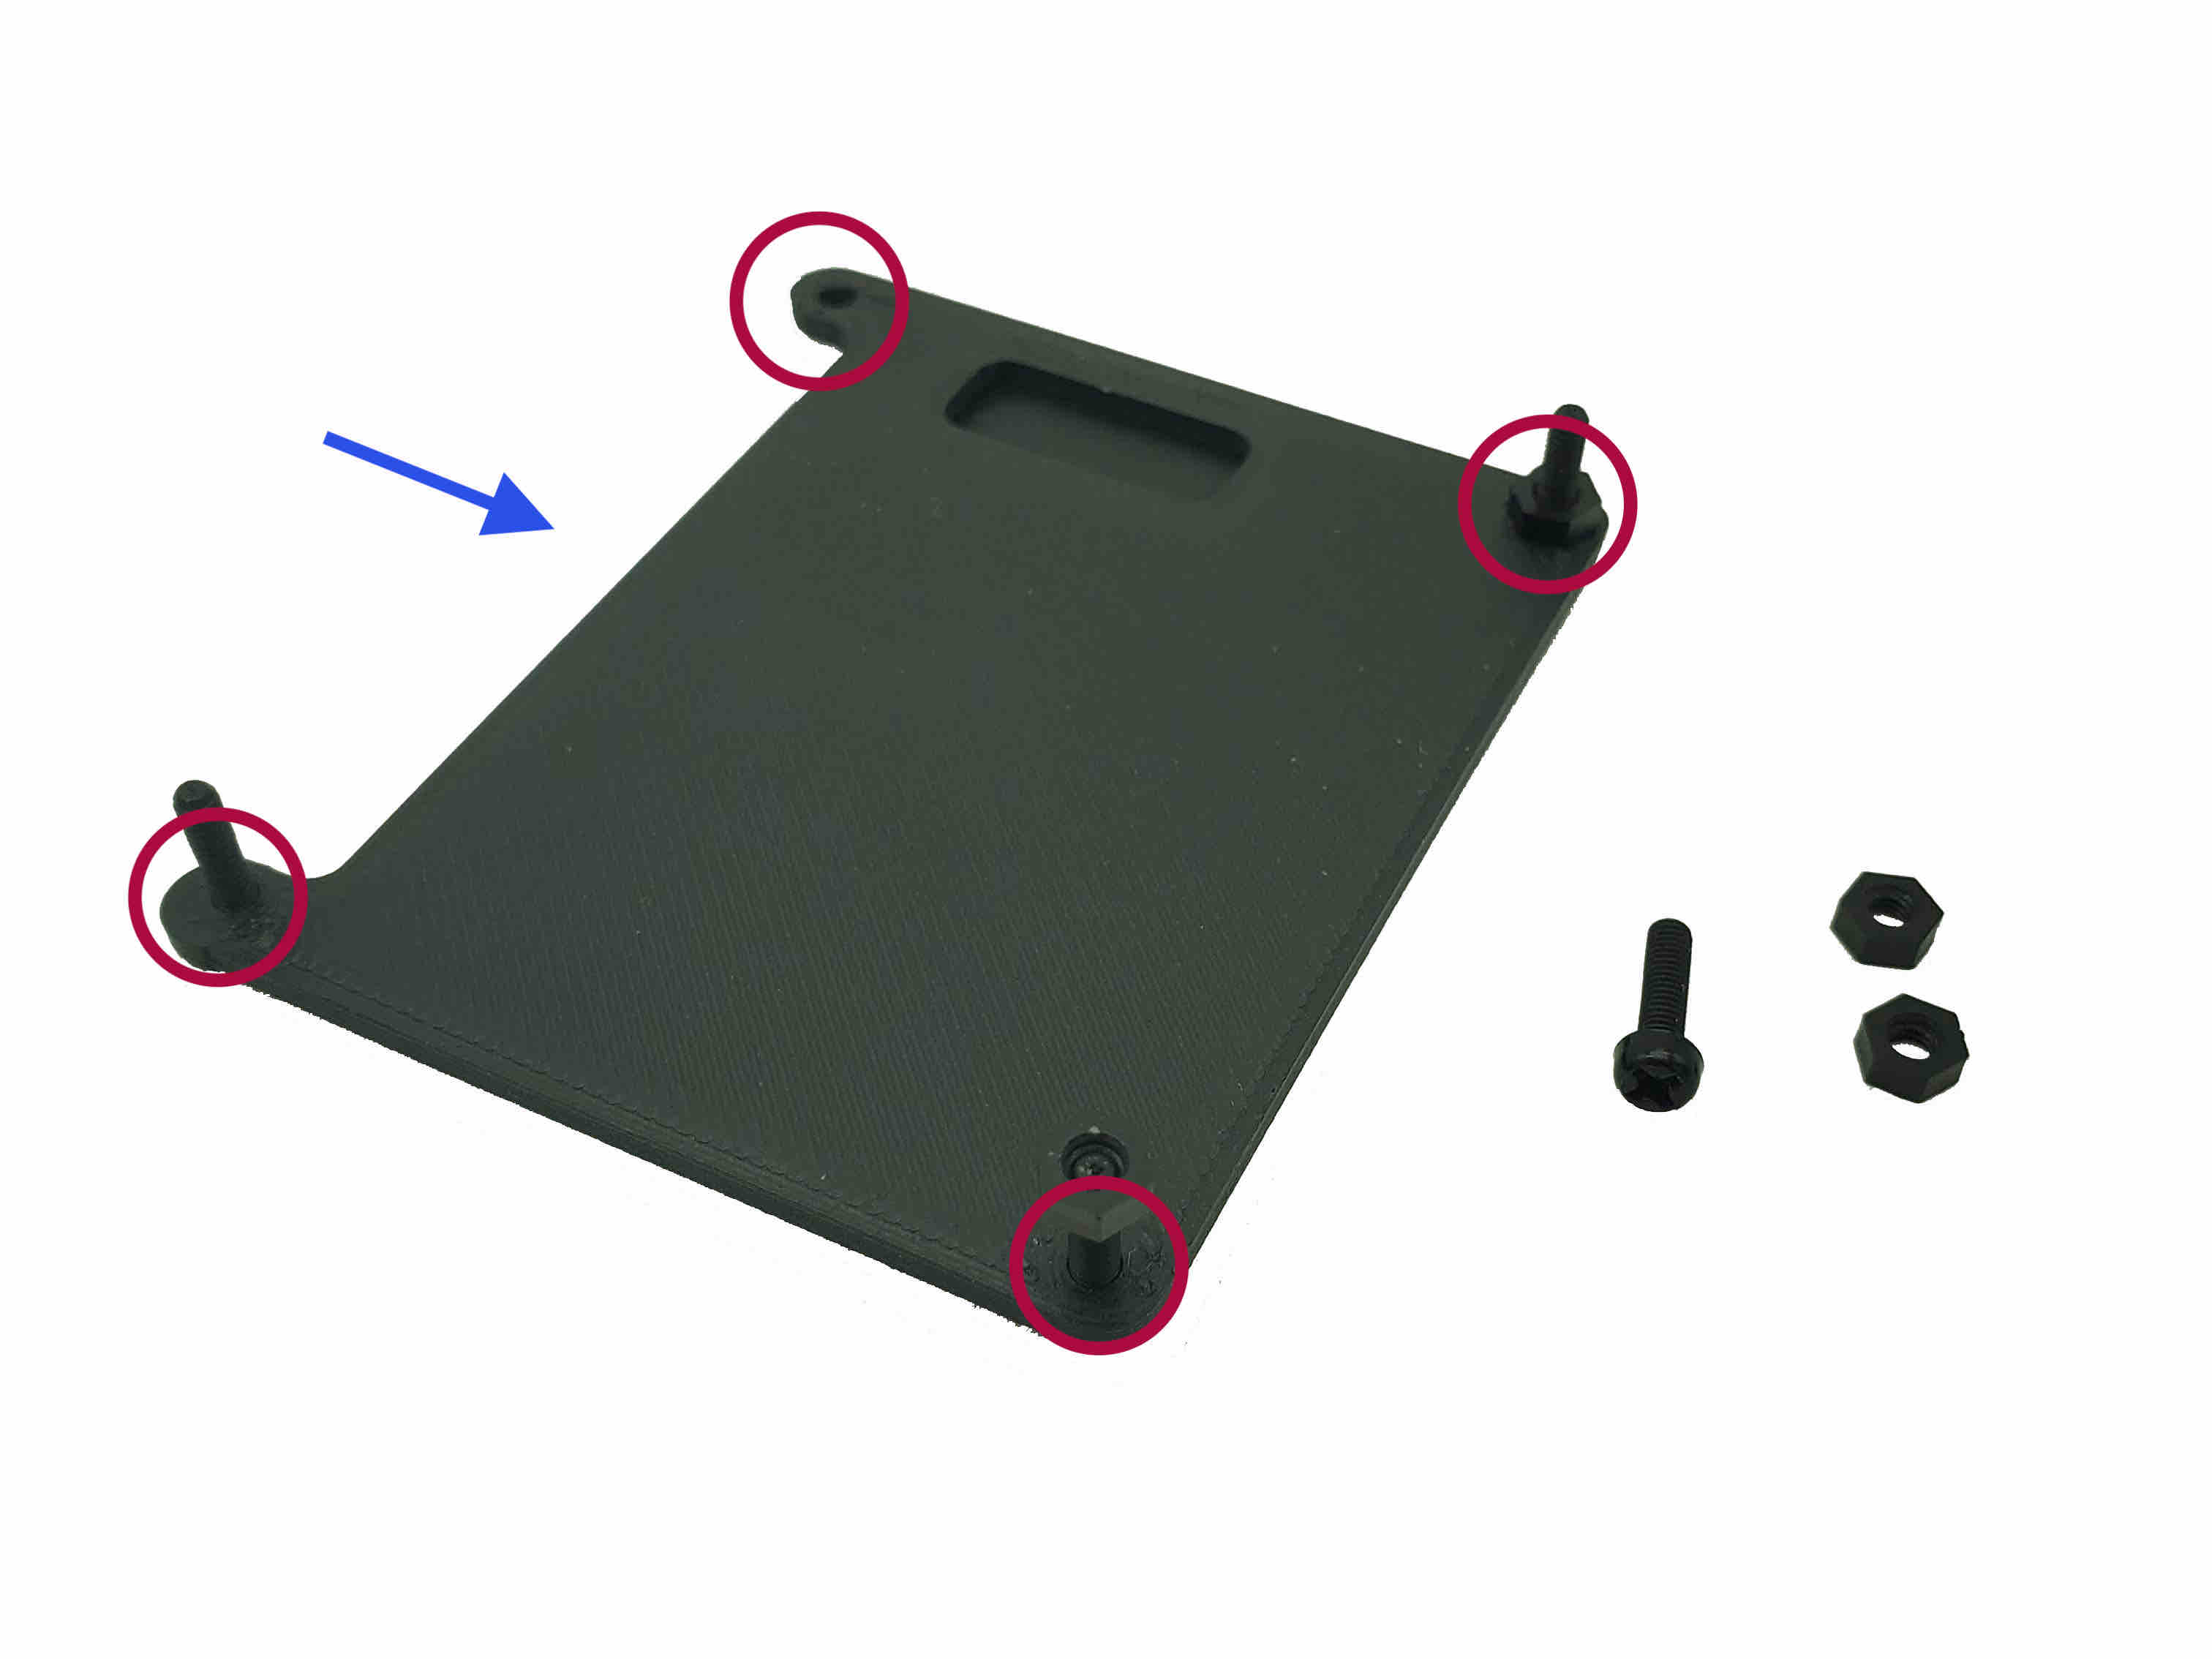
Step 2: Assemble the bottom faceplate (Raspberry Pi A or B) #
- If using a half-size Raspberry Pi (aka a Zero model), switch to the tab above called "Raspberry Pi Zero" to see Zero specific instructions.
The 40 GPIO pins (standing for general-purpose input/output) form a distinct row on one side of the Raspberry Pi. Note the orientation of these pins to help you assemble correctly!
- Orientation: the base will have a flat edge and an edge with an indent. The GPIO pins sit along the indent, seen on the left in the images.
- Insert the M2.5 10mm screws into the holes.
- Hand screw a hex nut onto each screw.
- Place the Raspberry Pi on top, aligning the holes, with the GPIO pins on the left. Note: your Raspberry Pi may look different than the one displayed.
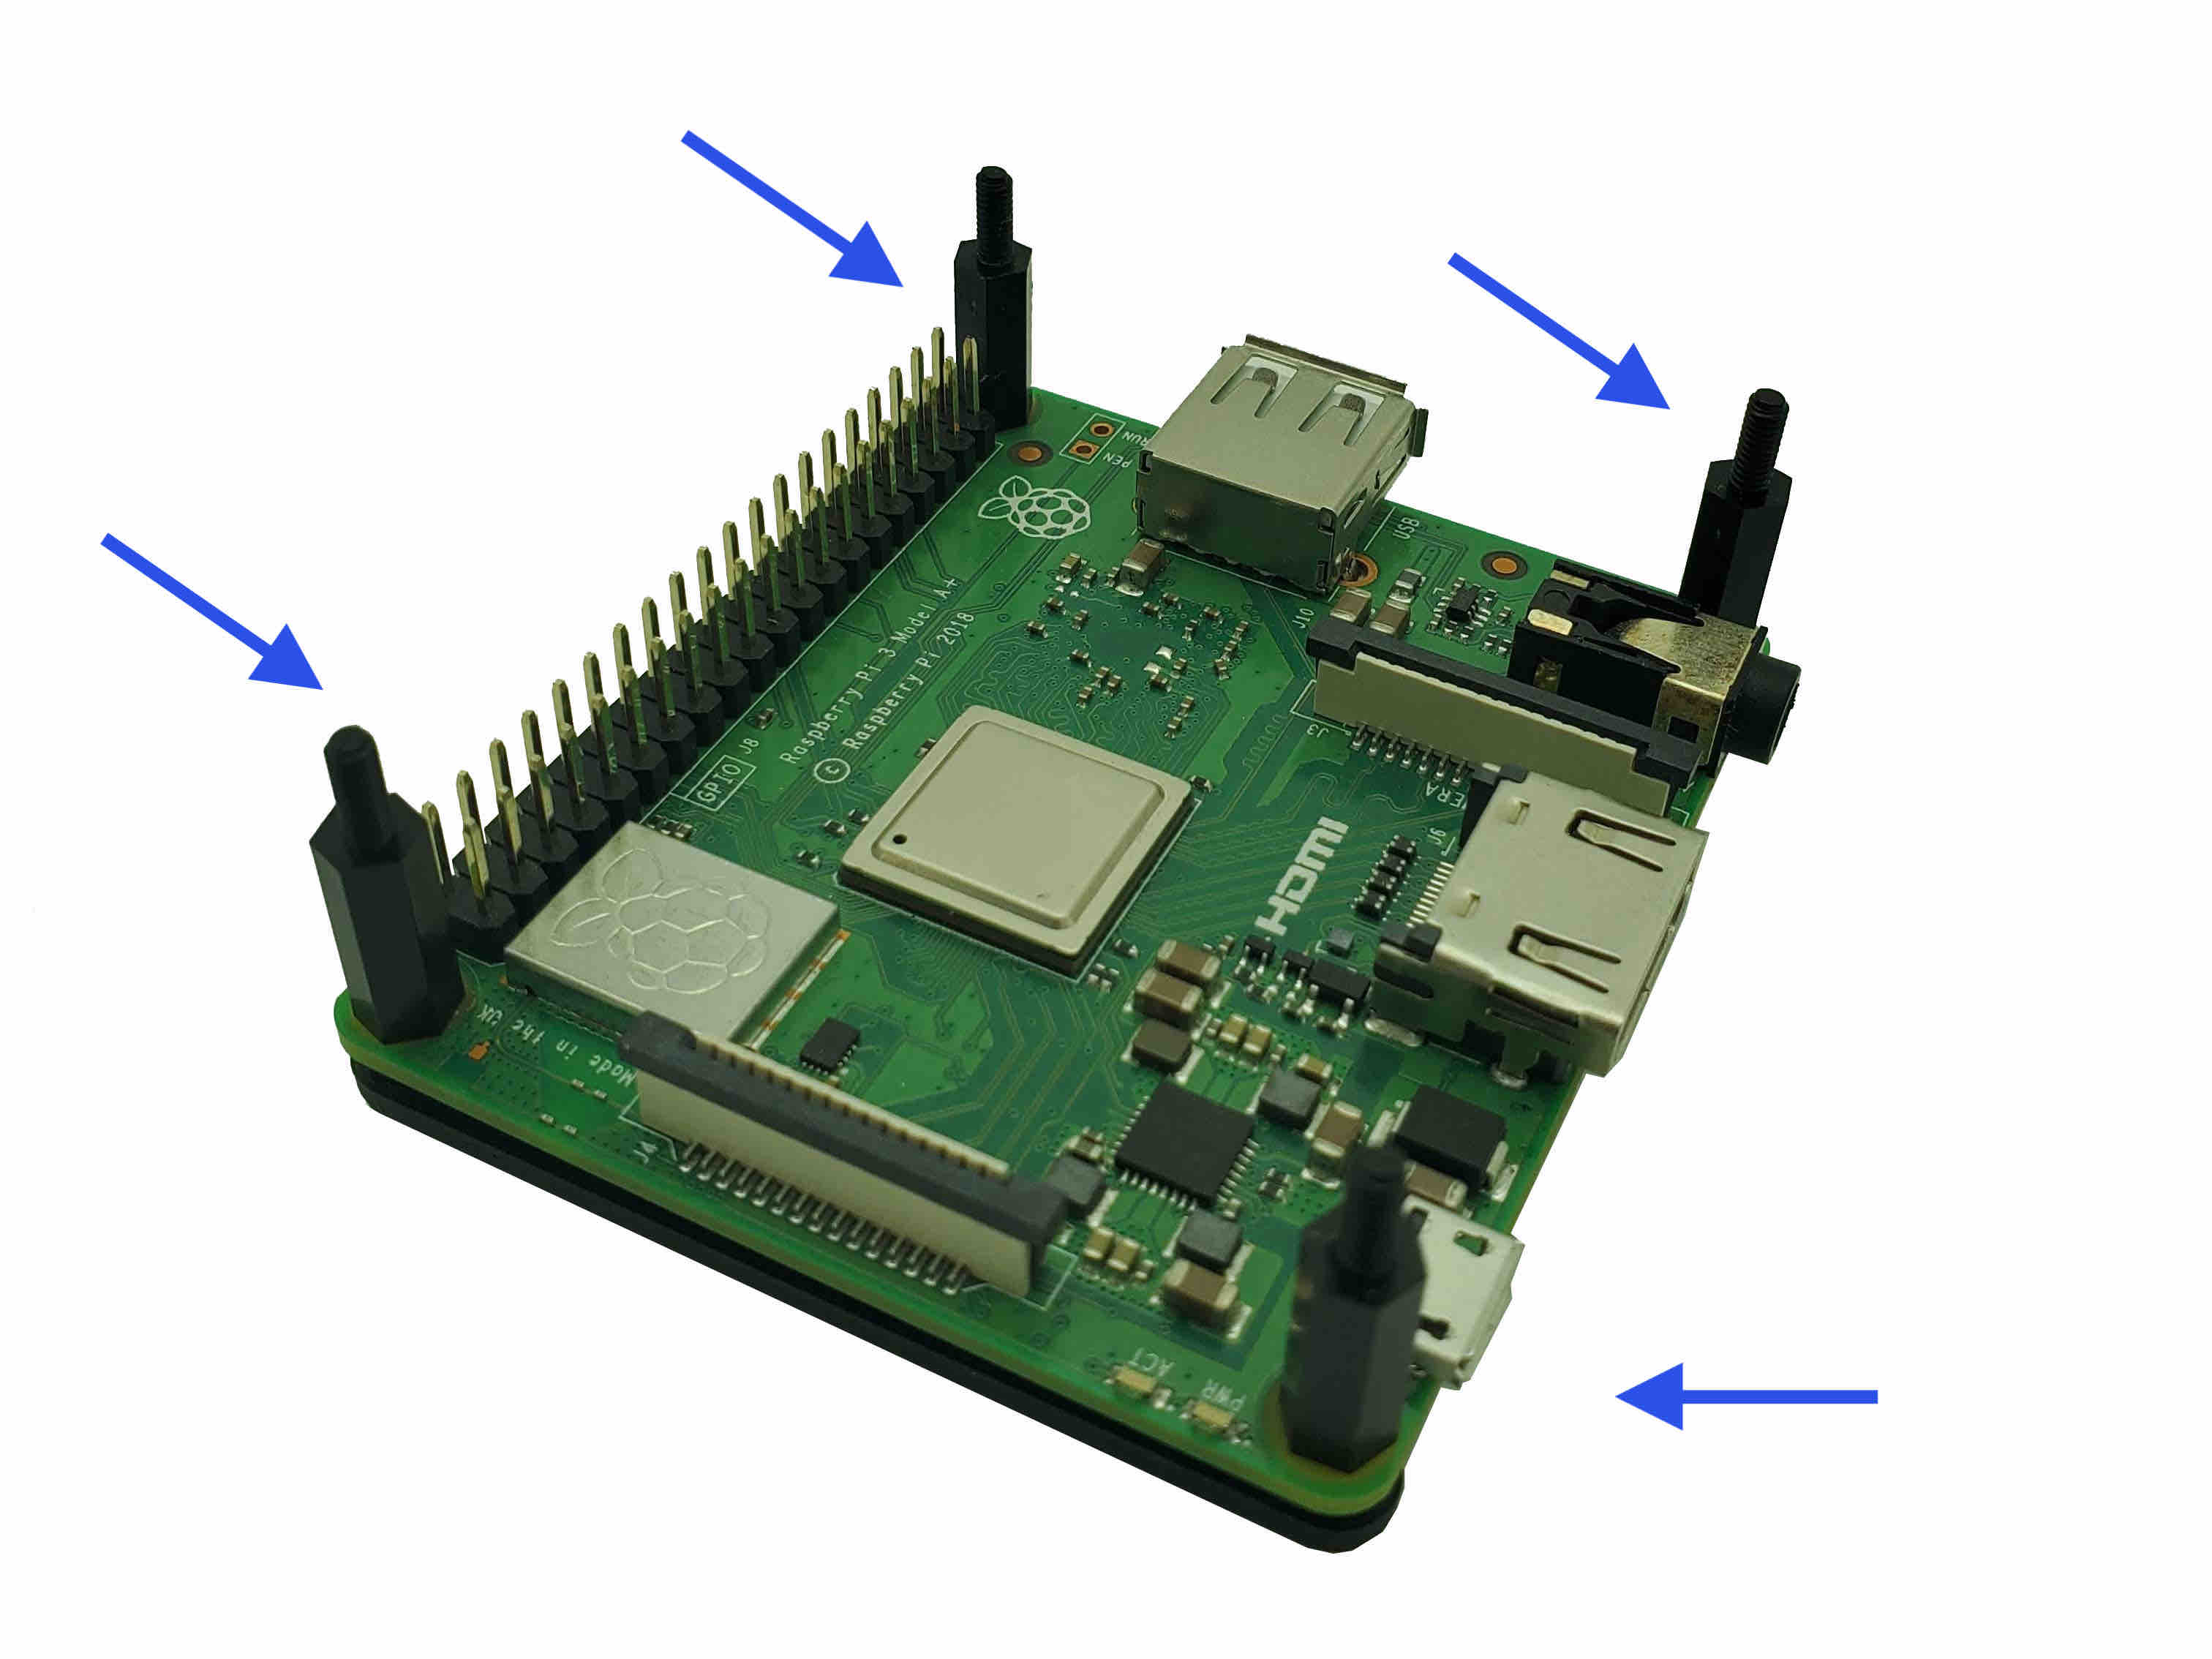
Step 3: Placing the HAT PCB on top (Raspberry Pi A or B) #
-
Hand screw on the M2.5 12mm hex standoffs-with-6mm-screw in each corner.
-
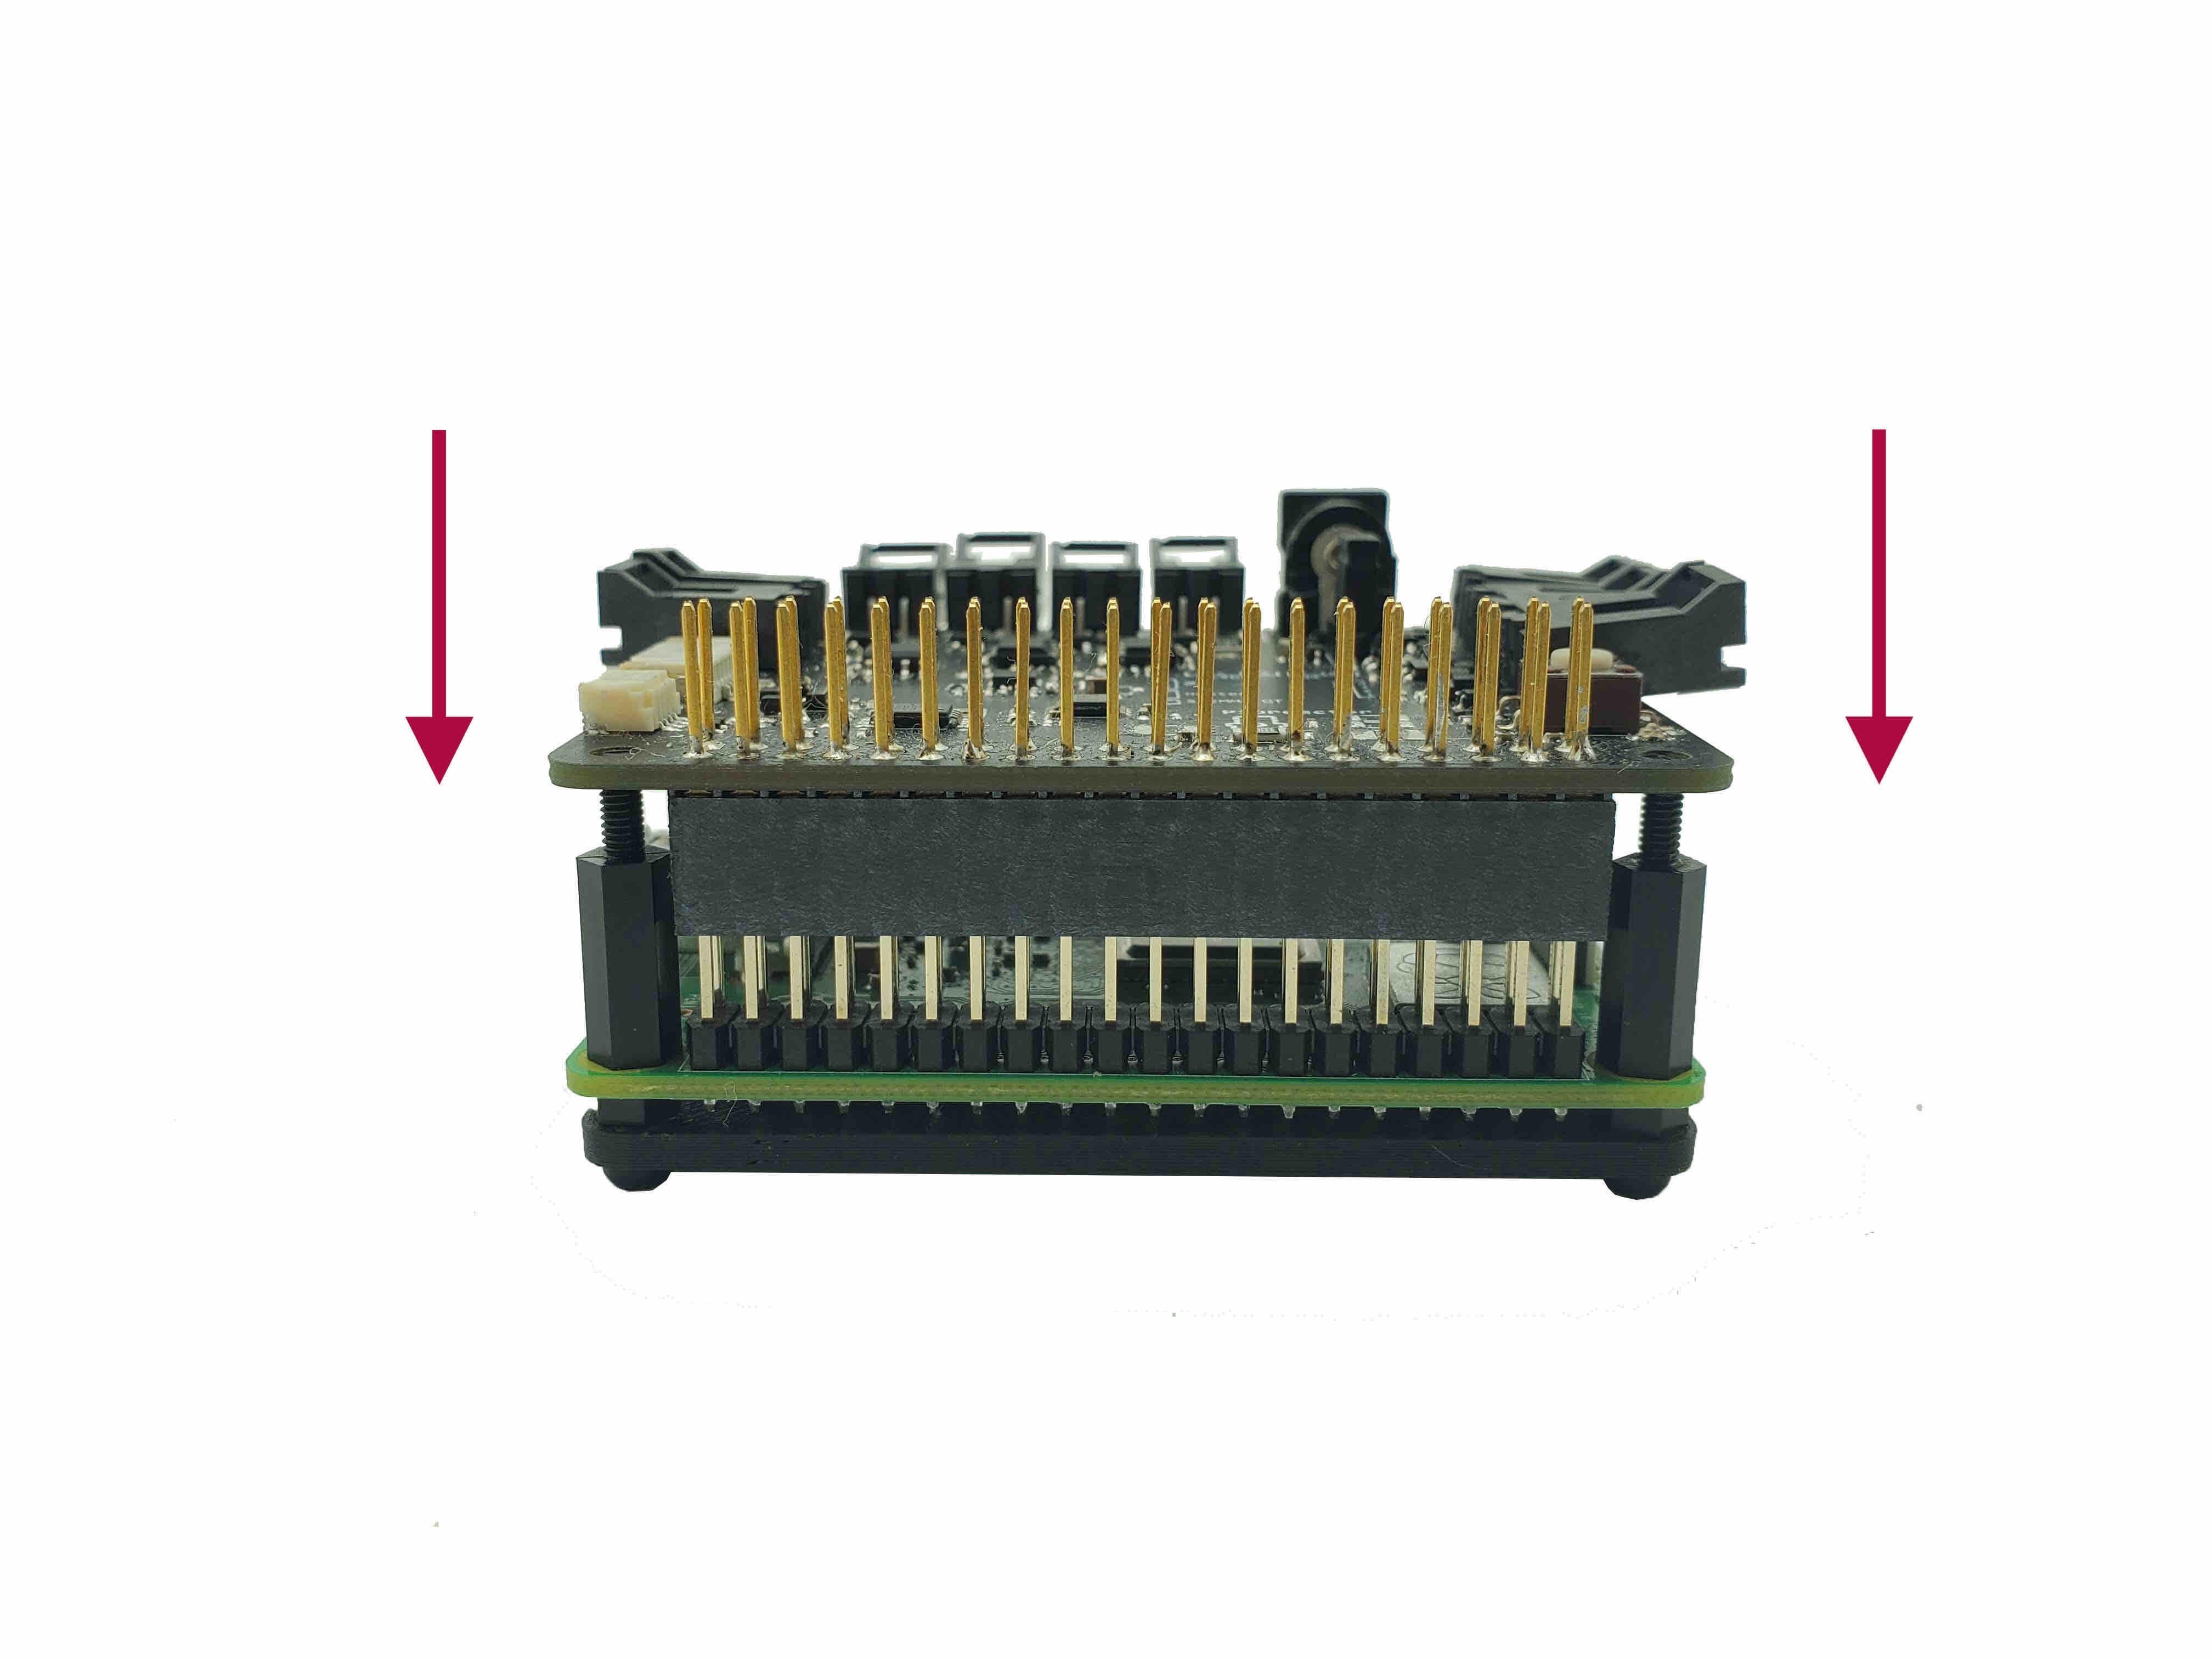
Place the HAT PCB on top. Push down from the corners to secure it in place. The HAT PCB's GPIO connector will line up with the RPi's GPIO pins and may require a slight force to compress down. You can also use the next Tip below to help apply force.
-
Hand screw the M2.5 12mm hex standoffs in each corner, on top of the HAT.
By screwing down the standoffs, they'll help compress the HAT onto the RPi, too.
- Put this aside and proceed to the next page.
Raspberry Pi Zero / Zero 2 instructions
Step 4: Assemble the bottom faceplate (Raspberry Pi Zero / Zero 2) #
The 40 GPIO pins (standing for general-purpose input/output) form a distinct row on one side of the Raspberry Pi. Note the orientation of these pins to help you assemble correctly!
- Orientation: the base will have a flat edge and an edge with an indent. The GPIO pins sit along the indent, seen on the left in the images.
- Insert the M2.5 g10mm screws into the holes.
- Hand screw the hexnuts on the screws along the flat edge of the bottom faceplate. Hexnuts are only needed on one side because of the size of the Raspberry Pi Zero.
- Place the Raspberry Pi along the indented edge of the faceplate, with the GPIO pins on the left.
- Hand screw on the M2.5 12mm hex standoffs-with-6mm-screw in each corner.
Step 5: Placing the HAT PCB on top (Raspberry Pi Zero / Zero 2) #
-
Place the HAT on top. Push down to secure it in place. The HAT PCB's GPIO connector will line up with the RPi's GPIO pins, and may require a slight force to compress down. You can also use the next Tip below to help apply force.
-
Hand screw the M2.5 12mm hex standoffs in each corner, on top of the HAT.
By screwing down the standoffs, you can use these standoffs to help compress the HAT onto the RPi, too.
- Put this aside and proceed to the next page.