Disassembling the old Pioreactor
Step 1: Unplug and disassemble the optics system #
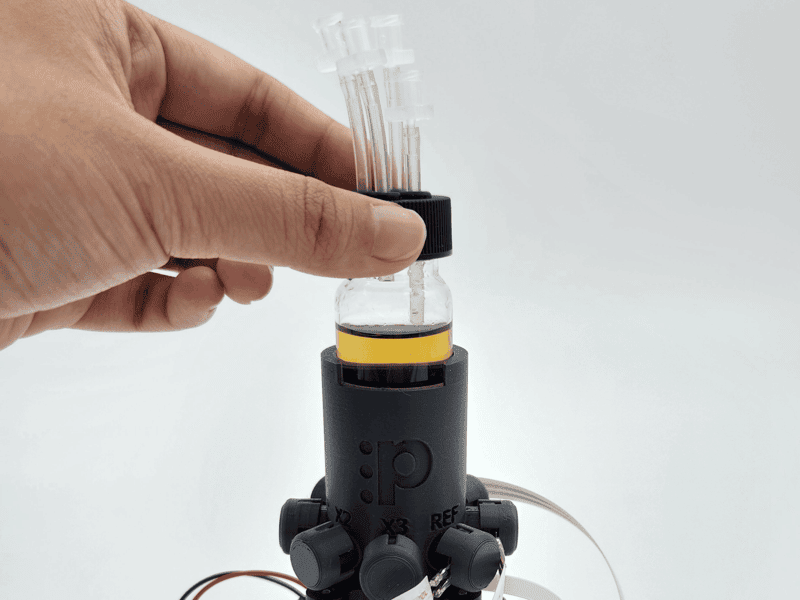
- Remove any vial placed in the vial holder.
- Carefuly remove the LED caps. Set these aside.
- Remove LED and PDs from their sockets.
caution
If the LEDs/PDs are stuck in the socket, do not pull! Gently twist the bulb until it loosens from the socket to safely remove it.
- Unplug the LED and PDs from the HAT. Set aside the LED and PDs for later.
- Unplug the fan and the heater flat-flex cable from the HAT.
Step 2: Remove the top assembly from the base #
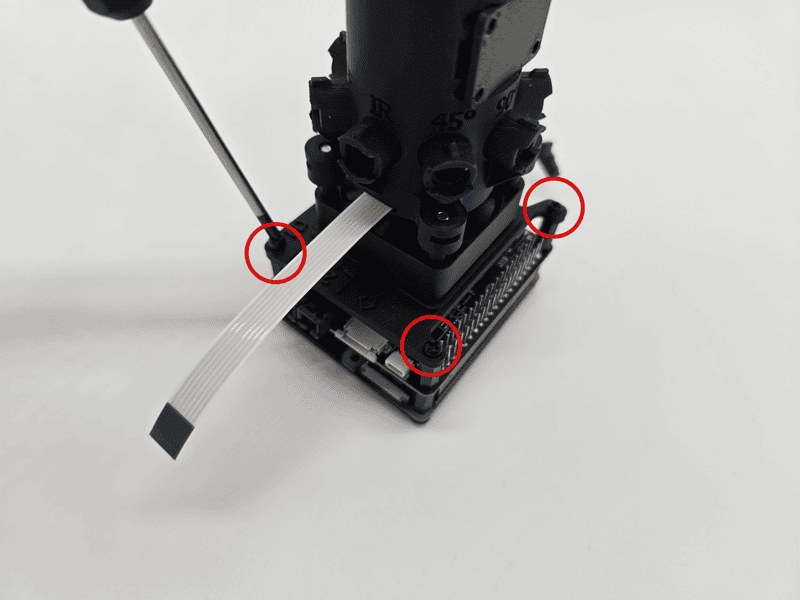
- Remove the four M2.5 6mm screws from the top faceplate. Set screws aside. The top assembly of your Pioreactor should now be separate from the HAT and Raspberry Pi.
- Partially unscrew the M3 30mm screws from the bottom of the faceplate, separating it from the vial holder.
- Remove the stirring fan from the faceplate. If required, use the screwdriver to carefully lever the fan out, applying force alternatively from all four sides. Set the fan aside for later.
Step 3: Remove the heater PCB from the vial holder #
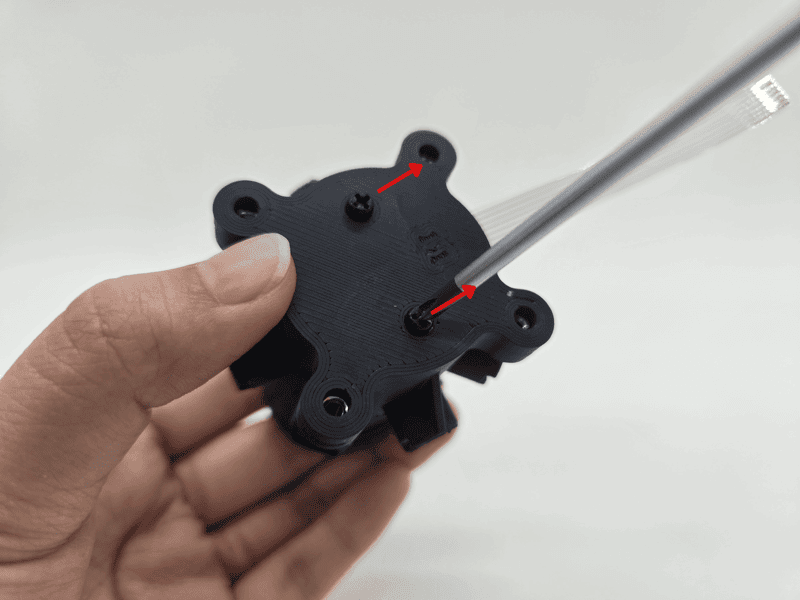
- Unscrew the two M2.5 4mm screws from the bottom of the vial holder. Set these screws aside for later.
- Remove the heater PCB and wire from the vial holder. Set aside for later.
Step 4: Remove the window cover #
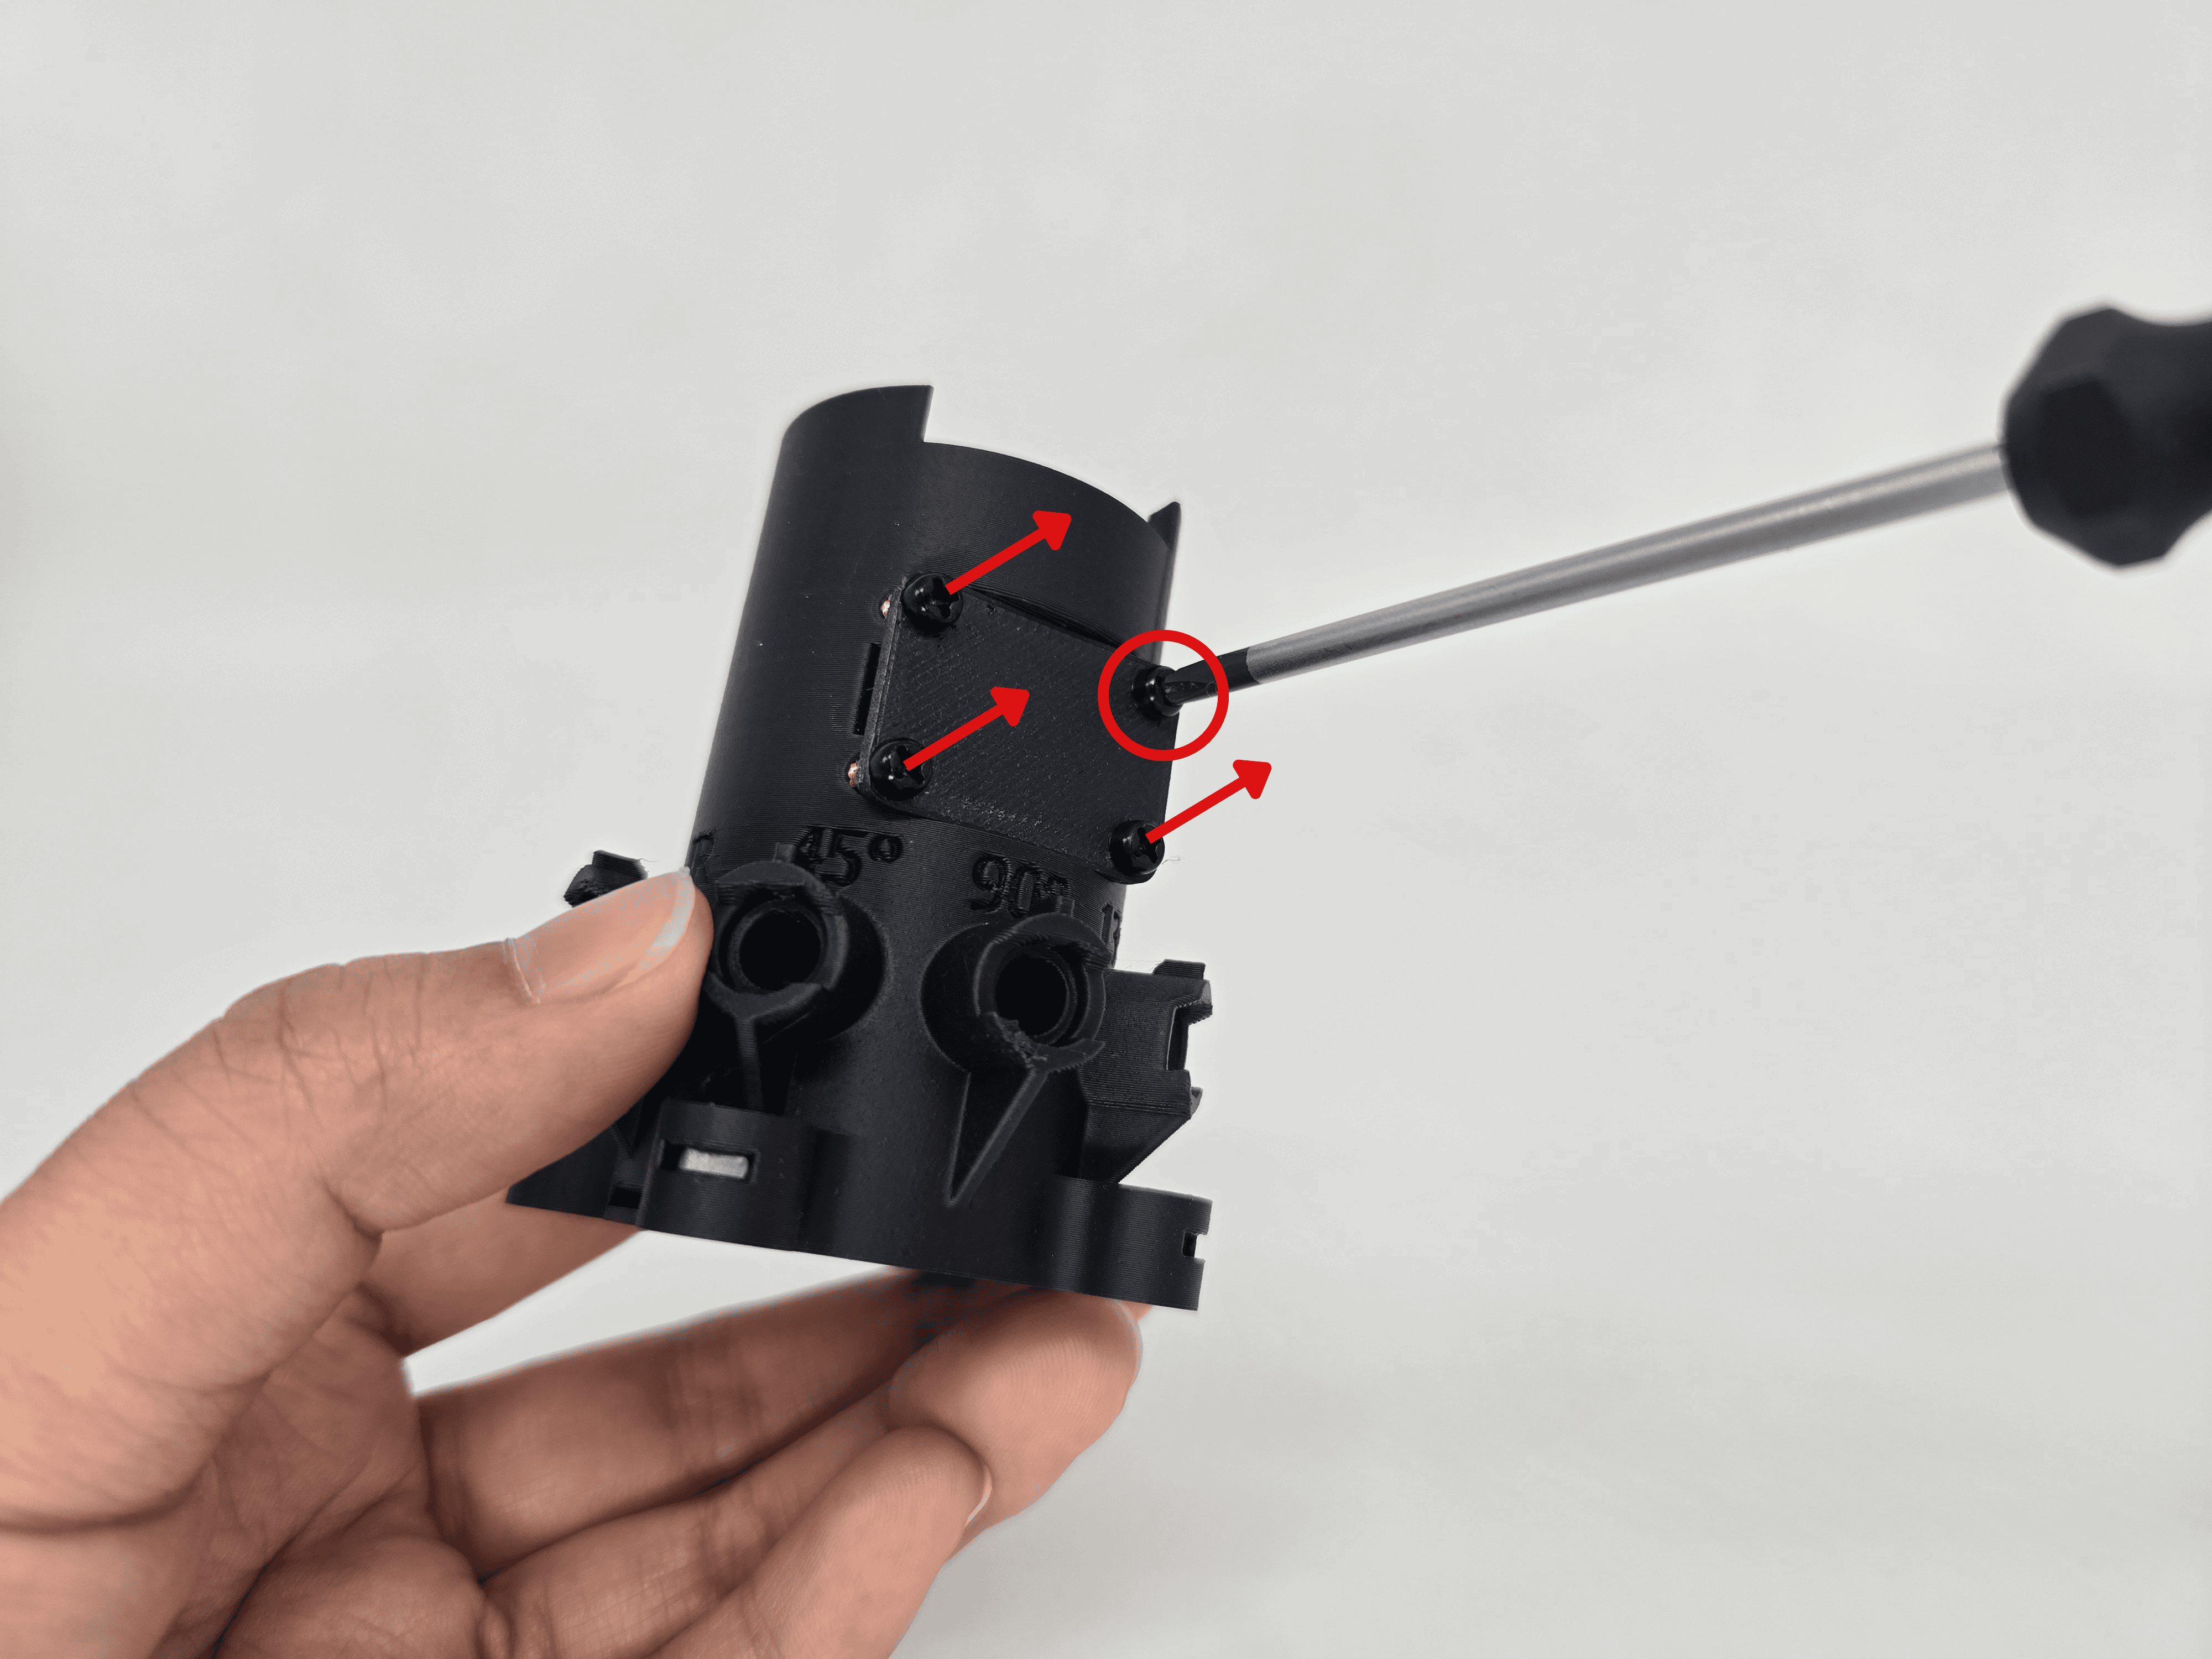
- Unscrew the M2.5 6mm screws that secure the window cover to the vial holder.
- Set aside the window cover.
Step 5: Items to be reused #
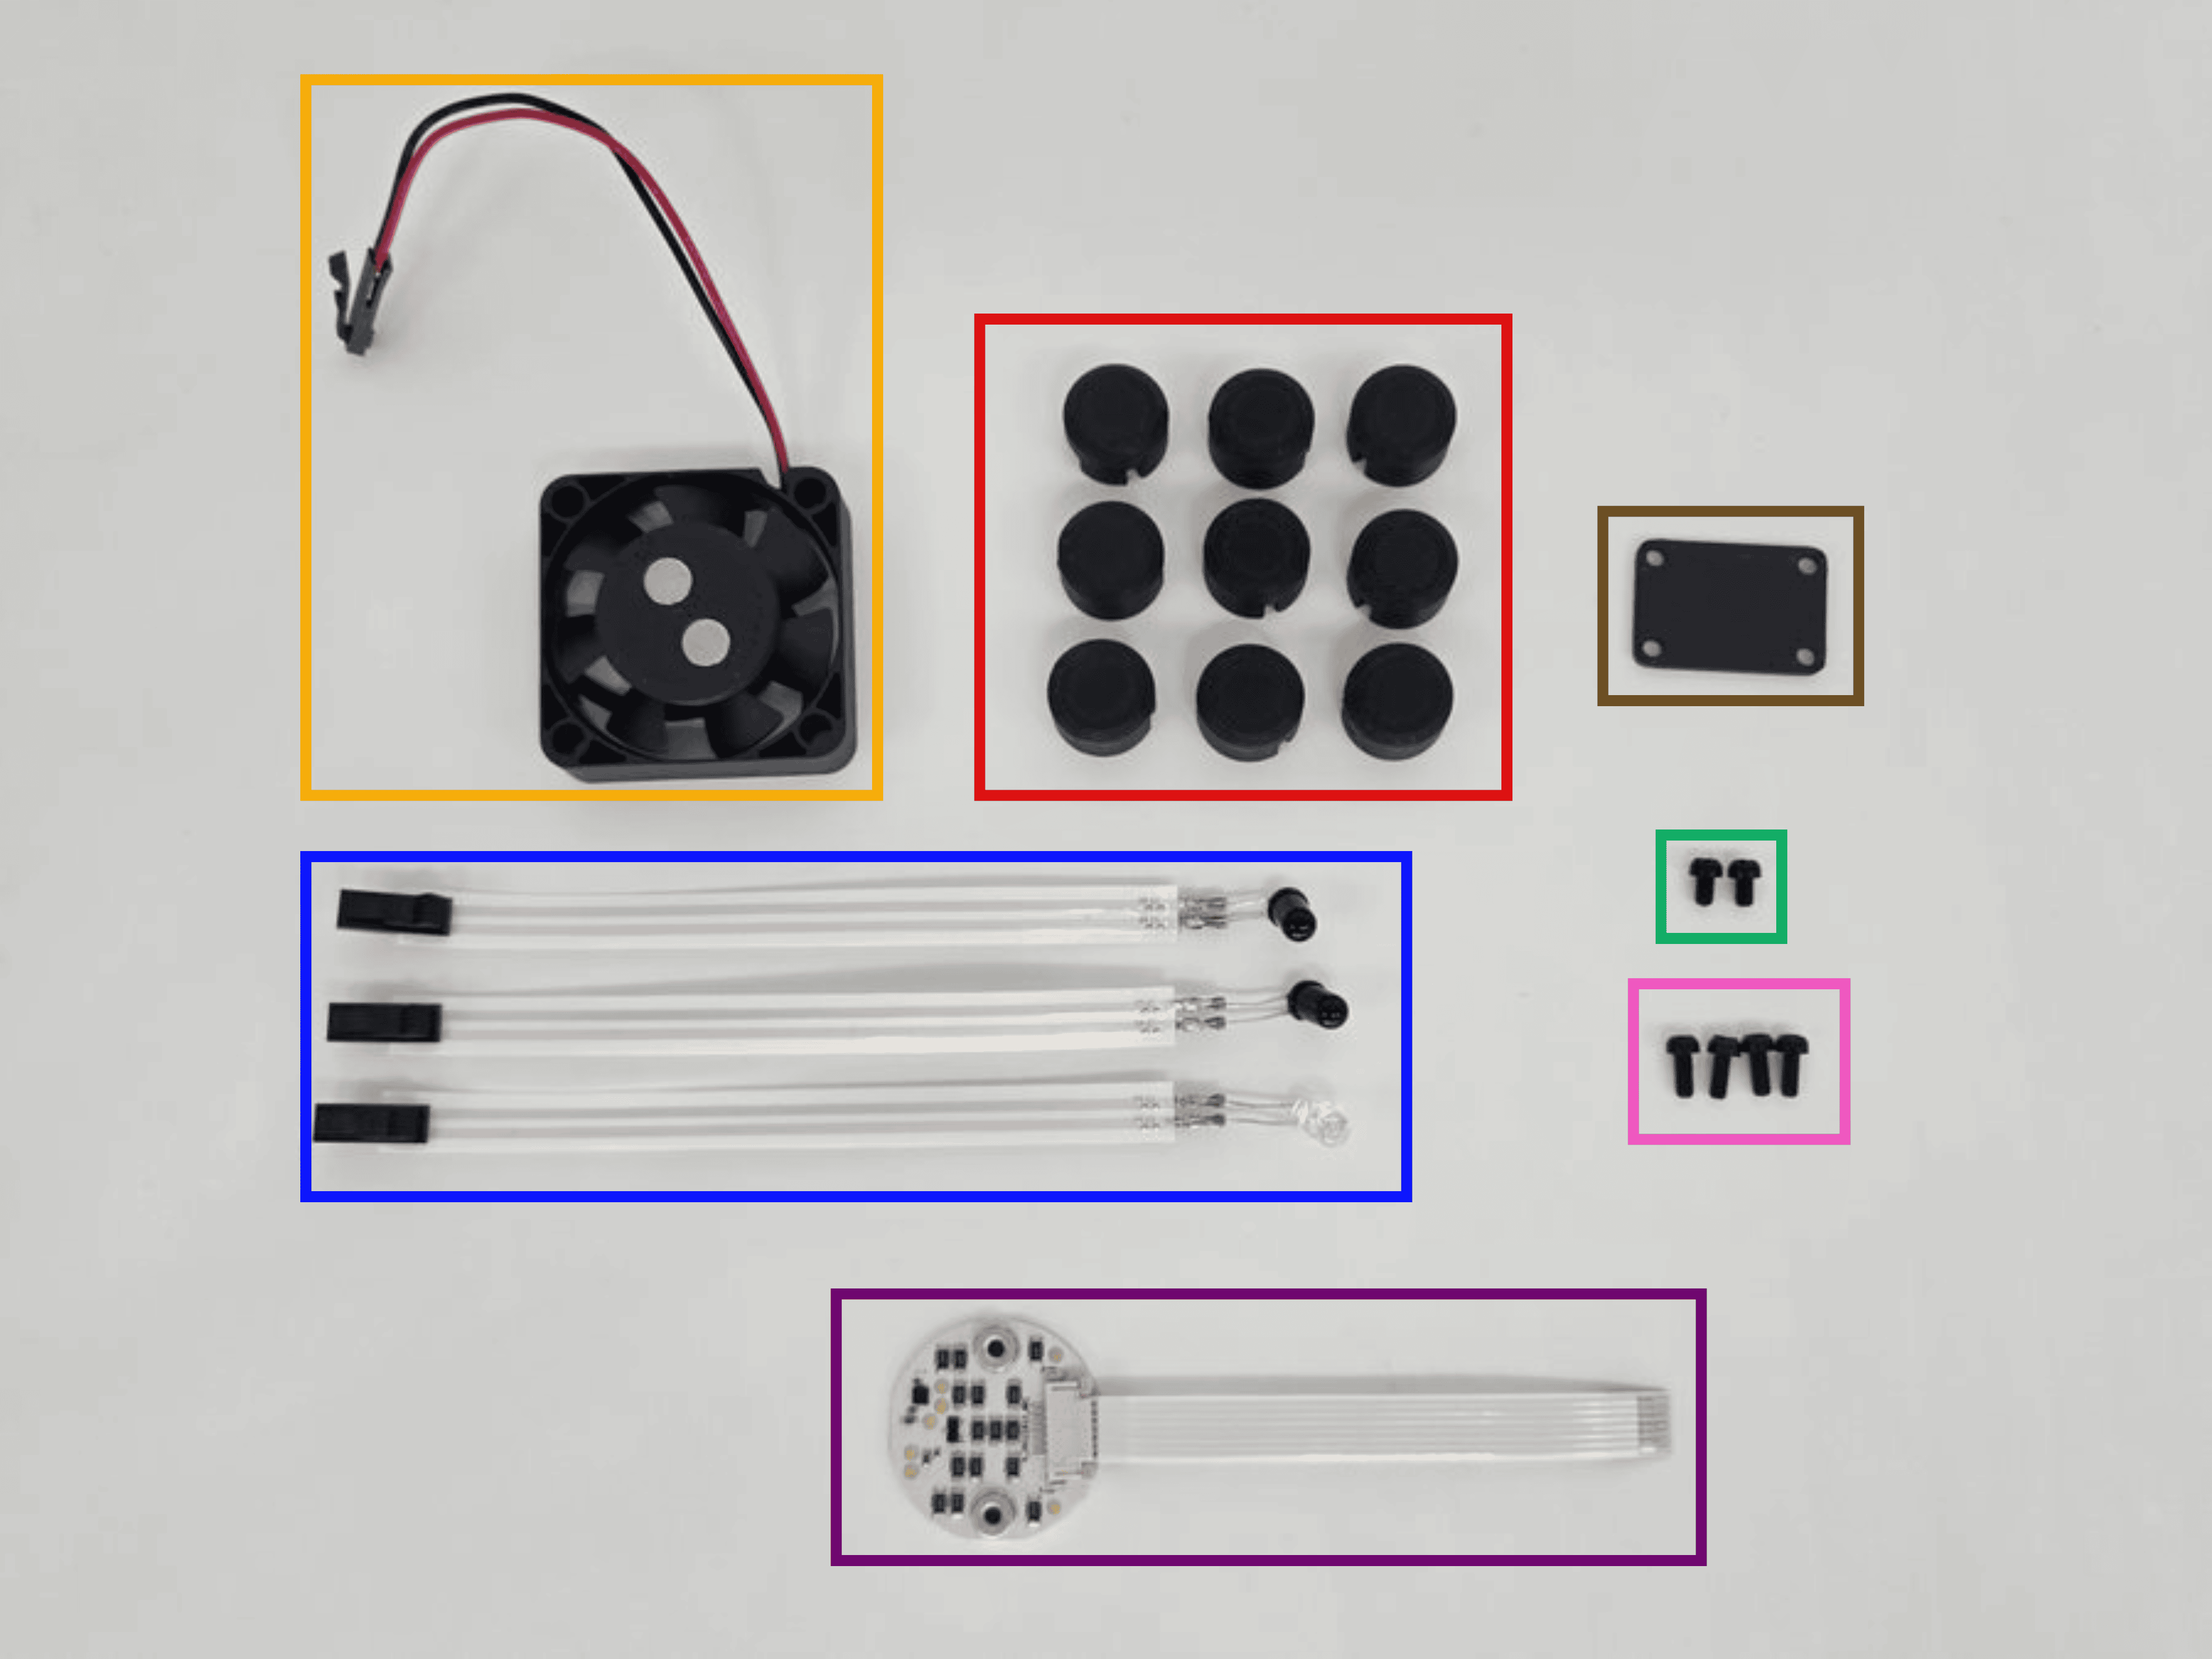
The following items from the disassembled v1.0 Pioreactor should be set aside to be used for the upgrade:
- LED (1x) and PDs (2x)
- Vial caps (6x or more)
- M2.5 6mm screws (4x)
- M2.5 4mm screws (2x)
- Stirring fan
- Heater PCB
- Window cover
Proceed to the next page to continue.