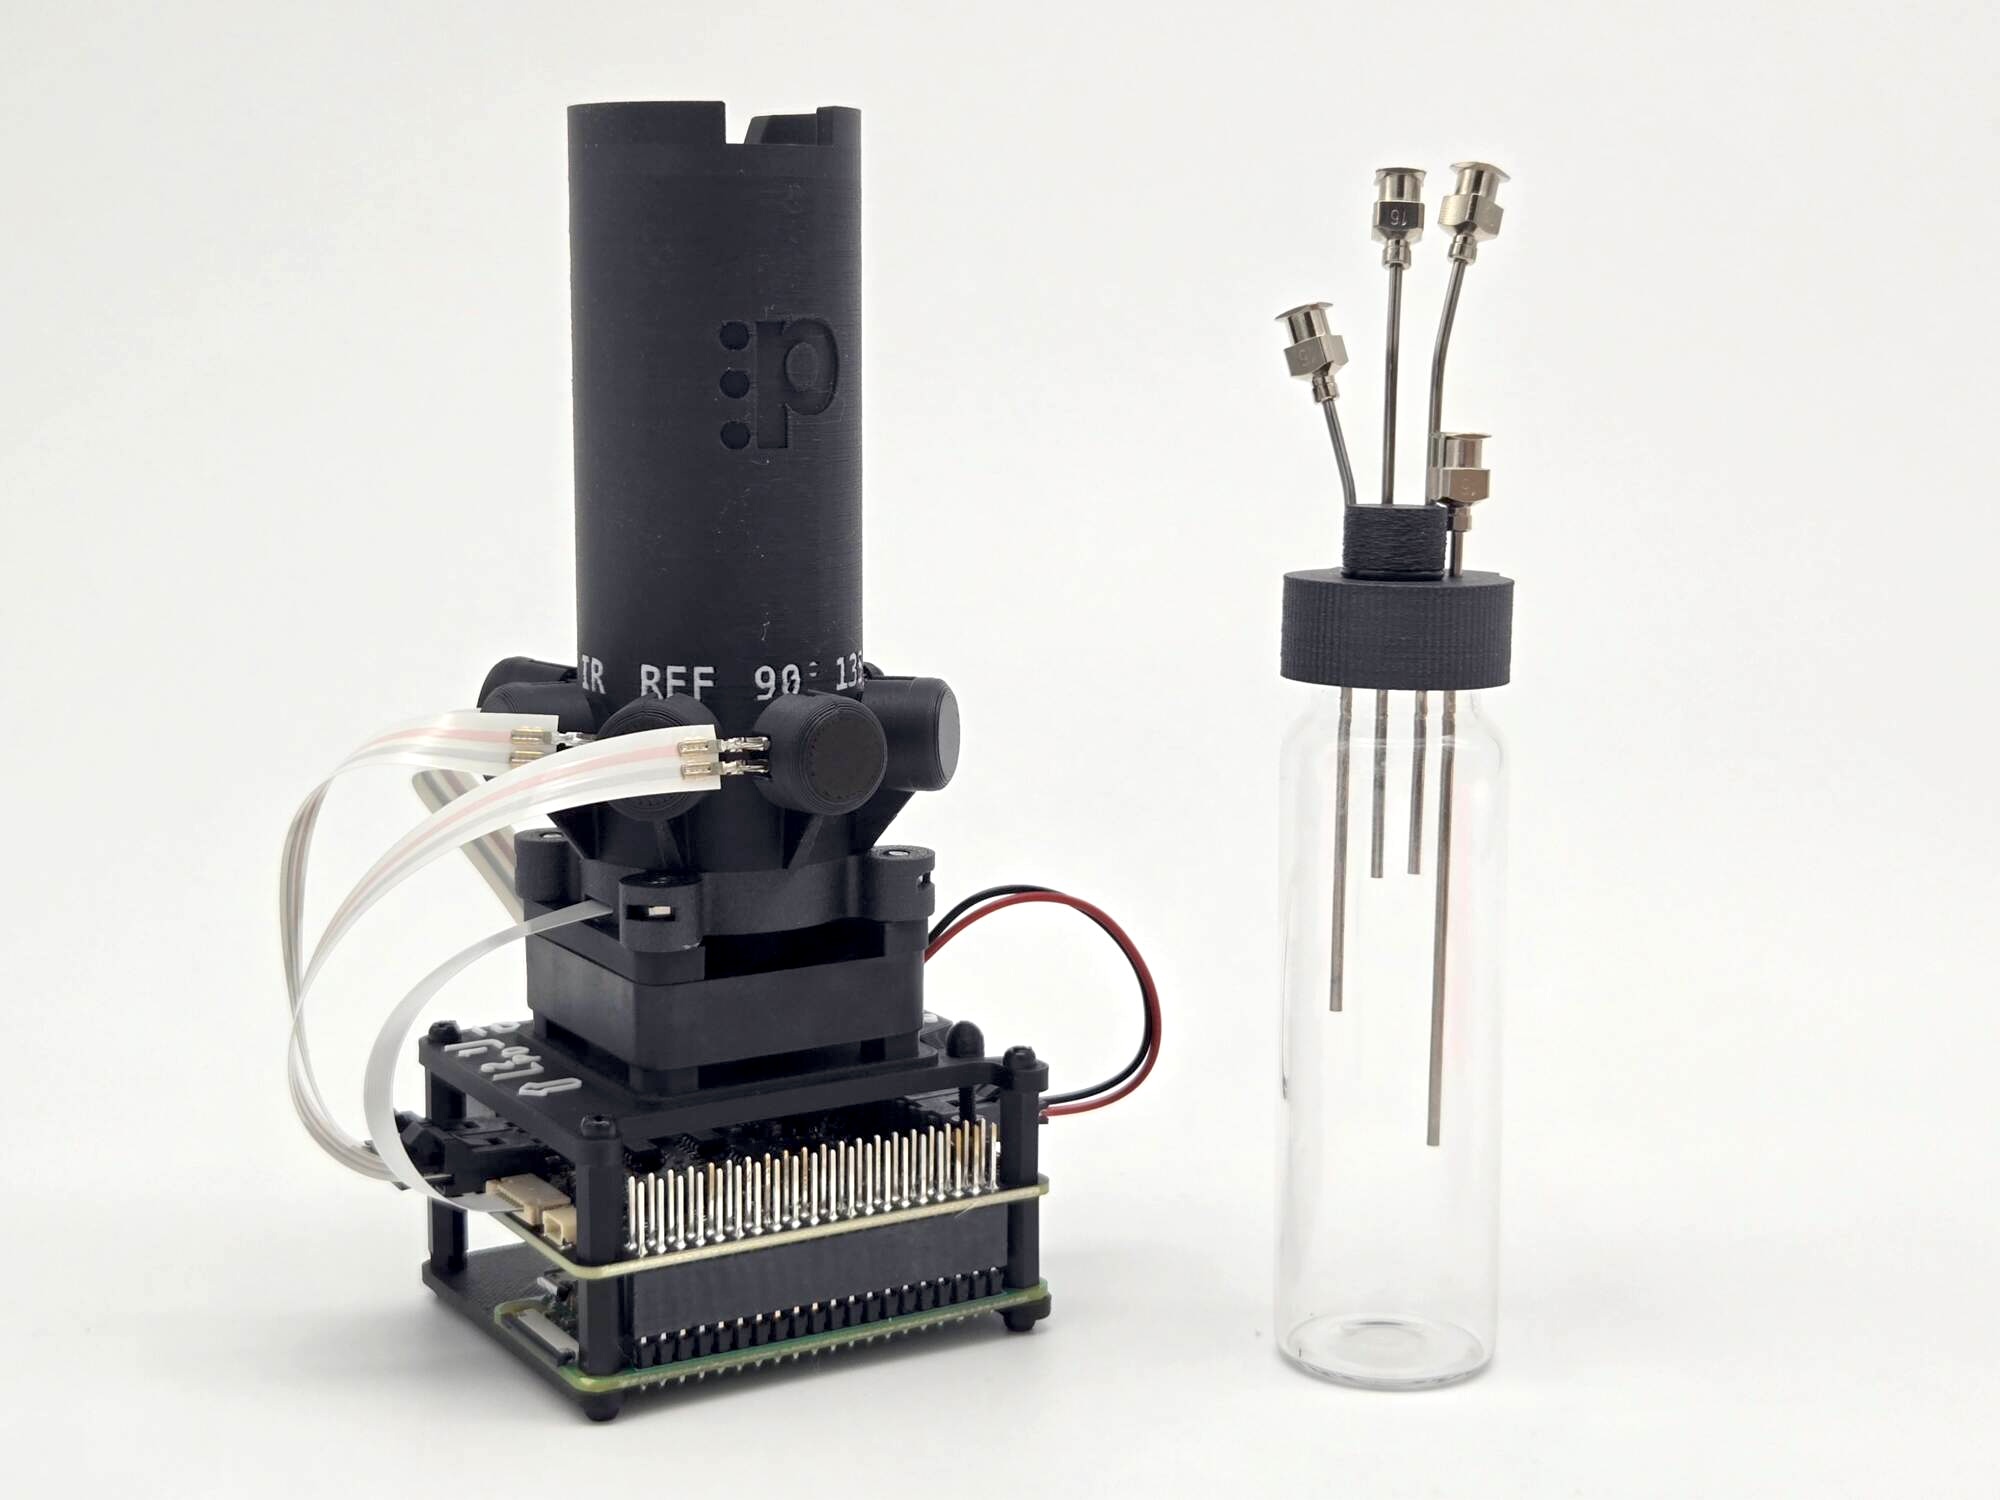
Connect the optics system
Step 1: Necessary parts #
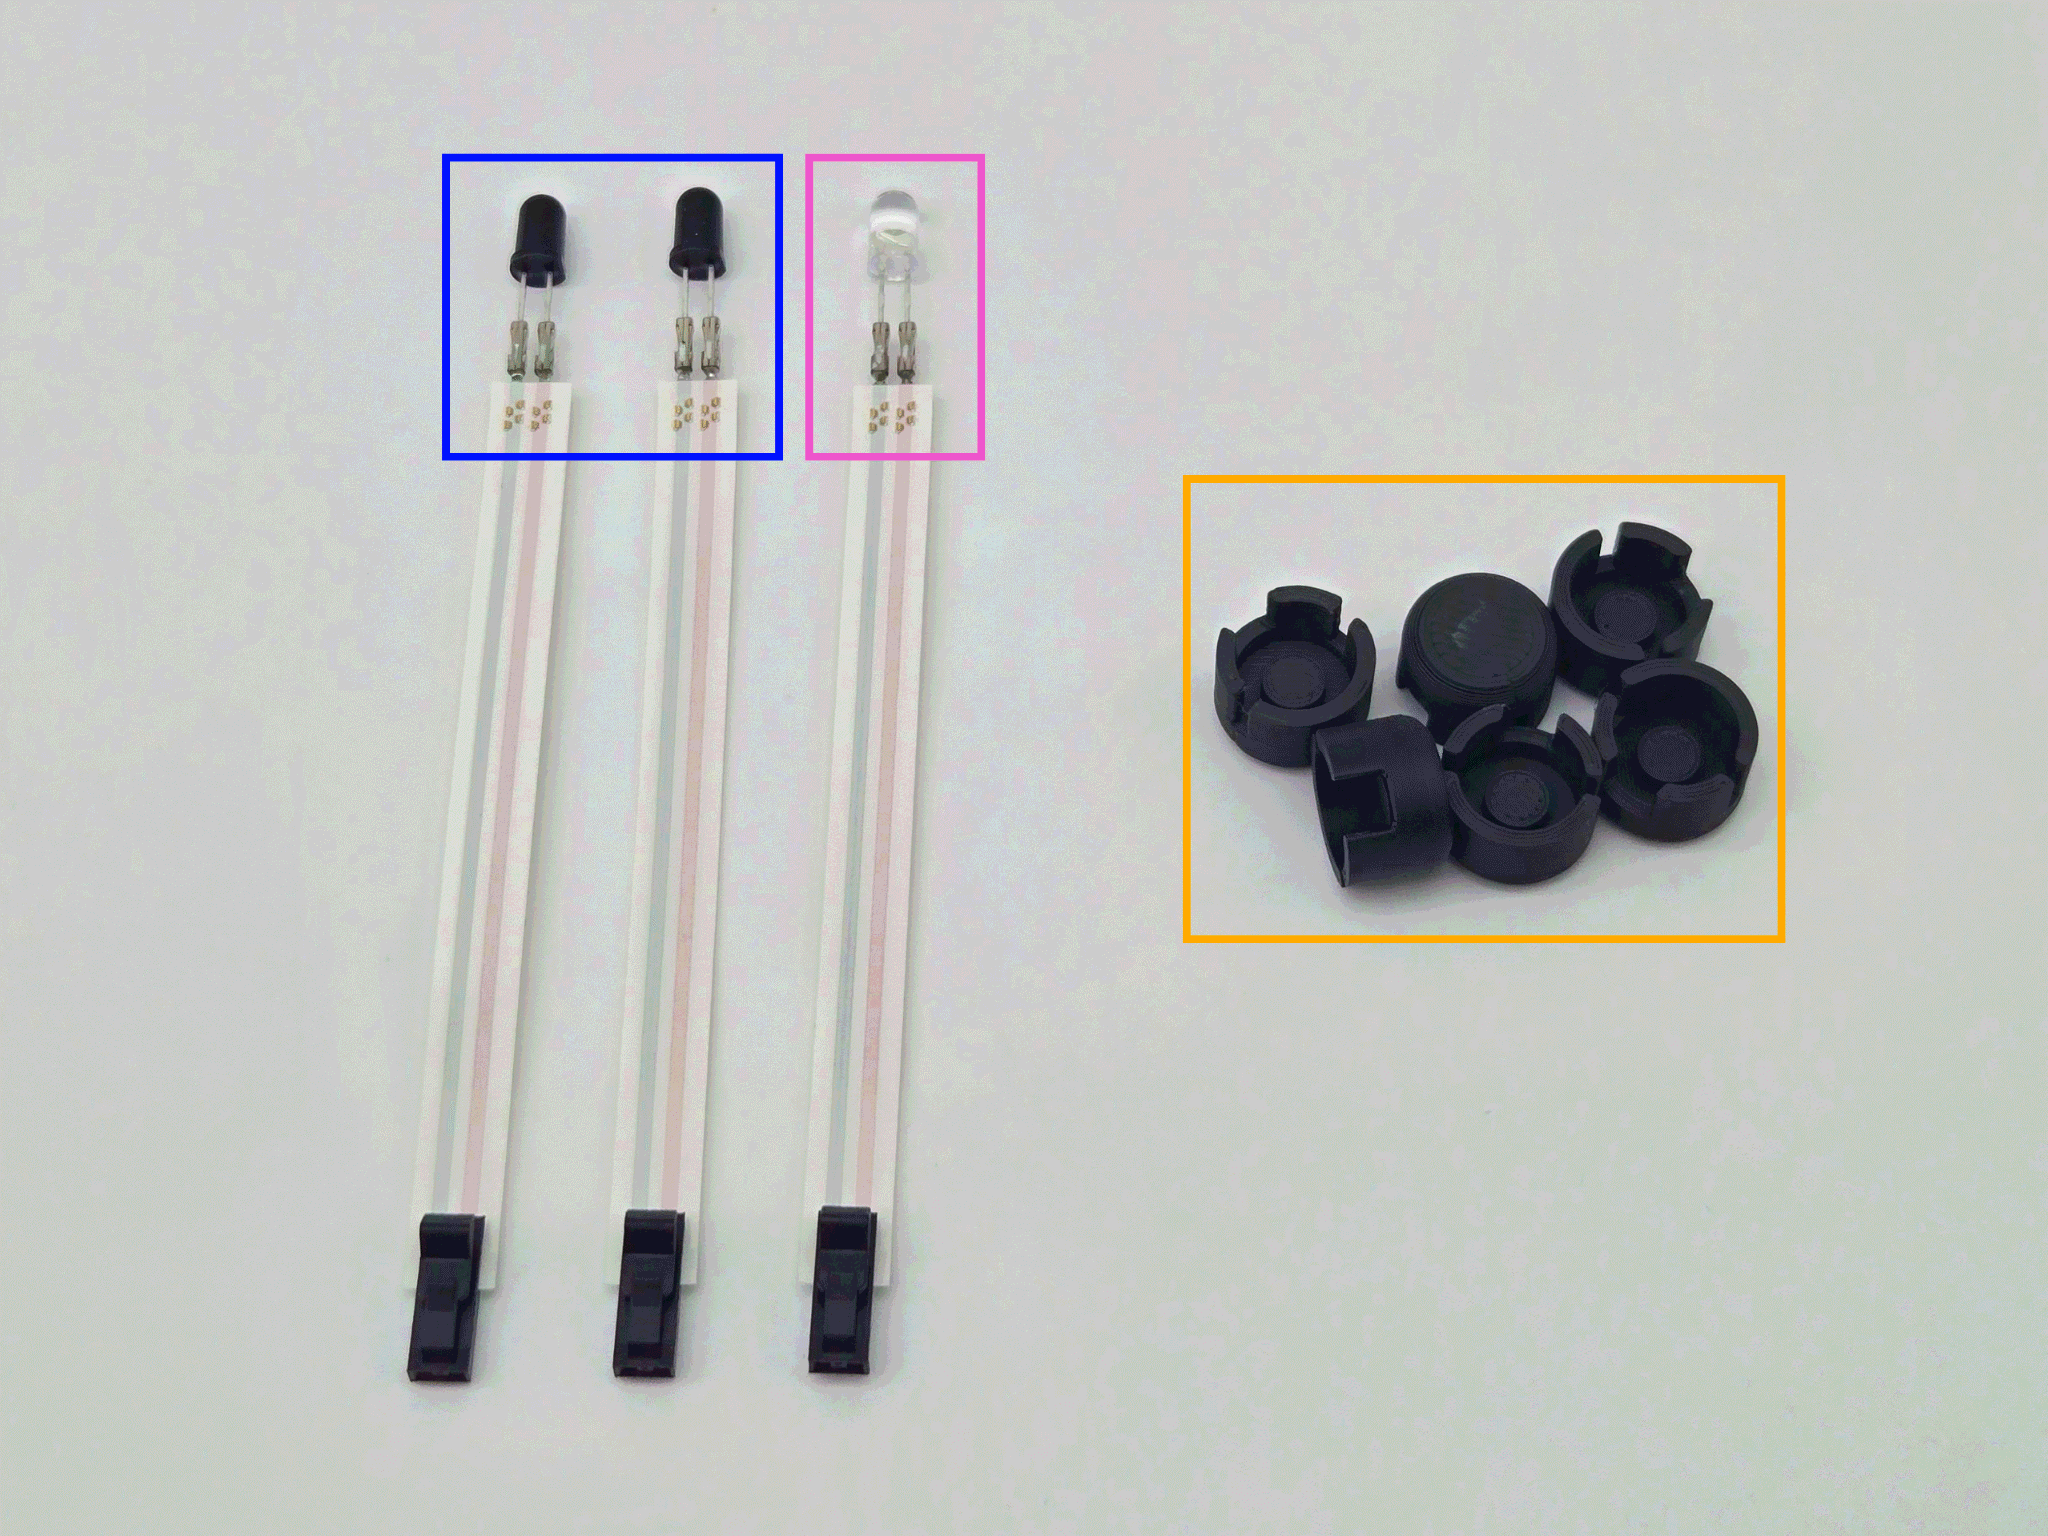
- You will need:
- PD cables (2x)
- IR cable (1x)
- LED caps
tip
Inspect each IR and PD to confirm that their leads are not touching each other.
Step 2: Connect the IR cable (IR → Channel A) #
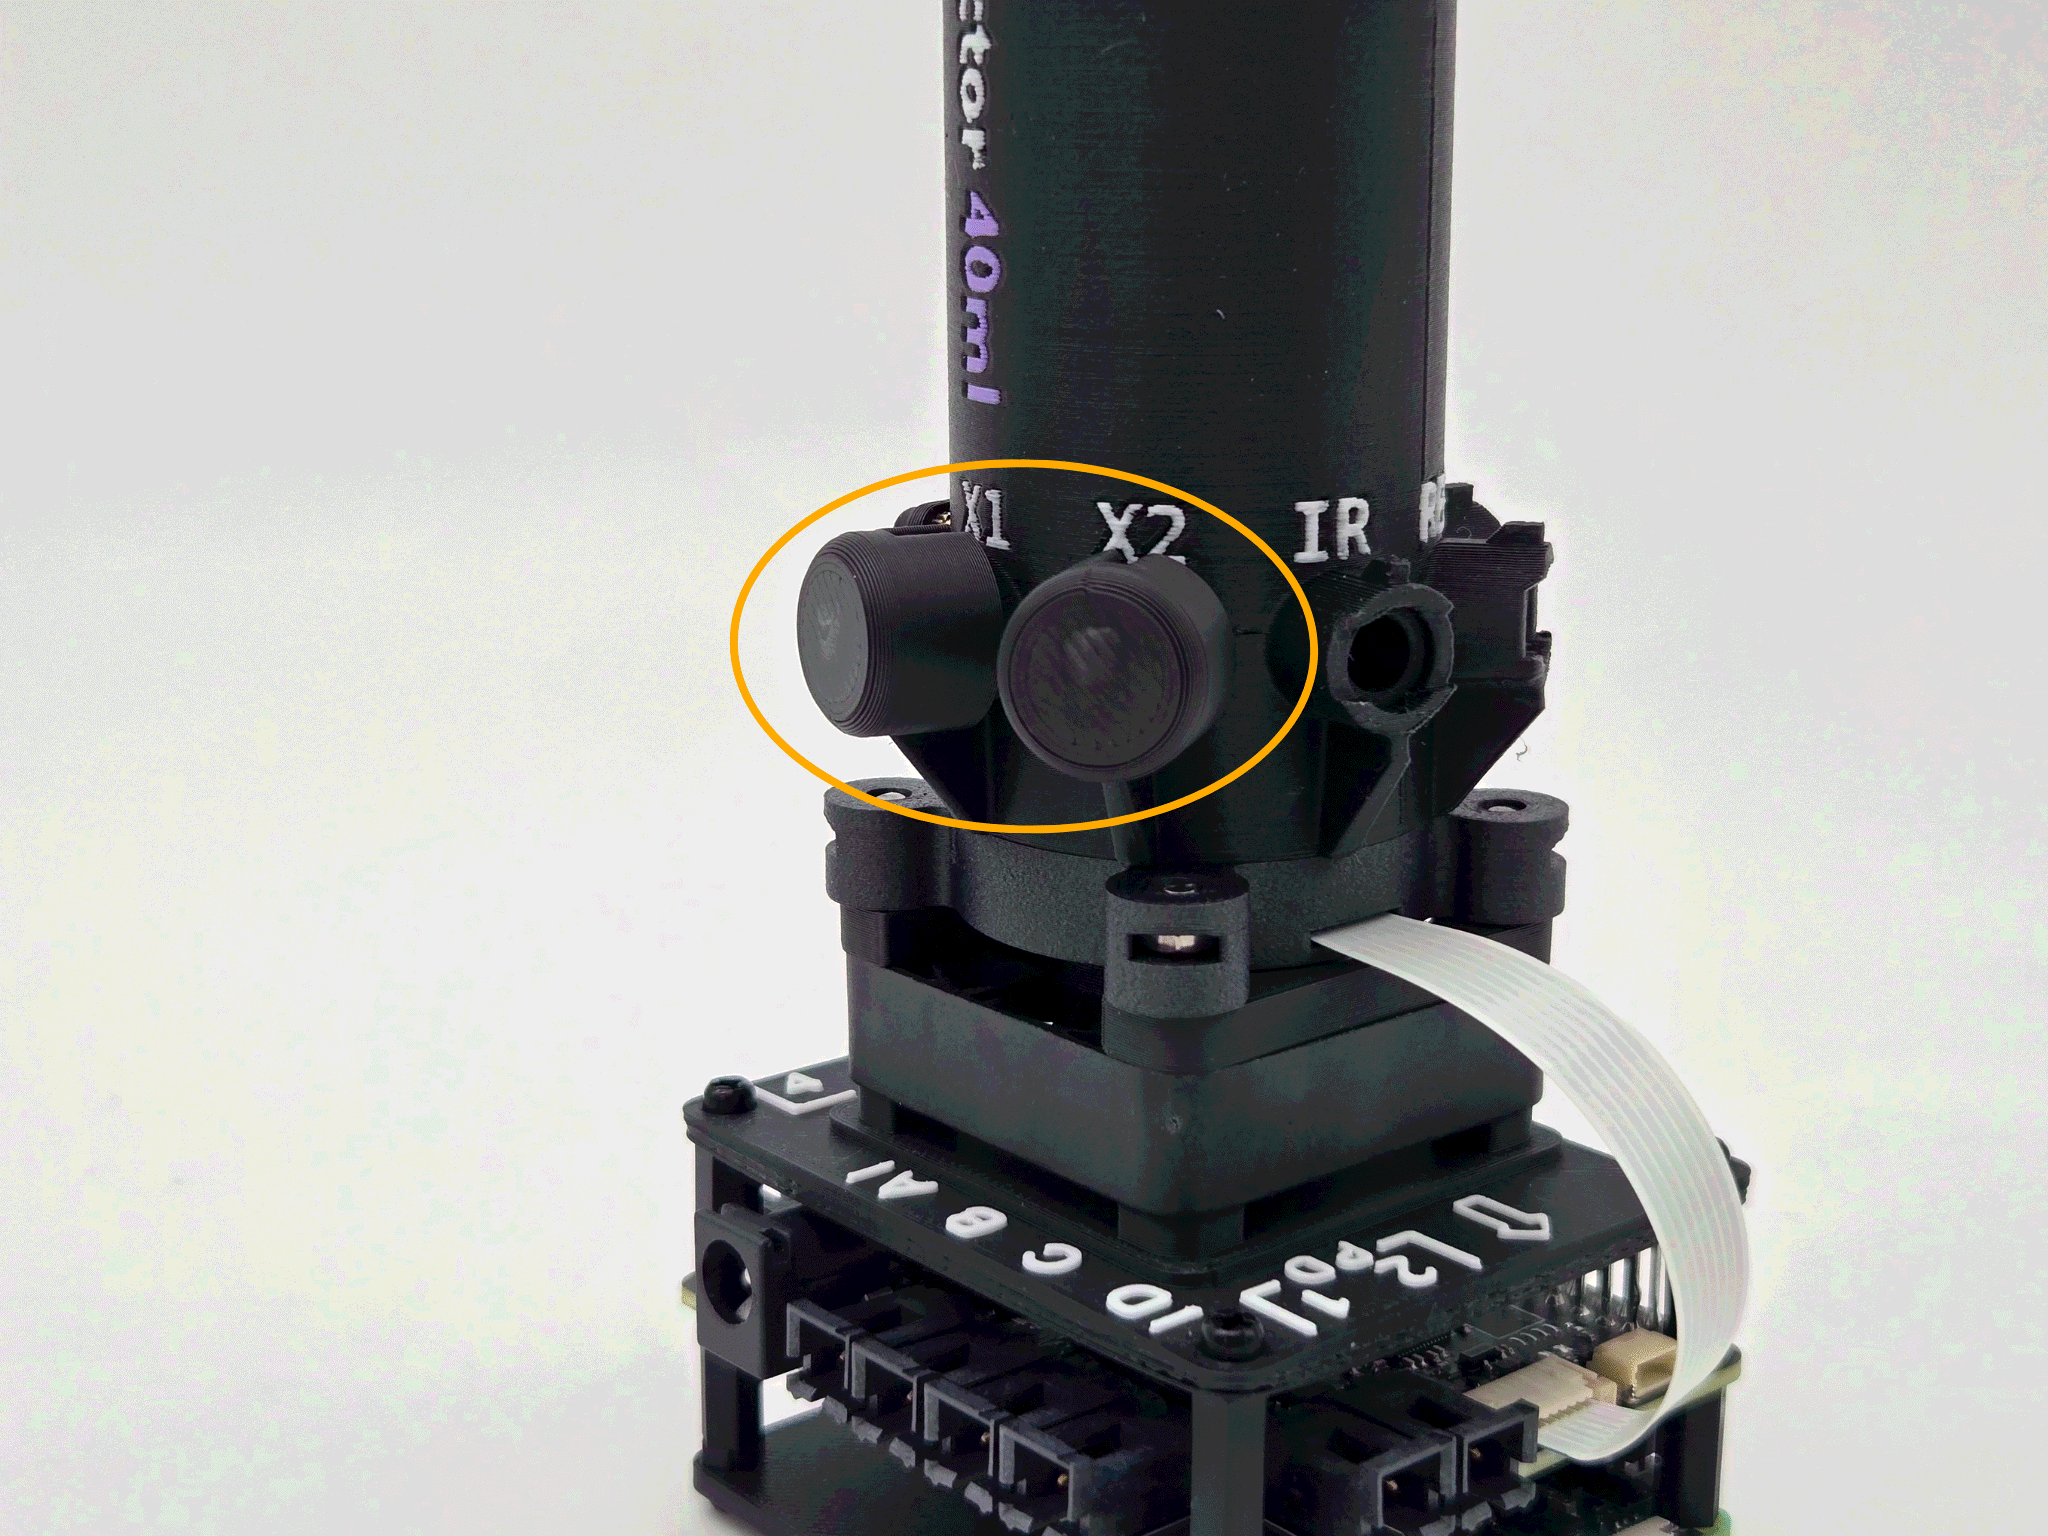
- Secure LED caps over the X1 and X2 pockets on the vial holder.
- With the tab of the black connector pointed left, insert the bulb of the IR cable into the pocket labeled IR. See image.
- Slowly bend the bulb's leads 90 degrees towards the left. The black connector tab should be facing away.
caution
Avoid over-stressing the leads, or applying too much force too quickly. After bending once, it's ill-advised to bend them again.
- Secure the bulb with an LED cap.
- Insert the connector of the IR cable into channel A (labelled on the faceplate).
Step 3: Connect PD cable (REF → Channel 1) #
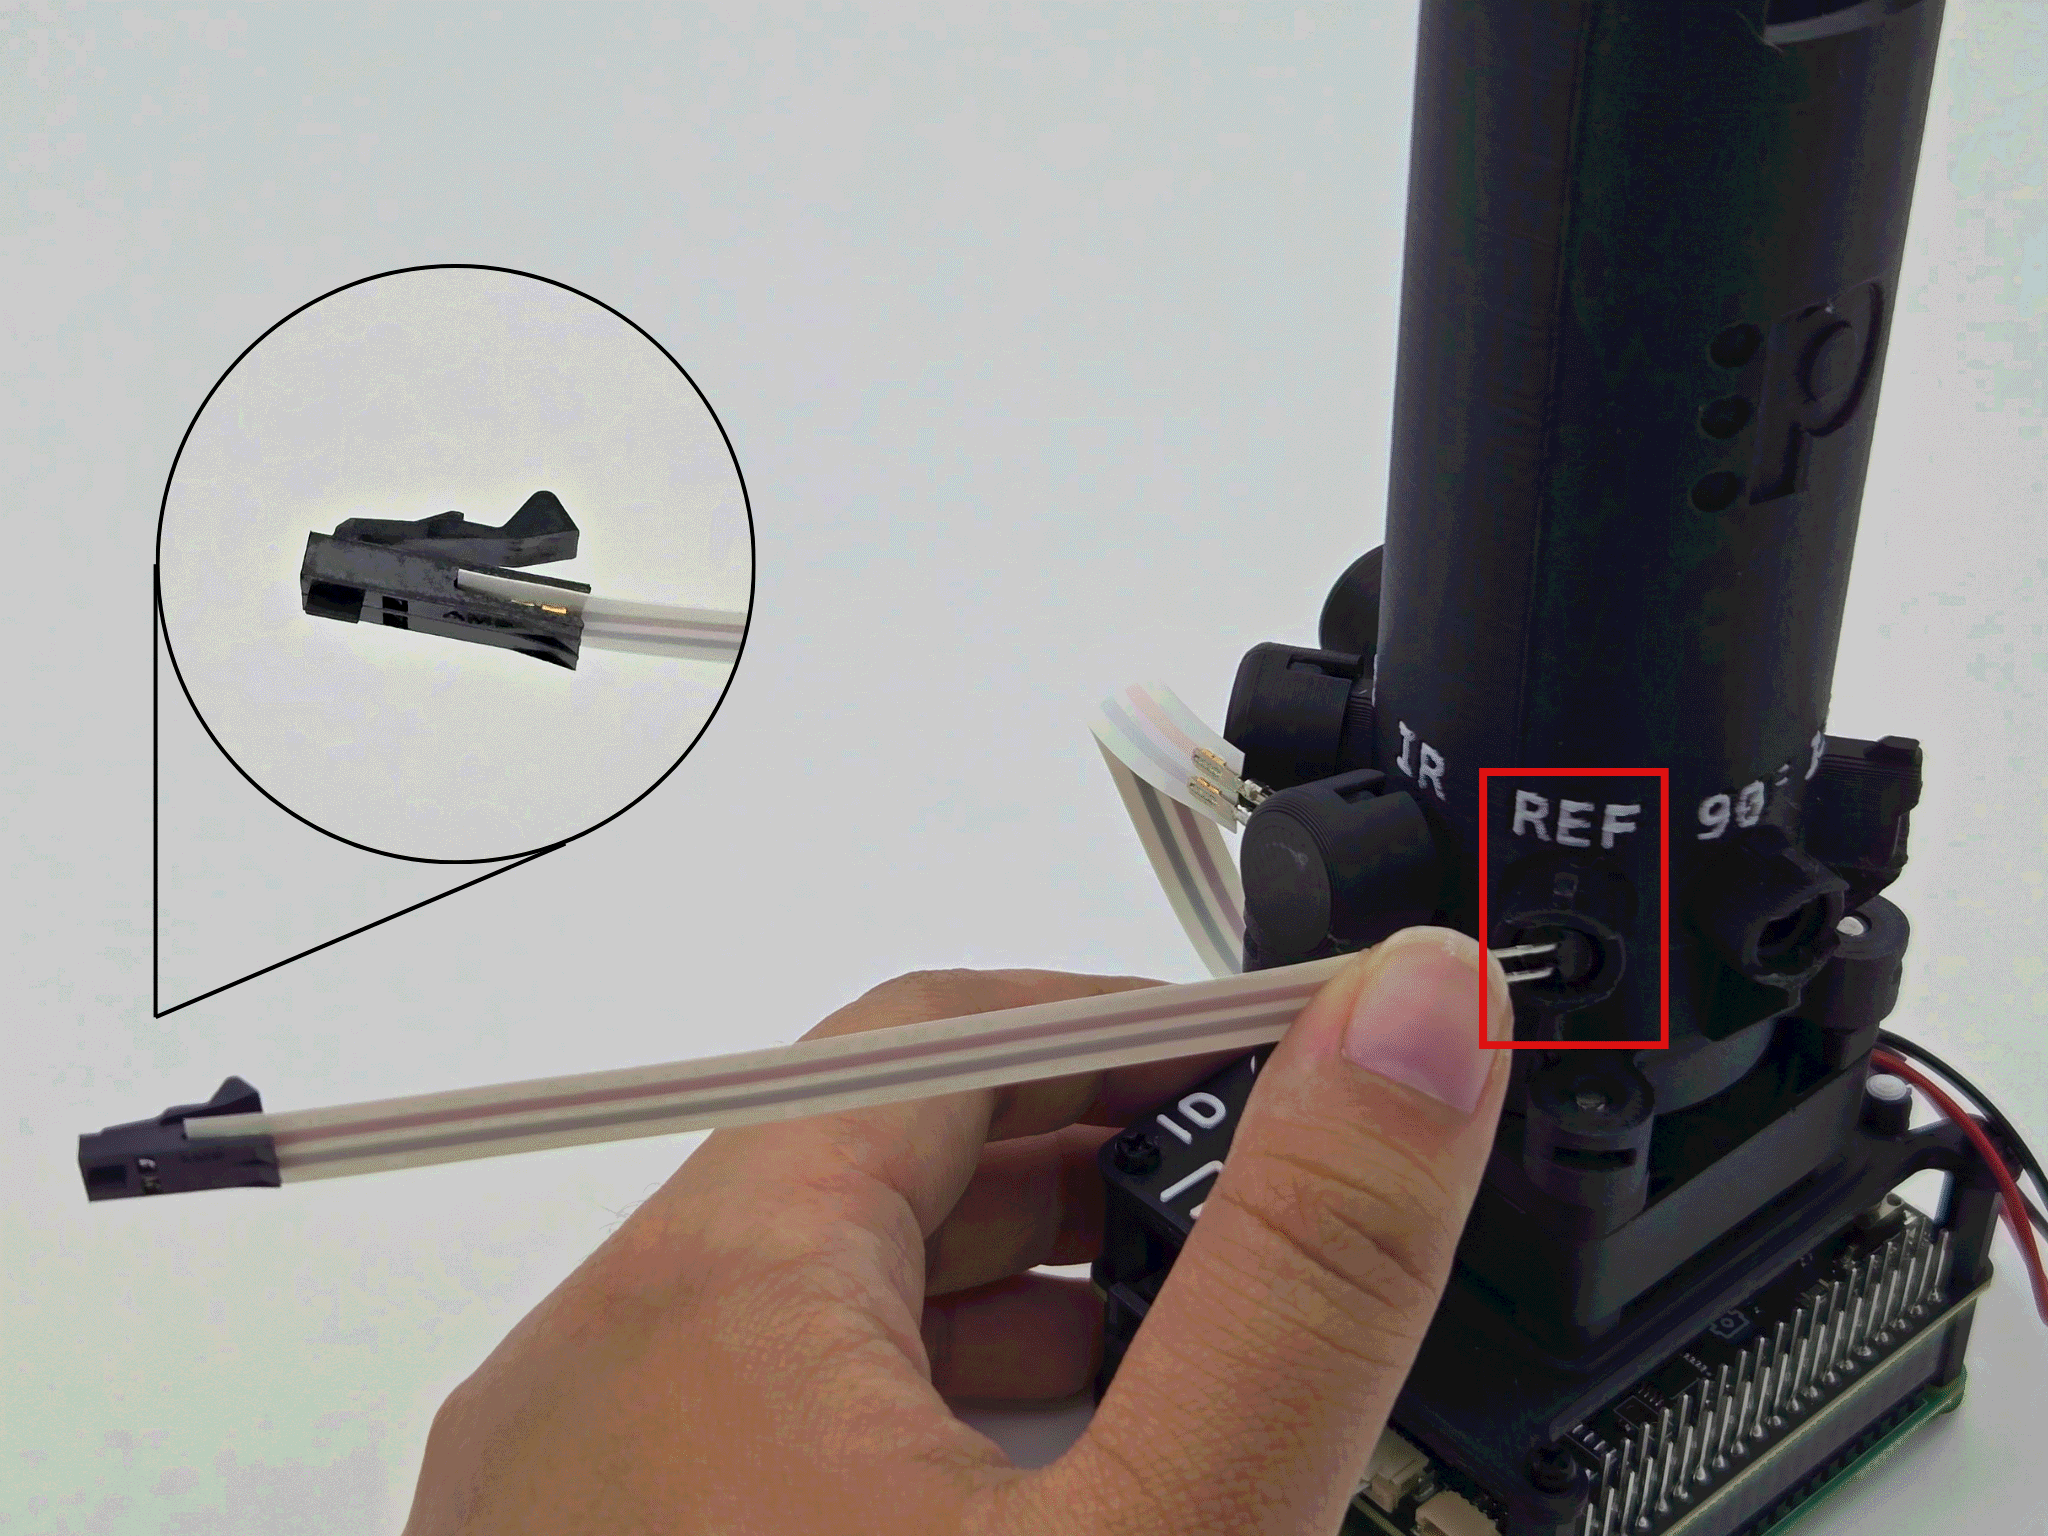
- With the tab of the black connector pointed left, insert the bulb of one PD cable into the pocket labeled REF. See image.
- Slowly bend the bulb's leads 90 degrees towards the left. The black connector tab should be facing away.
- Secure the bulb with an LED cap.
- Insert the connector of the IR cable into PD channel 1 (labelled on the faceplate).
Step 4: Connect PD cable (90° → Channel 2) #
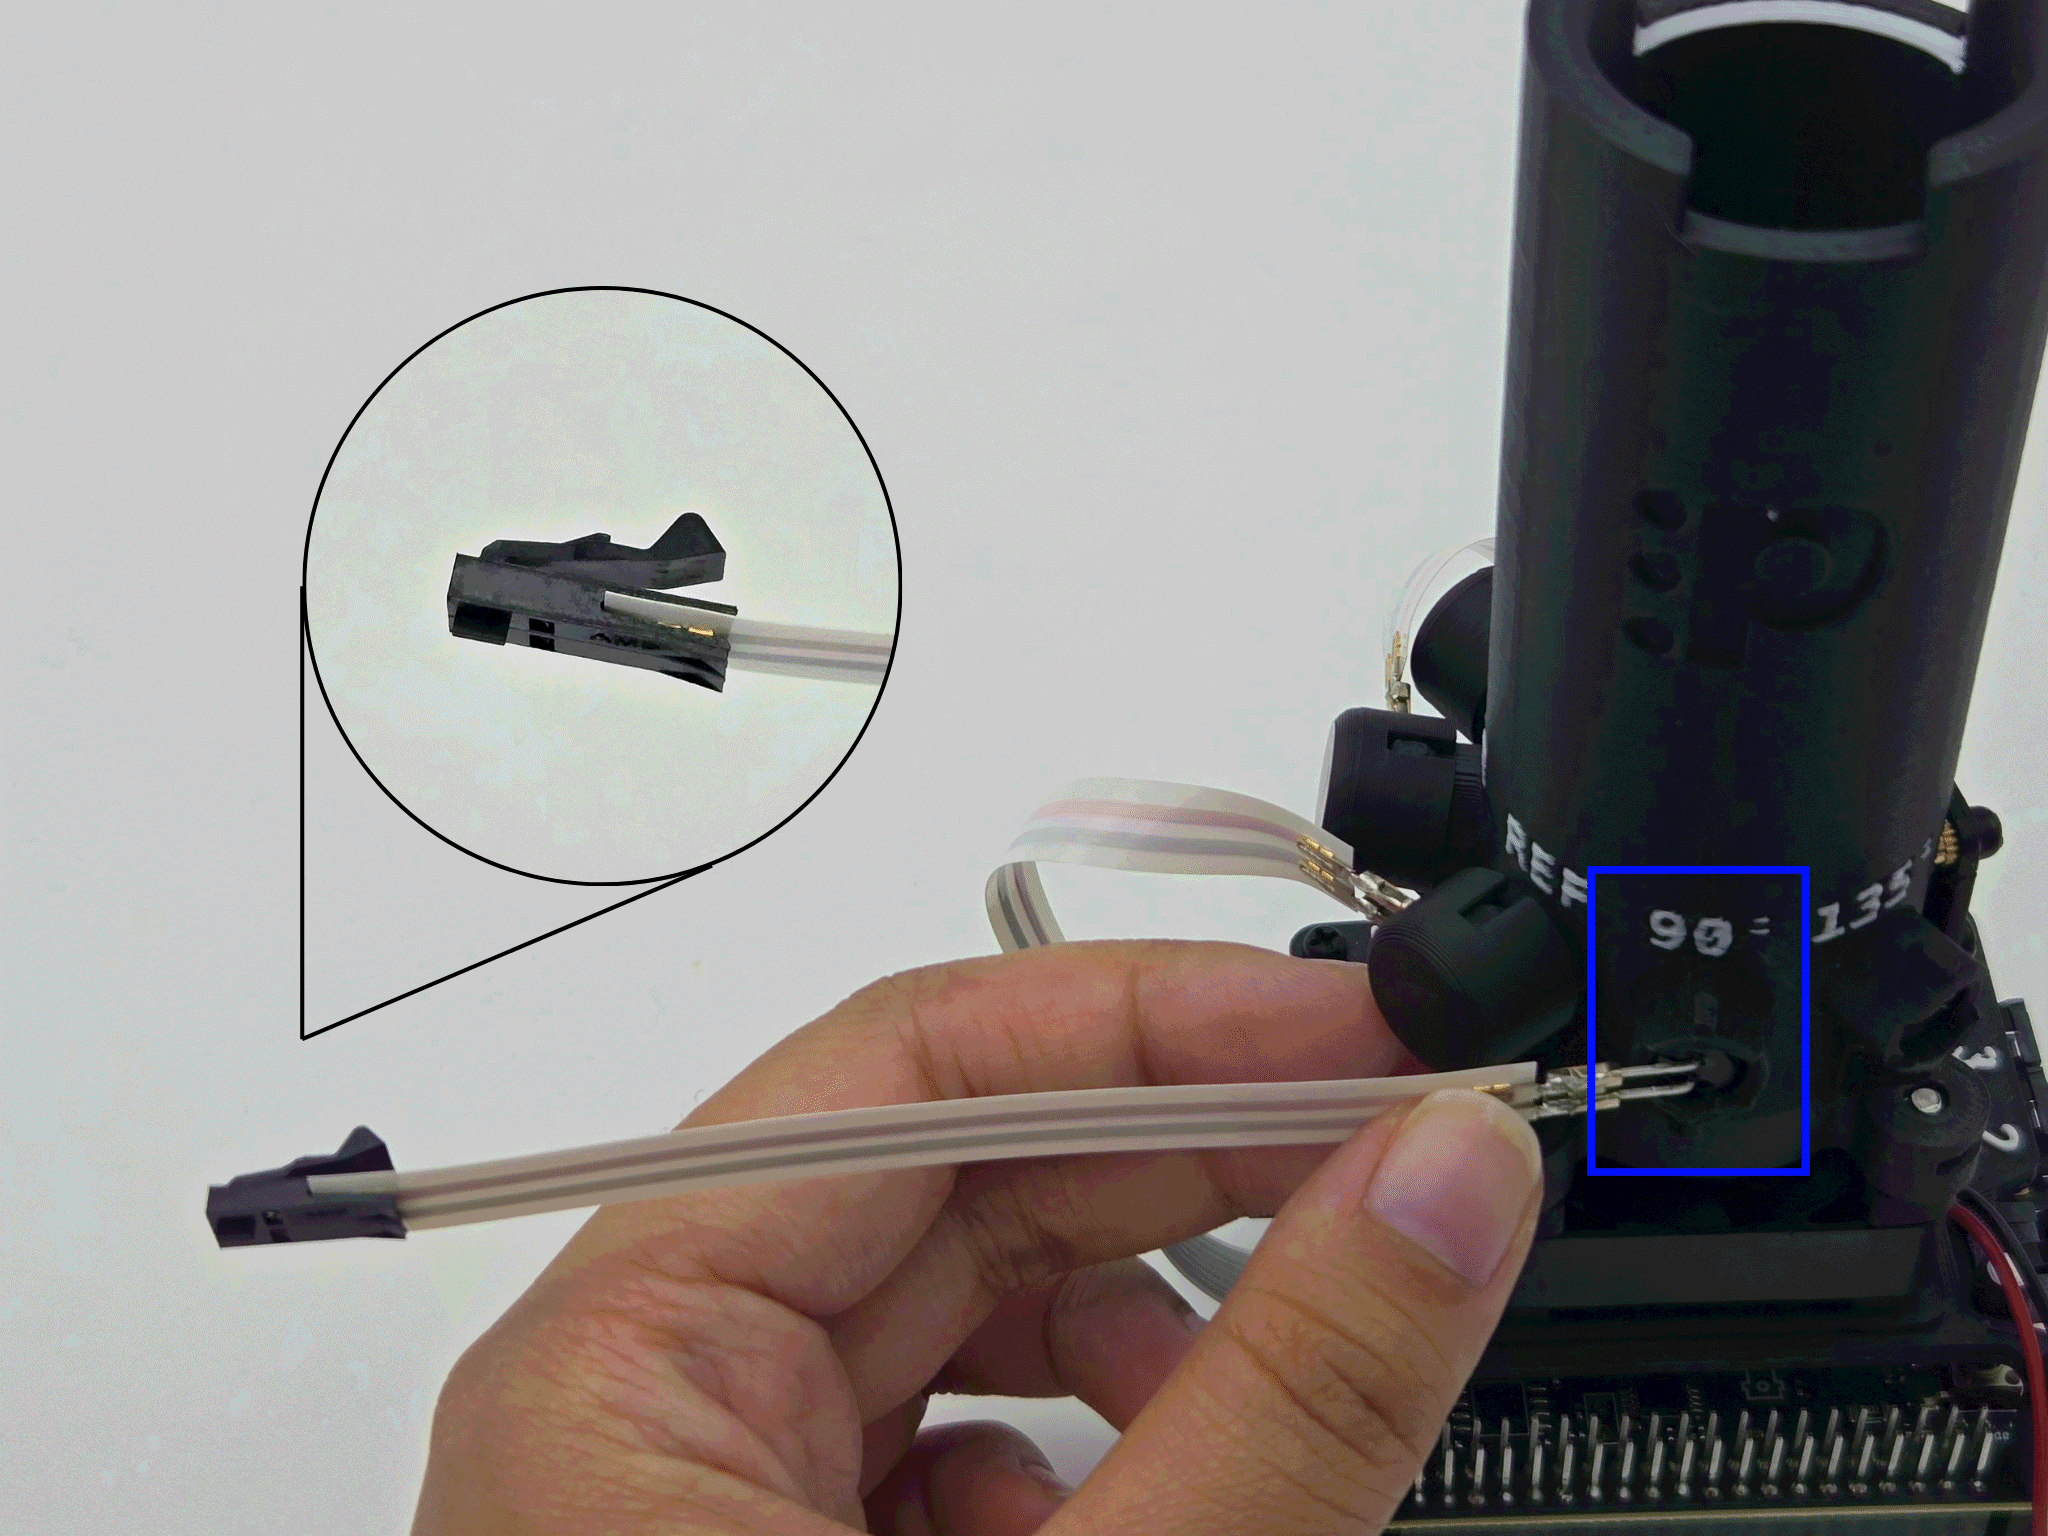
- Take the other PD cable and insert the bulb into the pocket labeled 90°.
- Bend the leads gently to the left. The tab of the black connector should be facing away.
- Secure the bulb with an LED cap.
- Plug the connector into channel 2.
- Push the remaining LED cap onto the pocket labeled 135°.