Stirring
Stirring is making a grinding noise.
Likely the fan's magnets are striking the 4mm screws above it. See this section if so.
UI is reporting "Stirring RPM is 0", or stirring self-test failed.
First, with the stirring activity running, carefully examine if the fan below is spinning.
- If the fan is not spinning,
- Check to confirm that the fan's cable is in the right PMW channel. You can find the right PWM channel to use in the config.ini, under
[PWM](also check that it is not overwritten in the unit specific config.ini) - Does the fan start to spin momentarily, but then stop? You may need to increase the target RPM in the UI. The lower limit of RPM is around 125. Target RPMs below 125 have a tendency to stall. Alternatively, increase the
initial_duty_cycleby 10 units or so and try again. - for Pioreactor 20ml 1.0:
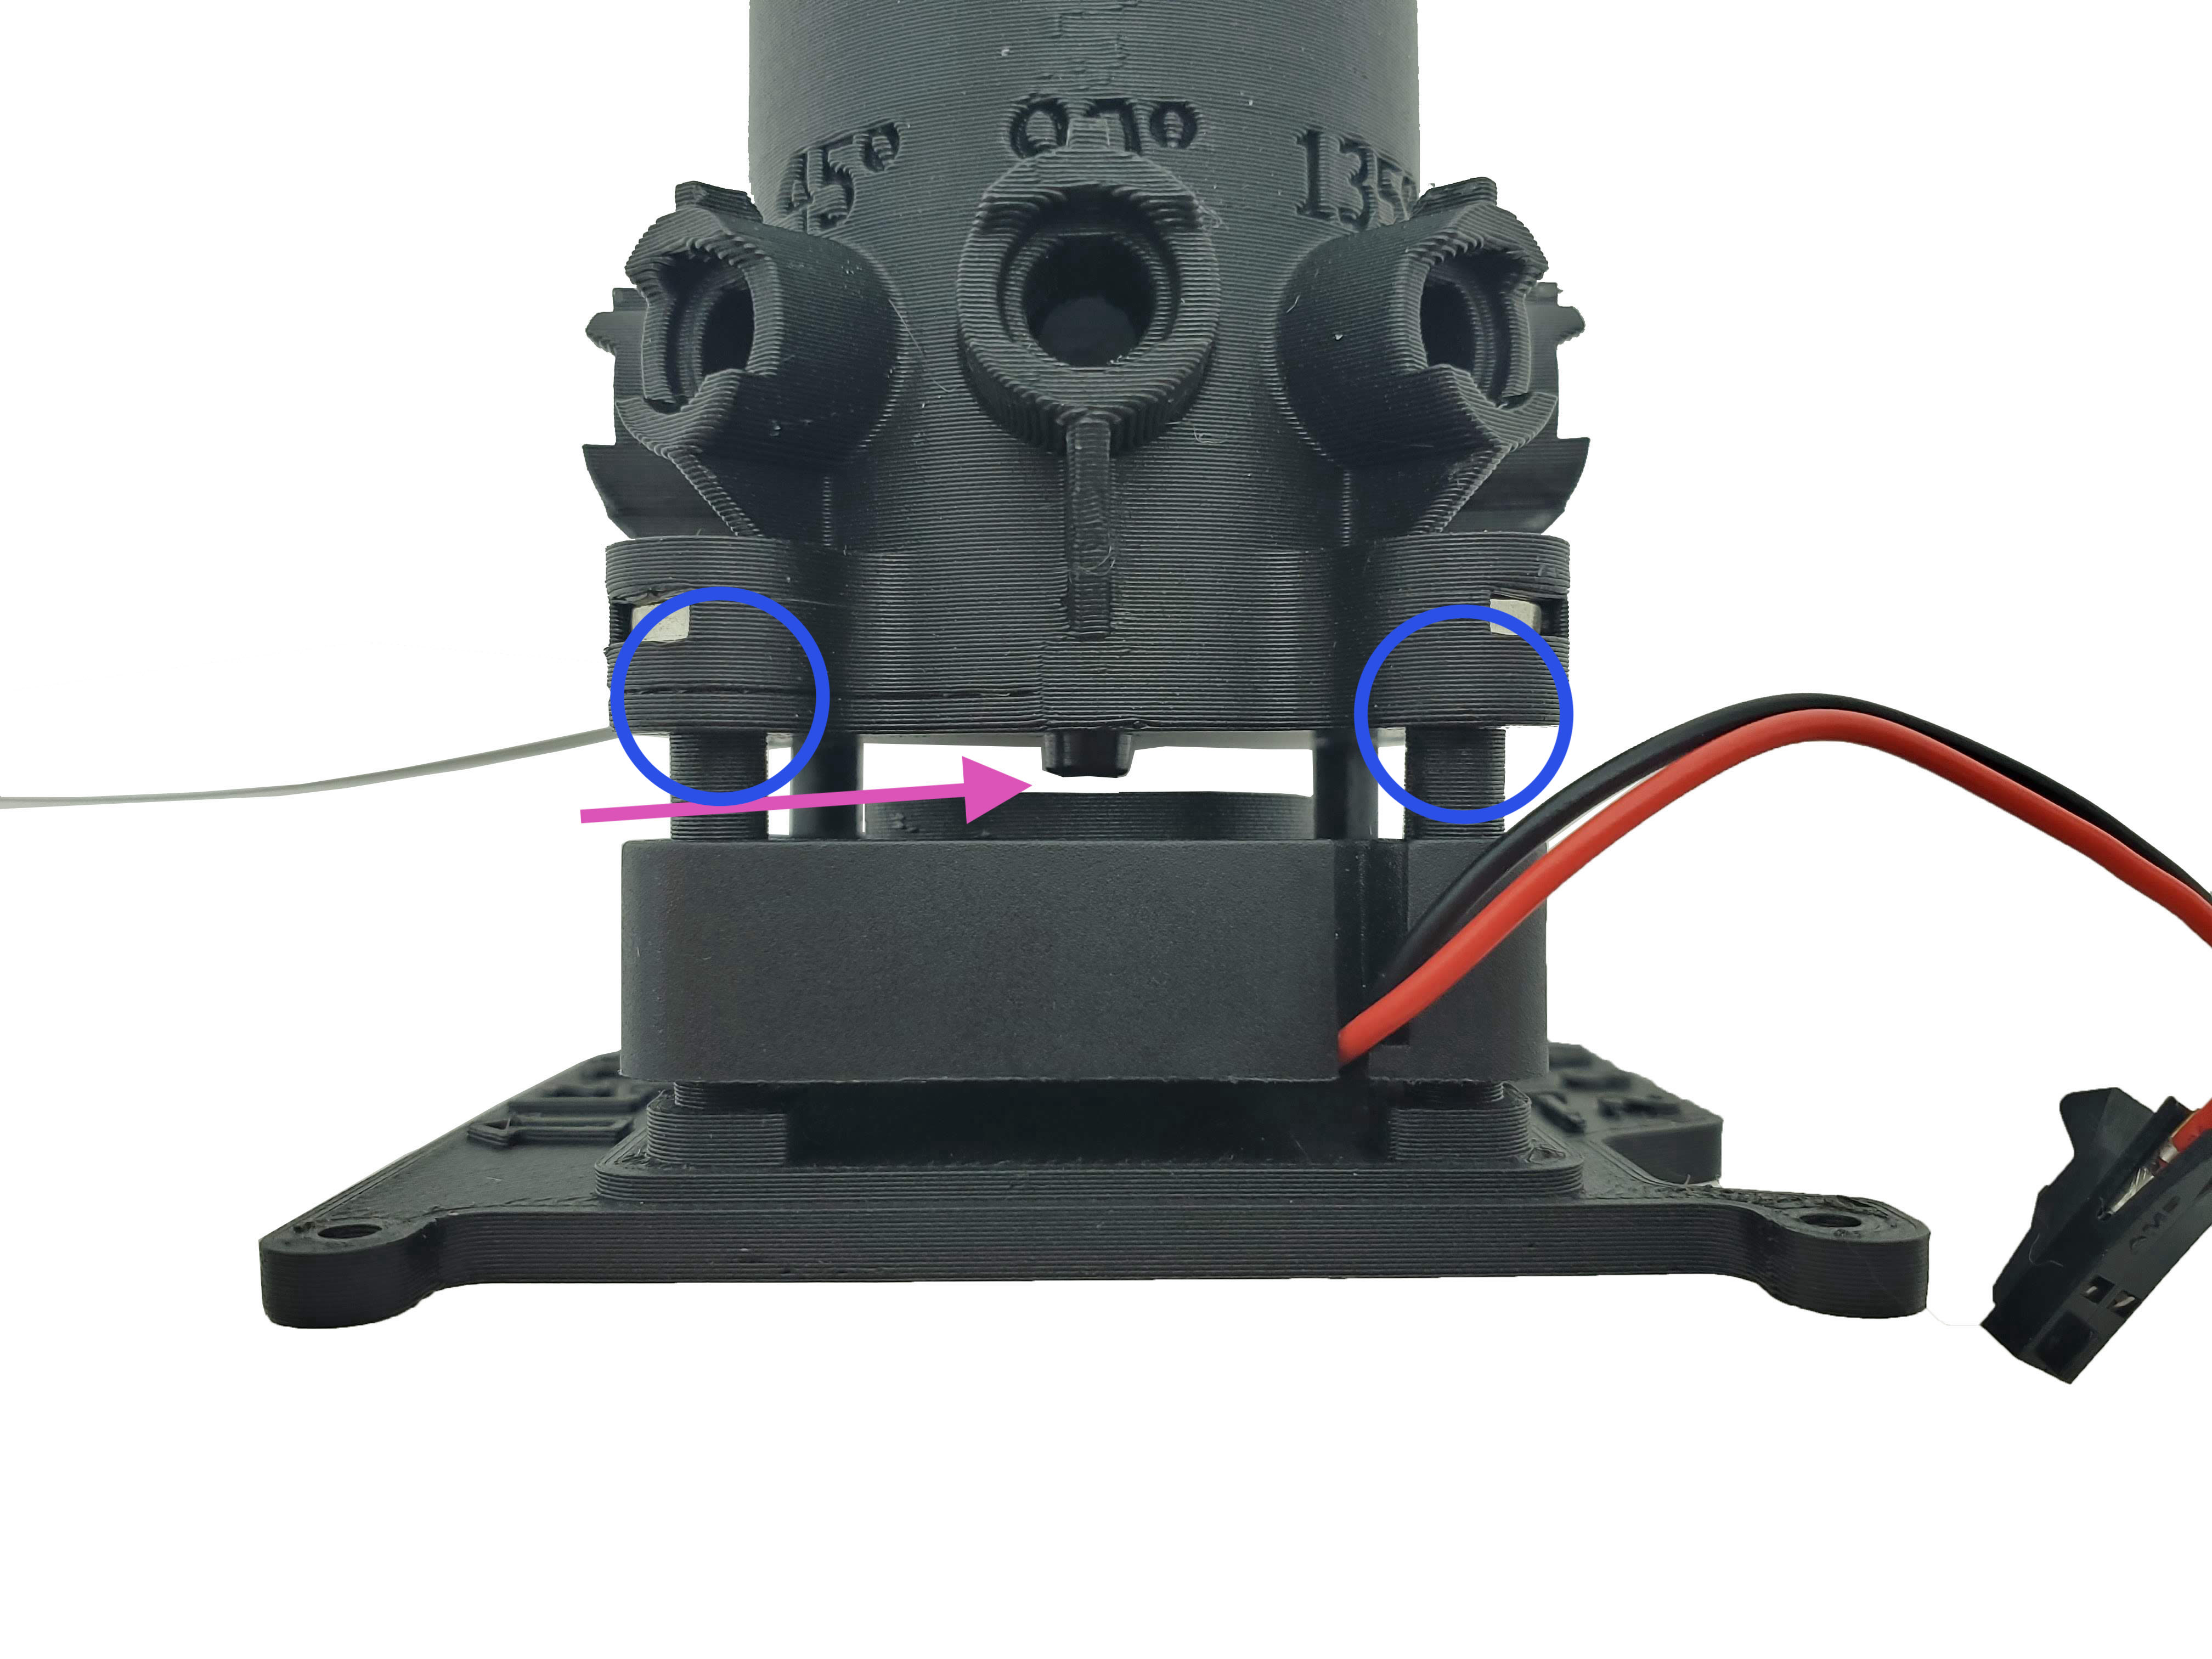
- Visually inspect the top of the fan from the side. If you rotate the fan with a pen, is it touching (or nearly touching) the screws above it (see image below)? See this section if so.
- for Pioreactor 20ml 1.1:
- you may need to increase the distance between the fan and the vial holder. You can unscrew the M3 30mm screws slightly to increase the distance.
- Very gently wiggle the connection between the stirring wires and the HAT - does the fan start? It may be a bad connection. Contact us at support@pioreactor.com
- The fan may be damaged. Contact us at support@pioreactor.com
- Check to confirm that the fan's cable is in the right PMW channel. You can find the right PWM channel to use in the config.ini, under
- If the fan is spinning:
- This issue may occur if the fan is positioned too far from the RPM sensors on the heater PCB above it.
- There should be no-to-very-little visible metal from the screw at the interface between the vial holder and the top faceplate's arms. See image below.
- Try pushing the fan only slightly higher up using a pen, pencil or thin rod. Avoid moving the fan too high up and hitting the vial holder's screws.
- Try moderately tightening the screws on the bottom of the top faceplate.
- Try lowering the
initial_duty_cyclein the config.ini to a value like ~20. - Are the two magnets still present on the fan? Visually inspect from the side, or unscrew the top faceplate from the vial holder to see better.
- The heater PCB may be damaged. Contact us at support@pioreactor.com.
- You can turn off the feedback loop by setting
use_rpm=0in the[stirring.config]section of your configuration. Set theinitial_duty_cycleto some appropriate value (20 to 40), as well.
- This issue may occur if the fan is positioned too far from the RPM sensors on the heater PCB above it.

The magnets rub against the plastic screws above them, causing the stirring performance to be degraded / stop.
Detach the top faceplate. Under the faceplate, slightly unscrew each of the four metal screws. This action will create more space between the magnets and the plastic screws.

Stir bar is not spinning
- Check that the vial is pushed down all the way.
- Try moving the fan closer to the vial holder by gently tightening the screws on the bottom of the top faceplate.
- The liquid in the vial may be too viscous for the mixing to work.
Stir bar goes out of balance during OD dodging (RPM changes)
If the stir bar stops, vibrates, or starts orbiting the vial when OD dodging changes the target RPM:
- Make sure a stirring calibration is active. Re-run it if you recently updated software or changed power/hardware. See stirring calibration.
- Check that the vial is fully seated on the heating pad. A small gap (for example, from an o-ring or debris) can make the bar lose sync during RPM transitions.
Stirring is not able to keep a steady RPM
- Consider decreasing the value of
Kpin the sectionstirring.pidin the config.ini by 50%. - Are you trying to target a very low RPM? The lower limit of RPM is around 125. Target RPMs below 125 have a tendency to stall.
- Try performing a stirring calibration.
My stir bar keeps skipping. How can I reduce that?
- Consider reducing your target RPM.
- Check if the vial is pushed all the way down.
- From the side profile, check that no metal from the screws is showing ⇒ the vial is straight vertically.
- Try another stir bar design, like a cross shape.
Raspberry Pi shuts off or restarts when stirring is turned on
This is likely caused by a short circuit in the fan's cable assembly. Remove the fan's power cable, and remove the plastic housing by applying pressure on the exposed metal tabs and gently pulling the wires out. Check for any stray wire strands and remove them. Carefully put the plastic housing back on until it clicks (red wire should be positioned closer to the GPIO pins), and try again.