Packaging plugins to share
If you want other people to install your plugin, package it as a Python package. A package lets Pioreactor install your Python code, UI YAML, configuration, database setup, and optional install scripts together.
This page walks through the pieces of a Pioreactor plugin package, then shows how to test it locally, publish it to PyPI, install it on a cluster, and submit it to the community plugin list.
Choose plugin names
Python packages often use two names:
PLUGIN_NAME: the importable Python package name. Use lowercase letters and underscores. Example:pioreactor_relay_plugin.DISTRIBUTION-NAME: the installable package name. Use lowercase letters and dashes. Example:pioreactor-relay-plugin.
Usually, DISTRIBUTION-NAME is just PLUGIN_NAME with underscores replaced by dashes.
Create the package files
Start by creating a new folder for your plugin, equal to the distribution name. In the relay example, this folder is named pioreactor-relay-plugin. The top-level folder contains these files:
The <PLUGIN_NAME> subfolder
This is the Python package that contains your plugin's code and any Pioreactor-specific files.
LICENSE.txt
A common license for software is the MIT license.
MANIFEST.in
Python packaging includes Python files by default, but it does not automatically include YAML, INI, SQL, or shell files. Add them to MANIFEST.in:
recursive-include <PLUGIN_NAME>/ui/ *.yaml
include <PLUGIN_NAME>/additional_config.ini
Add any optional files you use later on this page to MANIFEST.in, too.
README.md
Write a few notes to guide users. Call out any additional installation steps, hardware requirements, or leader-only behavior.
setup.py
Create a Python file called setup.py and adapt this template:
# -*- coding: utf-8 -*-
from setuptools import setup, find_packages

setup(
    name="<DISTRIBUTION-NAME (with dashes)>",
    version="<VERSION>",
    license_files = ('LICENSE.txt',),
    description="<DESCRIPTION OF PLUGIN>",
    long_description=open("README.md").read(),
    long_description_content_type="text/markdown",
    author_email="<EMAIL>",
    author="<NAME>",
    url="<A HOMEPAGE>",
    packages=find_packages(),
    include_package_data=True,
    install_requires=[], # PROVIDE OTHER PYTHON REQUIREMENTS, ex: "pioreactor>=23.6.0", "numpy>=1.0"
    entry_points={
        "pioreactor.plugins": "<PLUGIN_NAME> = <PLUGIN_NAME>"
    },
)
Add plugin code
Python files
Your Python files contain the core code for your plugin. If your plugin implements a background job, include a function decorated with @run.command so pio run can discover it. See the relay plugin example.
__init__.py
If implementing an automation, import the class from your automation file:
from <PLUGIN_NAME>.<PYTHON FILE NAME> import <CLASS NAME>
If implementing a job, import the function decorated with @run.command:
from <PLUGIN_NAME>.<PYTHON FILE NAME> import <PLUGIN CLICK FUNCTION>
Example for the relay plugin:
from pioreactor_relay_plugin.relay import start_relay
Here, start_relay is the function decorated with @run.command.
Add optional Pioreactor files
Skip any section here that your plugin does not need.
Configuration with additional_config.ini
This configuration file will contain additional configs that we want to add to our list of existing Configurations on the Pioreactor web interface. This file will be merged with the existing unit_config.ini when the plugin is installed.
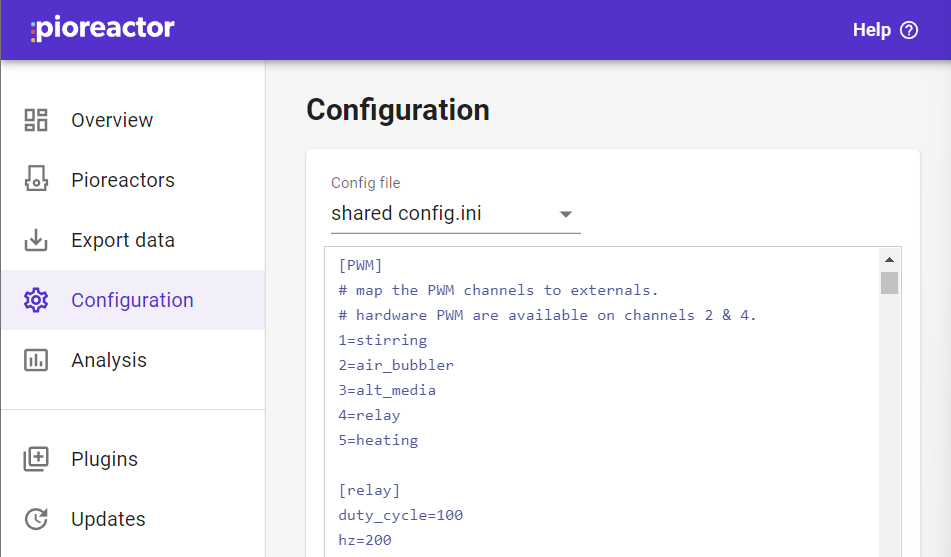
A convention we've tried to follow is to use the section name convention of [<job_name>.config] or [<automation_name>.config] in the configuration files. For example, our relay job has [relay.config] in its additional_config.ini and settings under it.
Worker job or automation details in the UI
If implementing a job
Within <PLUGIN_NAME> folder, create subfolders named ui/jobs. When the plugin is installed, these files are copied to ~/.pioreactor/plugins/ui/jobs on the Pioreactor where the package is installed.
Install this on each Pioreactor that should run the job. For a job, create a .yaml file that looks like the following format. The name of the YAML file can be anything, but convention is to use <job_name>.yaml:
---
display_name:  # human readable name
job_name: # `job_name` as defined in your Python file
display: # bool; true to display on the /Pioreactors card
source: # name of your plugin
description: # description of what your plugin does
published_settings:
  - key:  # as defined in Python
    unit: # unit (ml, lux, AU, etc.)
    label: # human readable name
    description: # description of your setting
    type:  # one of numeric, boolean, string, json
    default: # provide a default value, often null
    display: # bool; true to display on the /Pioreactors card
  - key: ...
    unit: ...
  ...
There are lots of examples of job YAML files here.
If implementing an automation
In the case of creating an automation plugin, create subfolder(s) with ui/automations/<AUTOMATION TYPE>, where AUTOMATION TYPE is one of dosing, led, or temperature depending on your automation type. When the plugin is installed, these files are copied to ~/.pioreactor/plugins/ui/automations/<AUTOMATION TYPE> on the Pioreactor where the package is installed.
Install this on each Pioreactor that should run the automation. Create a YAML file with the following convention. The name of the YAML file can be anything, but by convention it's <automation_name>.yaml.
---
display_name:  # human readable name
automation_name: # automation name as defined in your Python files
source: # name of your plugin
description: # description of your plugin
fields:
  - key:  # as defined in Python
    unit: # unit of your key
    label: # human readable name
    description: # description of your key
  - key: ...
    unit: ...
There are lots of examples of automation YAML files here.
Optional: adding leader database tables and exposing them on the Export Data page
You can also add a file called additional_sql.sql that will run against the SQLite database during install. If this table is used by charts or exports, install this part of the plugin on the leader. For example, a CO₂ sensor may want to create a new table in the leader database to store its sensor data. Its additional_sql.sql may look like:
CREATE TABLE IF NOT EXISTS co2_readings (
    experiment               TEXT NOT NULL,
    pioreactor_unit          TEXT NOT NULL,
    timestamp                TEXT NOT NULL,
    co2_reading_ppm          REAL
);
You also need to tell Pioreactor software how to populate this table from your source of data. This persistence code should be loaded on the leader, because it registers MQTT topics to write into the leader database. Include the following in your code such that it executes when the plugin is loaded:
- a parser function that accepts a MQTT topic and payload, and returns a dictionary that maps to the new tables schema.
- a
TopicToParserToTableobject is created with the MQTT topics to listen to, the parser, and the table name to load to. ThisTopicToParserToTableis provided toregister_source_to_sink.
Example below for a CO2 sensor:
...
from pioreactor.background_jobs.leader.mqtt_to_db_streaming import produce_metadata
from pioreactor.background_jobs.leader.mqtt_to_db_streaming import register_source_to_sink
from pioreactor.background_jobs.leader.mqtt_to_db_streaming import TopicToParserToTable
from pioreactor.utils import timing

...

def parser(topic, payload) -> dict:
    metadata = produce_metadata(topic)
    return {
        "experiment": metadata.experiment,
        "pioreactor_unit": metadata.pioreactor_unit,
        "timestamp": timing.current_utc_timestamp(),
        "co2_reading_ppm": float(payload),
    }


register_source_to_sink(
    TopicToParserToTable(
        ["pioreactor/+/+/scd_reading/co2", "pioreactor/+/+/co2_reading/co2"],
        parser,
        "co2_readings",
    )
)

...
You also need to add the following to your MANIFEST.in:
...
include <PLUGIN_NAME>/additional_sql.sql
See an example plugin that uses this idea here.
Exportable datasets
Now that you've added the code for adding to the database, you can also allow users to export your data from the UI's Export Data page. Exportable dataset YAML is read by the leader. To do this, add a new folder exportable_datasets to your project's source folder, alongside the __init__.py file, and add a YAML file:
dataset_name: some_unique_dataset_name
default_order_by: timestamp # for example
description: A lovely description which shows up in the UI
display_name: A lovely name which shows up in the UI
has_experiment: true # does your SQL table have an experiment column.?
has_unit: true # does your SQL table have an pioreactor_unit column.?
source: your_plugin_name
table: the_target_table # see also query below
timestamp_columns:
- timestamp
always_partition_by_unit: false
query: SELECT * FROM the_target_table WHERE reading < 4 AND ... # optional: you can specify a query.
You can add multiple dataset YAML files, too.
Include the following in your MANIFEST.IN:
recursive-include your_plugin_name/exportable_datasets *.yaml
Leader charts
To add a chart that displays real-time and historical data, provided by MQTT and the SQL store respectively, add chart files to the leader:
- In a new folder named
ui/chartsin your project, add a YAML file as described here. When the plugin is installed on the leader, it is copied to~/.pioreactor/plugins/ui/charts. The name of the file can be thechart_keyfield, appended with.yaml. - In your leader-installed
additional_config.ini, add a new entry to be merged:
[ui.overview.charts]
<your chart key>=1
You'll need to make sure your database table has the necessary fields. See details under data_source in the docs here.
See an example plugin that uses this idea here.
post_install.sh and pre_uninstall.sh
If your plugin needs to edit the operating system, you can include either of the following files: post_install.sh, or pre_uninstall.sh. We have used these files to enable systemd services such that the job being installed will start at startup. Example post_install.sh and pre_uninstall.sh.
You'll need to append to your MANIFEST.in, too:
include <PLUGIN_NAME>/post_install.sh
include <PLUGIN_NAME>/pre_uninstall.sh
For an example, see the logs2slack plugin's repository.
Leader-only plugins
Some plugins may only want to be installed on the leader. For example, if they are changing the UI or database. To signal that a plugin should only be installed on the leader (and no-op on workers), add an empty file named LEADER_ONLY to the folder.
You'll need to append to your MANIFEST.in, too:
include <PLUGIN_NAME>/LEADER_ONLY
For an example, see the logs2slack plugin's repository.
Organizing your files
Start with what your plugin does. A package for a simple background job needs Python code and, optionally, job YAML. A data-producing plugin may also need leader-side SQL, chart YAML, and exportable dataset YAML.
Use this rule when deciding which files your package should include and where the package should be installed:
- Worker runtime files belong on each Pioreactor that should run the job, script, or automation.
- Leader UI and data files belong on the leader.
| File | Put this in your package | Installed path | Install on |
|---|---|---|---|
| Python code for a job, script, or automation | Python package files imported from __init__.py | Python package in the Pioreactor environment | Each Pioreactor that should run it |
| Job YAML | ui/jobs/*.yaml | ~/.pioreactor/plugins/ui/jobs/ | Each Pioreactor that should run the job |
| Automation YAML | ui/automations/<type>/*.yaml | ~/.pioreactor/plugins/ui/automations/<type>/ | Each Pioreactor that should run the automation |
| Chart YAML | ui/charts/*.yaml | ~/.pioreactor/plugins/ui/charts/ | Leader |
| Exportable dataset YAML | exportable_datasets/*.yaml | ~/.pioreactor/plugins/exportable_datasets/ | Leader |
| Database schema | additional_sql.sql | Applied during plugin install | Leader, if it creates leader database tables |
| Chart config | additional_config.ini with [ui.overview.charts] entries | Merged into Pioreactor config during plugin install | Leader |
For a complete example, see CamDavidsonPilon/pioreactor-relay-plugin. It packages a background job named pioreactor_relay_plugin that turns a PWM channel on or off.
Background job package layout
<DISTRIBUTION-NAME>
|-- <PLUGIN_NAME>
|   |-- ui
|   |   `-- jobs
|   |       `-- <PLUGIN_NAME>.yaml
|   |-- __init__.py
|   |-- additional_config.ini
|   `-- my_plugin_code.py
|-- LICENSE.txt
|-- MANIFEST.in
|-- README.md
`-- setup.py
Automation package layout
<DISTRIBUTION-NAME>
|-- <PLUGIN_NAME>
|   |-- ui
|   |   `-- automations
|   |       `-- <AUTOMATION TYPE>
|   |           `-- <PLUGIN_NAME>.yaml
|   |-- __init__.py
|   |-- additional_config.ini
|   `-- my_plugin_code.py
|-- LICENSE.txt
|-- README.md
|-- MANIFEST.in
`-- setup.py
<AUTOMATION TYPE> is one of dosing, led, or temperature.
Test the package from source
It isn't enough to run pip install while testing a Pioreactor plugin package, because that only installs the Python package. It does not apply the extra Pioreactor files, such as config, UI YAML, SQL, or install scripts.
To install the whole package from source, run:
pio plugins install <PLUGIN_NAME> --source <PLUGIN_FOLDER>
Publish to PyPI
Create an account on https://pypi.org/. Make sure to verify your email.
On your command line, type the following:
pip install twine
pip install --upgrade build
python -m build --wheel
This creates a .whl file in a dist/ folder. Next, upload the wheel to PyPI:
twine upload dist/<THE .WHL FILE>
You will then be prompted for your PyPI credentials. After upload, your package is available at the link provided by twine.
Before you build a new wheel, it's good practice to clean up your previous build.
This can be done using python setup.py clean --all on the command line.
Installing your Python package on your cluster
A plugin can be installed on a Pioreactor using pio:
pio plugin install <DISTRIBUTION-NAME OR PLUGIN_NAME>
To install the plugin on the leader and all workers connected to the leader in a cluster, use pios plugins install.
pios plugin install <DISTRIBUTION-NAME OR PLUGIN_NAME>
Sharing your plugin with the community
To make your plugin appear in the Plugins page, add it to plugins.json in the Pioreactor list-of-plugins repository.
There are two ways to do this:
- Create an issue to have us edit the plugins.json file for you.
- Fork from our repository to edit the plugins.json file, then create a pull request.
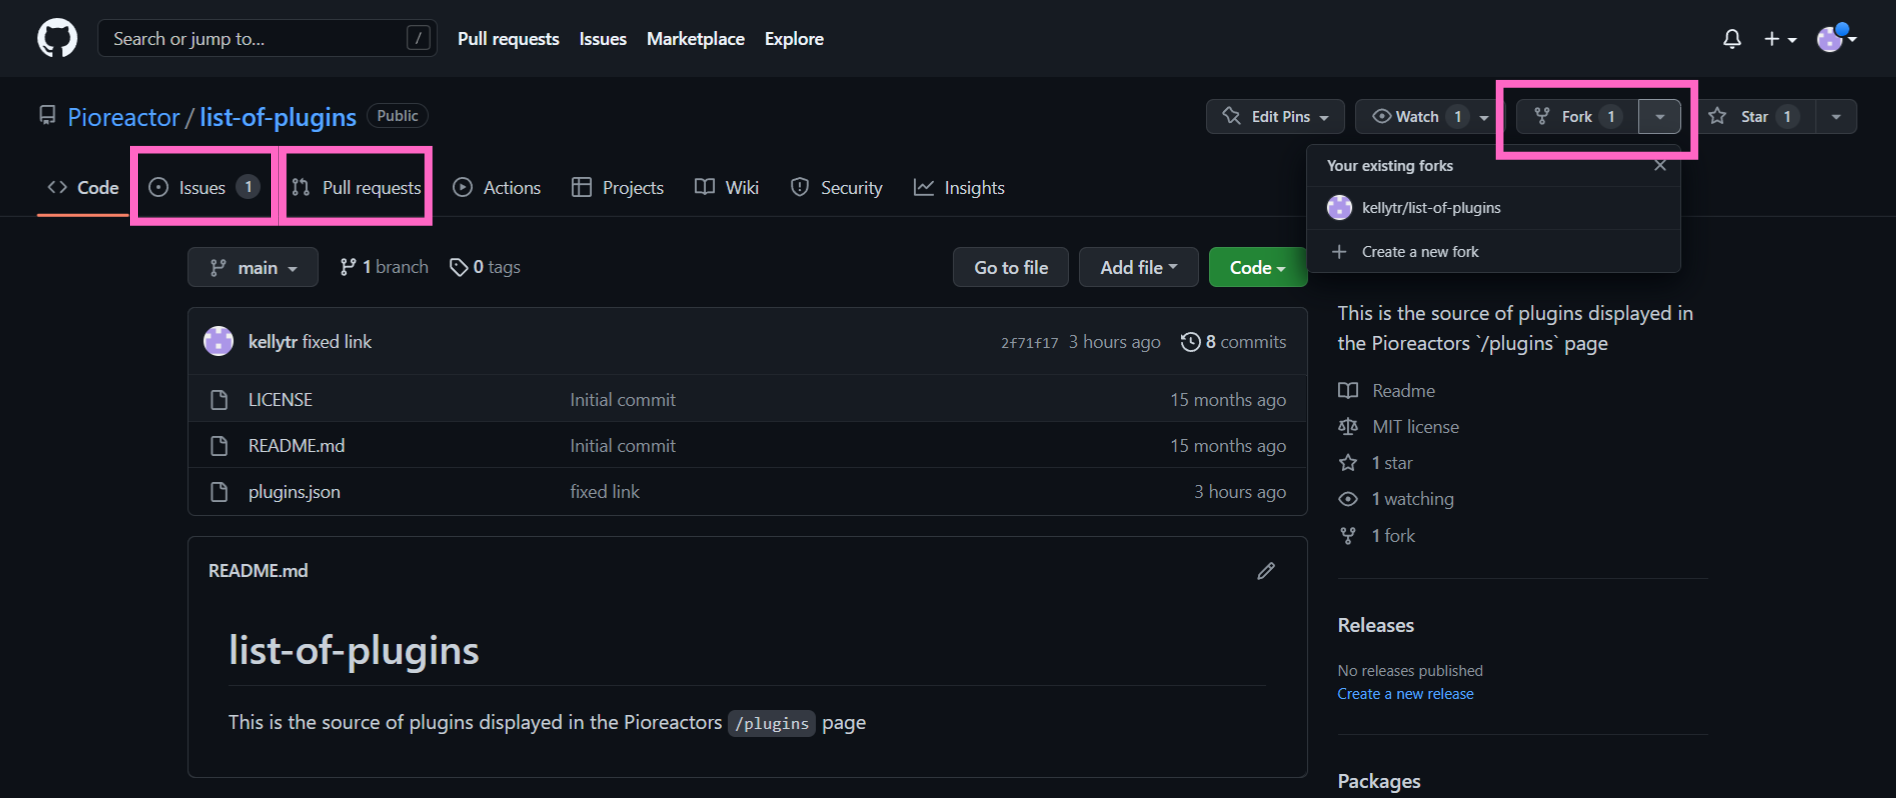
In both cases, we will evaluate your plugin to ensure code quality and all requirements are met.
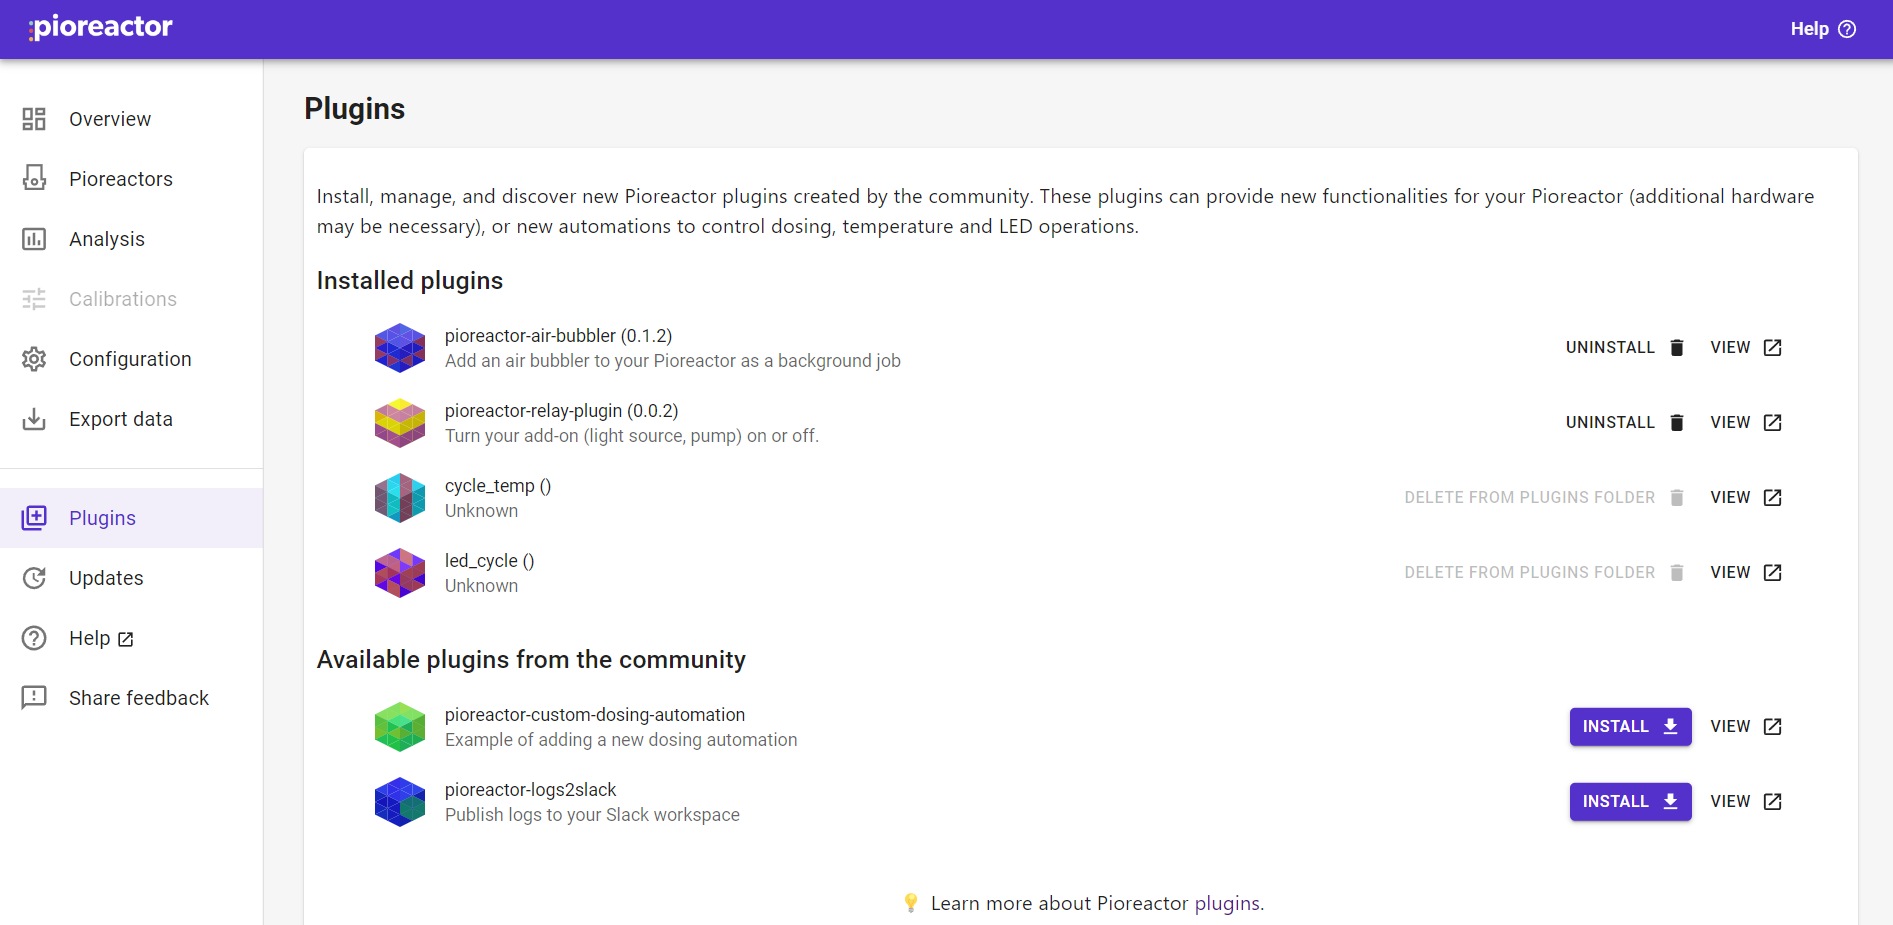
Once your plugin is accepted, it will appear on the Plugins page. Users in the community can click Install to download your plugin onto their Pioreactors.
Troubleshooting
-
Do you see an error like:
WARNING: Skipping /usr/local/lib/python3.13/site-packages/X due to invalid metadata entry 'Y'Try the following:
sudo rm -rf /usr/local/lib/python3.13/site-packages/Xand then reinstall the plugin.