Yeast growth at varying temperatures
Demonstrate the effect of temperature on yeast growth.
Requirements
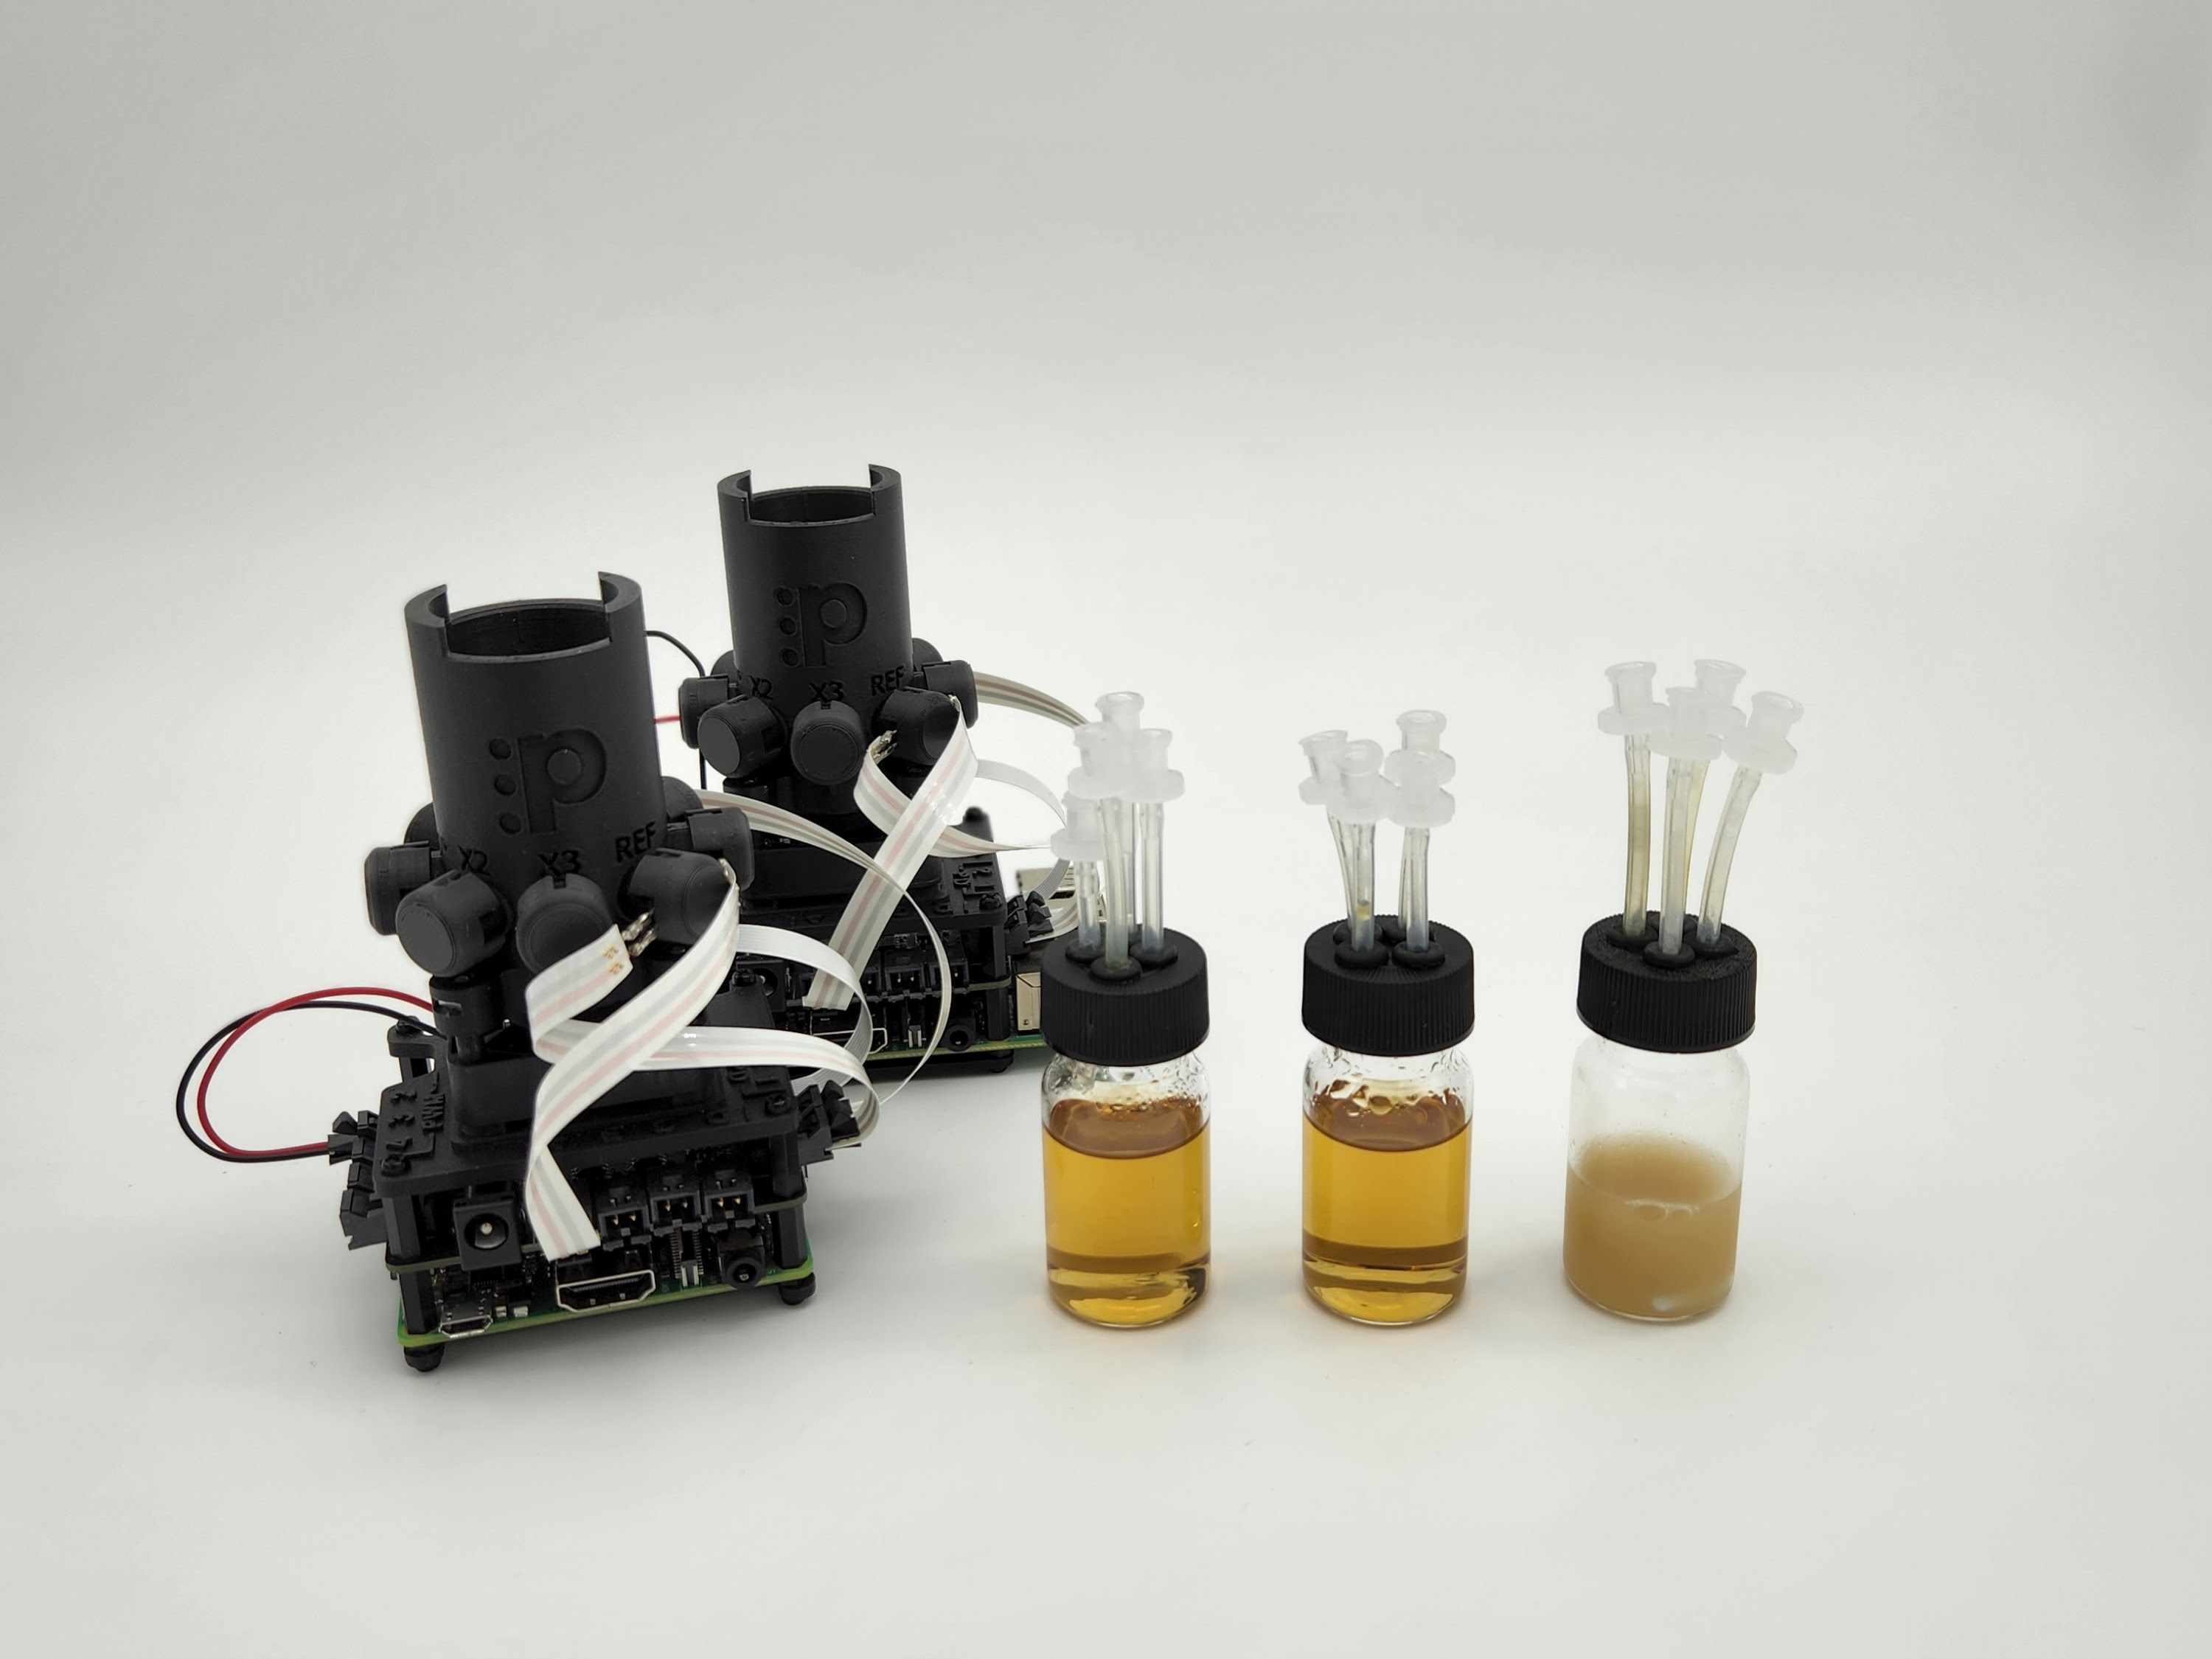
- At least two available Pioreactors
- Dry baker's yeast
- YPD broth mix, or any other media mix
Introduction
Students may have a prior belief that temperature effects are linear. For example: a culture at 10℃ will grow at half the rate compared to a culture at 20℃, and a third the rate at 30℃. In reality, cells have a range of temperatures it will do well at, and temperatures too cold or too hot will lead to slower growth rates. This experiment would show the non-linear effect of temperature on growth (and relate it to how refrigerators halt spoilage for so long!). Students and the teacher can pick temperatures to test beforehand.
The Pioreactor doesn't cool samples, so it can't achieve temperatures below your ambient temperature. If you want to test low temperatures, you can place the Pioreactor in a fridge, or in a cooler with ice packs (making sure the electronics won't get wet).
Experiment
The following experiment was performed using four Pioreactors. Four vials containing 15 mL of the sterile YPD stock were inoculated with 1 drop of rehydrated active yeast (0.500 g of dry yeast in a 15mL YPD broth vial). They were grown at temperatures of 28°C, 32°C, 36°C and 40°C.
Results
Over the course of 12 hours, the following graphs were recorded:
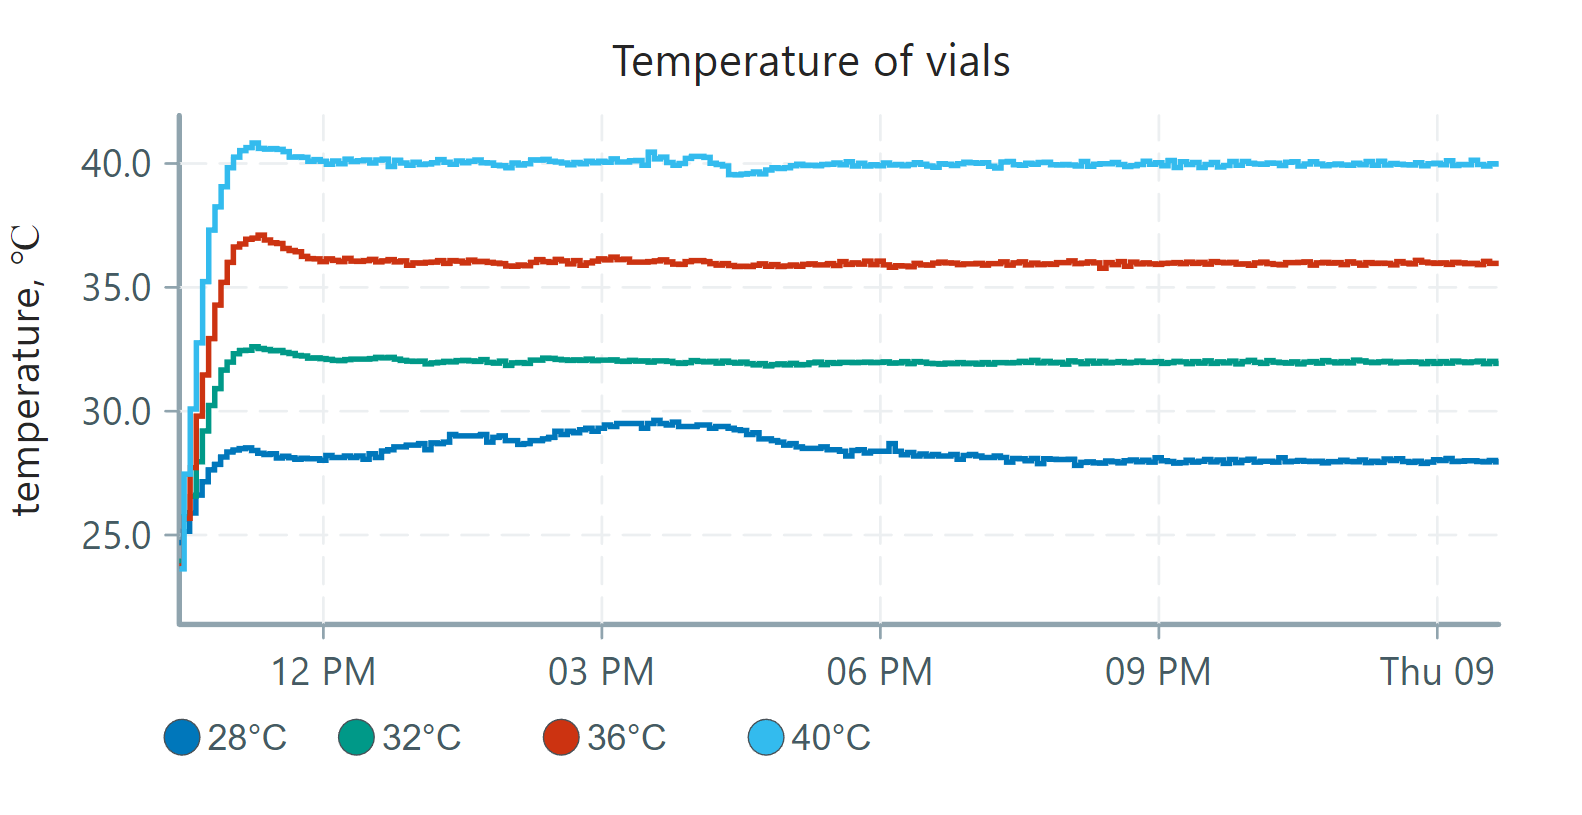
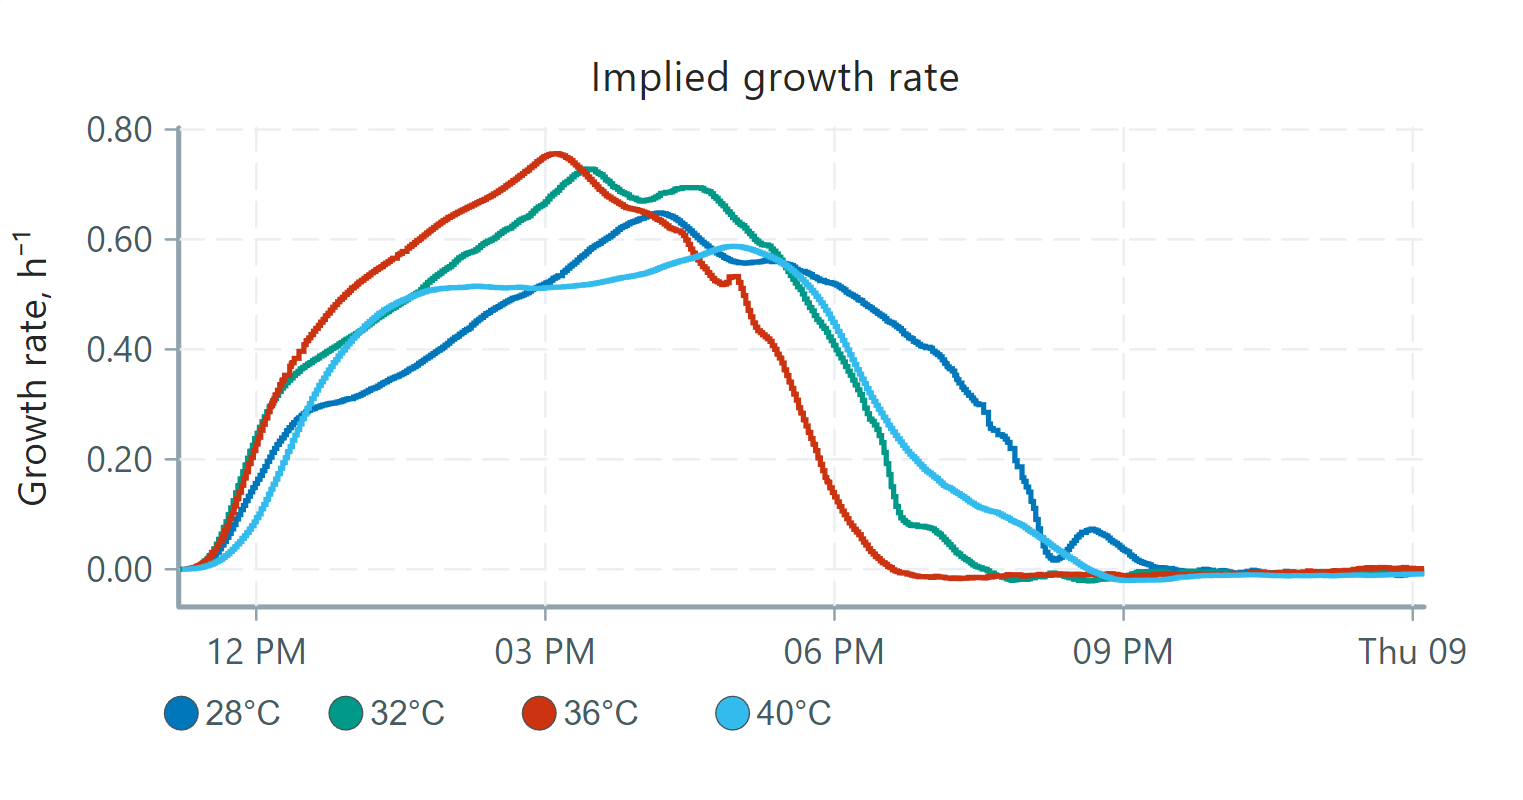
Though subtle, non-linear patterns of growth rate are observed between the temperatures. Key data points are summarized in the following table:
| Temperature | Peak growth rate (h⁻¹) | Time to reach stationary phase |
|---|---|---|
| 28°C | 0.65 | 9 hours |
| 32°C | 0.73 | 8.5 hours |
| 36°C | 0.76 | 7.5 hours |
| 40°C | 0.59 | 9.5 hours |
Rather than increasing as temperature increases, the highest growth rates form a bell curve, with the highest overall growth rate of 0.76 h⁻¹ occurring at 36°C. It decreases at 40°C since this temperature lies outside of the ideal temperature range for yeast.
The time it takes for each culture to reach the stationary phase is also related to the peak growth rates. Cultures that peaked higher did so in a quicker time frame, thus reaching the stationary phase sooner! Consider the extremes in this case: what would happen if we drop the temperature? Increased it to 50°C? How does this relate to cooking and food storage?
Recommendations
We chose a relatively small temperature range that mostly aligned with optimal temperatures for yeast growth. We encourage you to explore temperatures outside of this range, whether by cooling the Pioreactor externally (using ice/a cooler) or increasing the temperature (the maximum that can be reached is room temperature plus 20°C).
Keep in mind to not get the electronics of your Pioreactor wet! Elevate your Pioreactor to protect it from any spills.
Detailed procedure
- Prepare a stock of 50g YPD / 1L distilled water. Aim for 20ml × the number of Pioreactors you are using, as each Pioreactor will require about 15mL of media.
- Divide this stock into small vials, then sterilize by autoclaving. Allow stock to cool.
- Dilute a small amount of yeast in 15mL of YPD stock media.
- Sterily add 3-4 drops of this yeast solution to your vials.
- Wipe the vials and place them in the Pioreactor.
- Visit pioreactor.local and start a new experiment.
- On the left menu, select the Pioreactors page. Add any additional Pioreactors that you would like to use (more information here). Select Control all Pioreactors, and start:
- Stirring activity
- OD reading activity
- Select Control on an individual Pioreactor. Turn on the Temperature automation activity on Thermostat, selecting your temperature of interest.
- Confirm that everything looks normal on the Overview page (ex: receiving optical density signal).
- Back on the Pioreactors page, select Control all Pioreactors and start Growth rate.
- Optional: you can change the names of the Pioreactor in the UI to display the target temperature.
- Students can watch growth progress on the Overview page.